Google Meet Integration
Apptoto’s Google Meet integration allows you to create Booking Pages that automatically generate Google Meet links when clients book appointments with you.
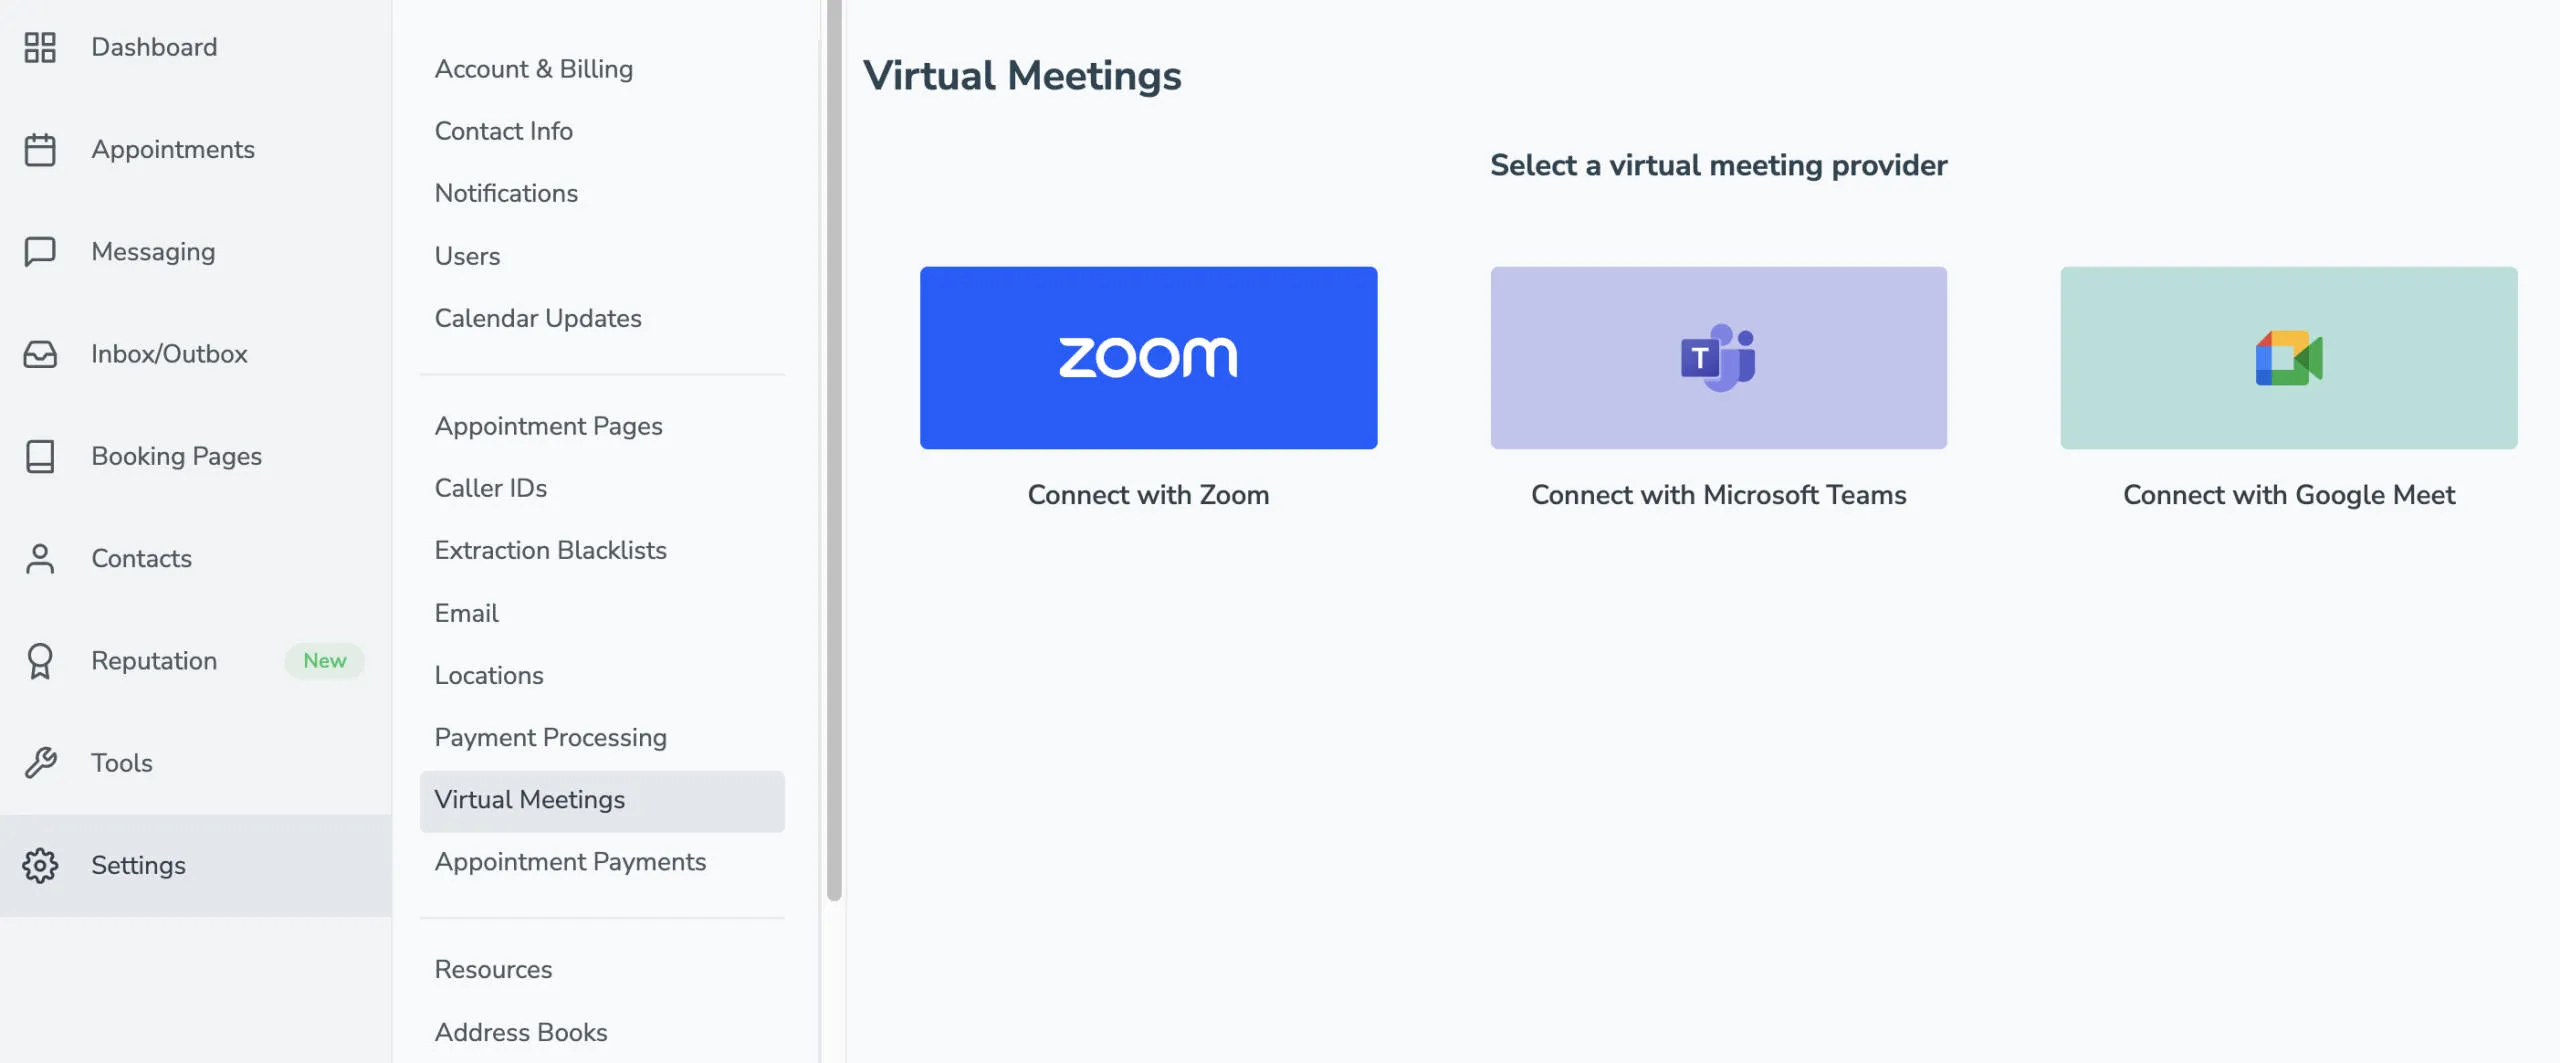
Connect Google Meet
Section titled “Connect Google Meet”- Open Integrations: Navigate to Settings > Virtual Meetings.
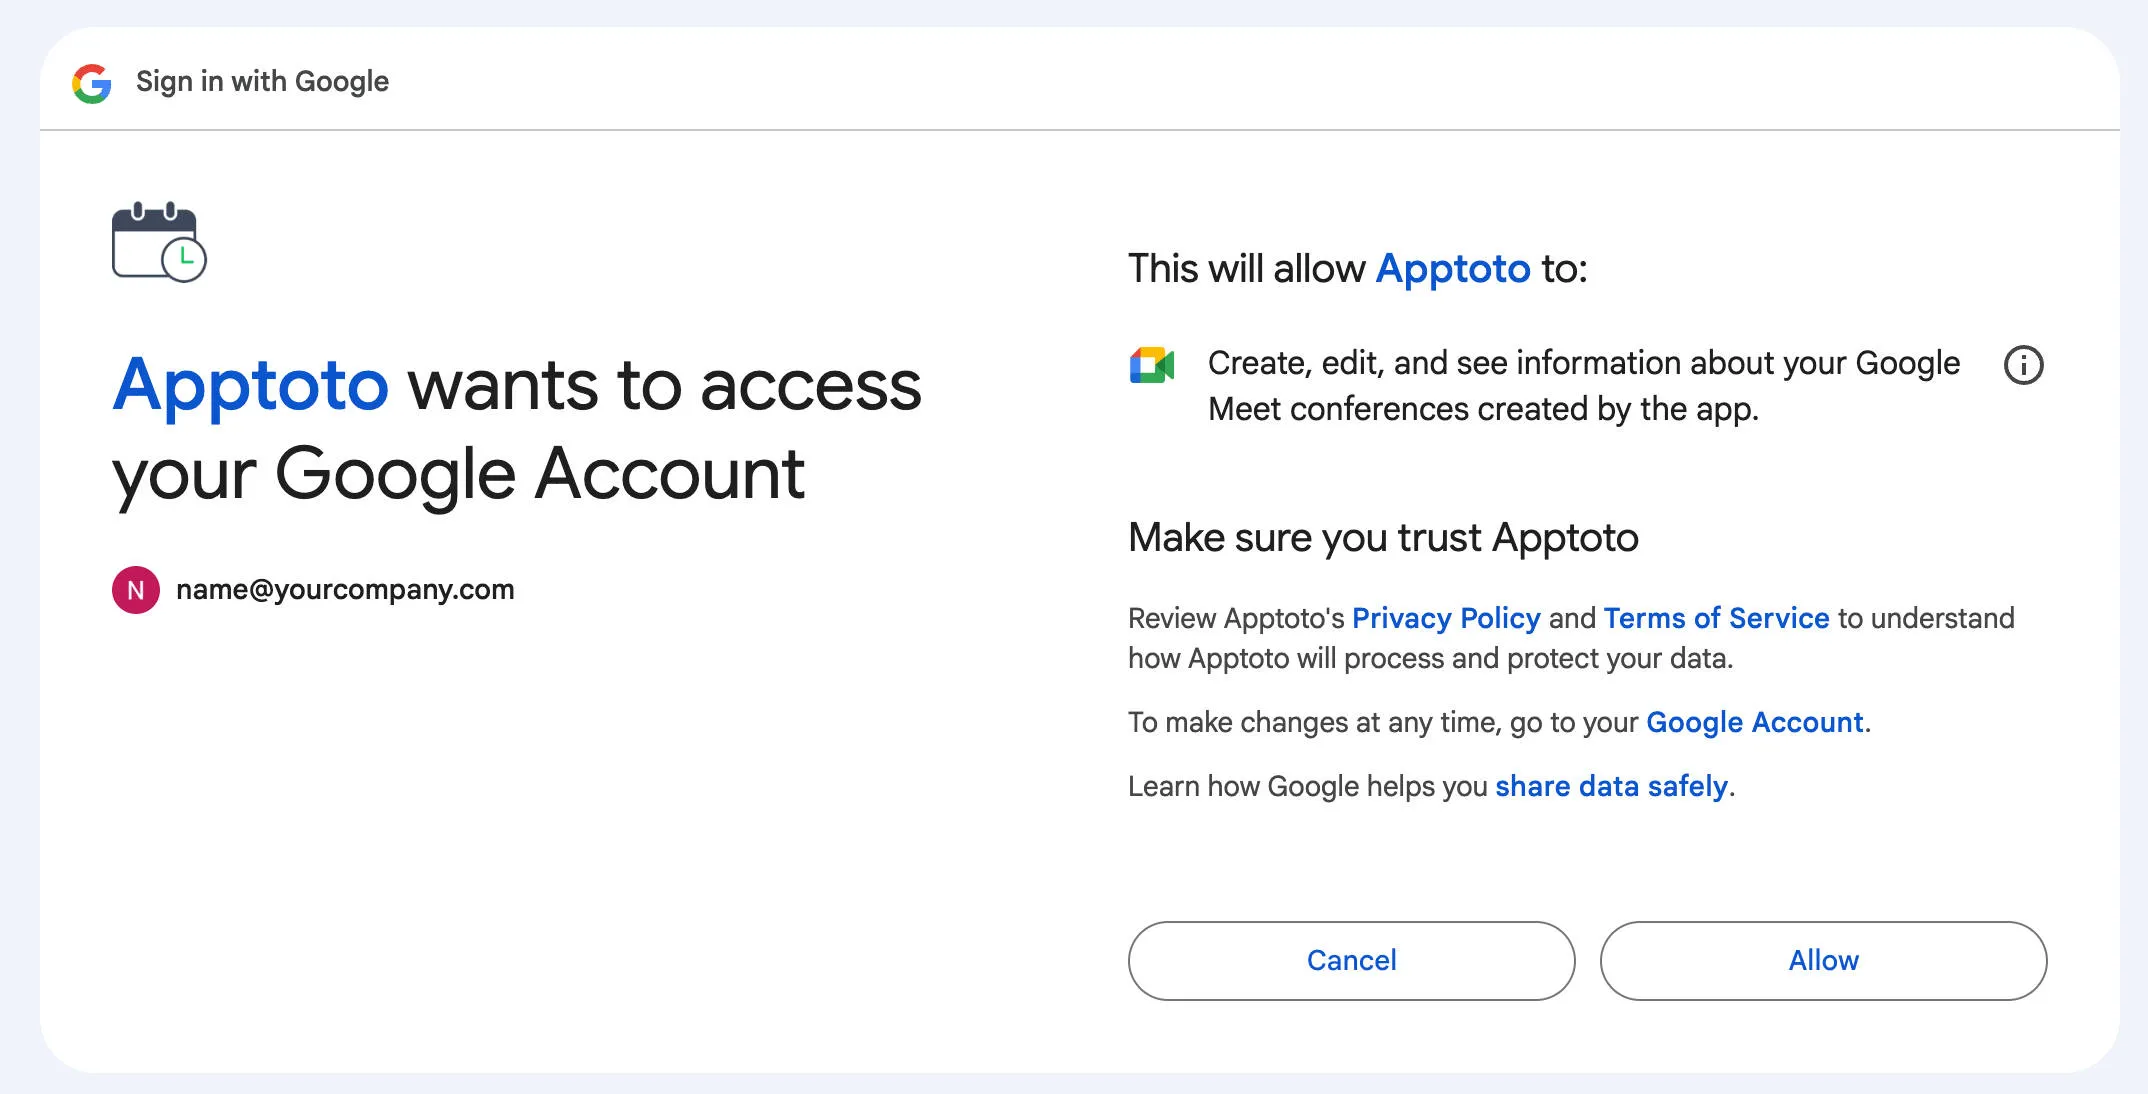
- Connect Google: Click Connect with Google Meet to sign in with the Google account you want to use.
- Grant Permissions: Follow the prompts to allow Apptoto to “Create, edit, and see information about your Google Meet conferences created by the app.”
Enabling Google Meet Meetings on Booking Pages
Section titled “Enabling Google Meet Meetings on Booking Pages”- Go to your booking page: Navigate to Booking Pages, select a page, and click Edit.
- Open Appointment Types: Click the Appointment Types tab.
- Enable Virtual Meetings: Under Virtual Meetings, toggle Create a virtual meeting automatically when clients book on. If you have multiple appointment types, edit each type individually to enable it per type.
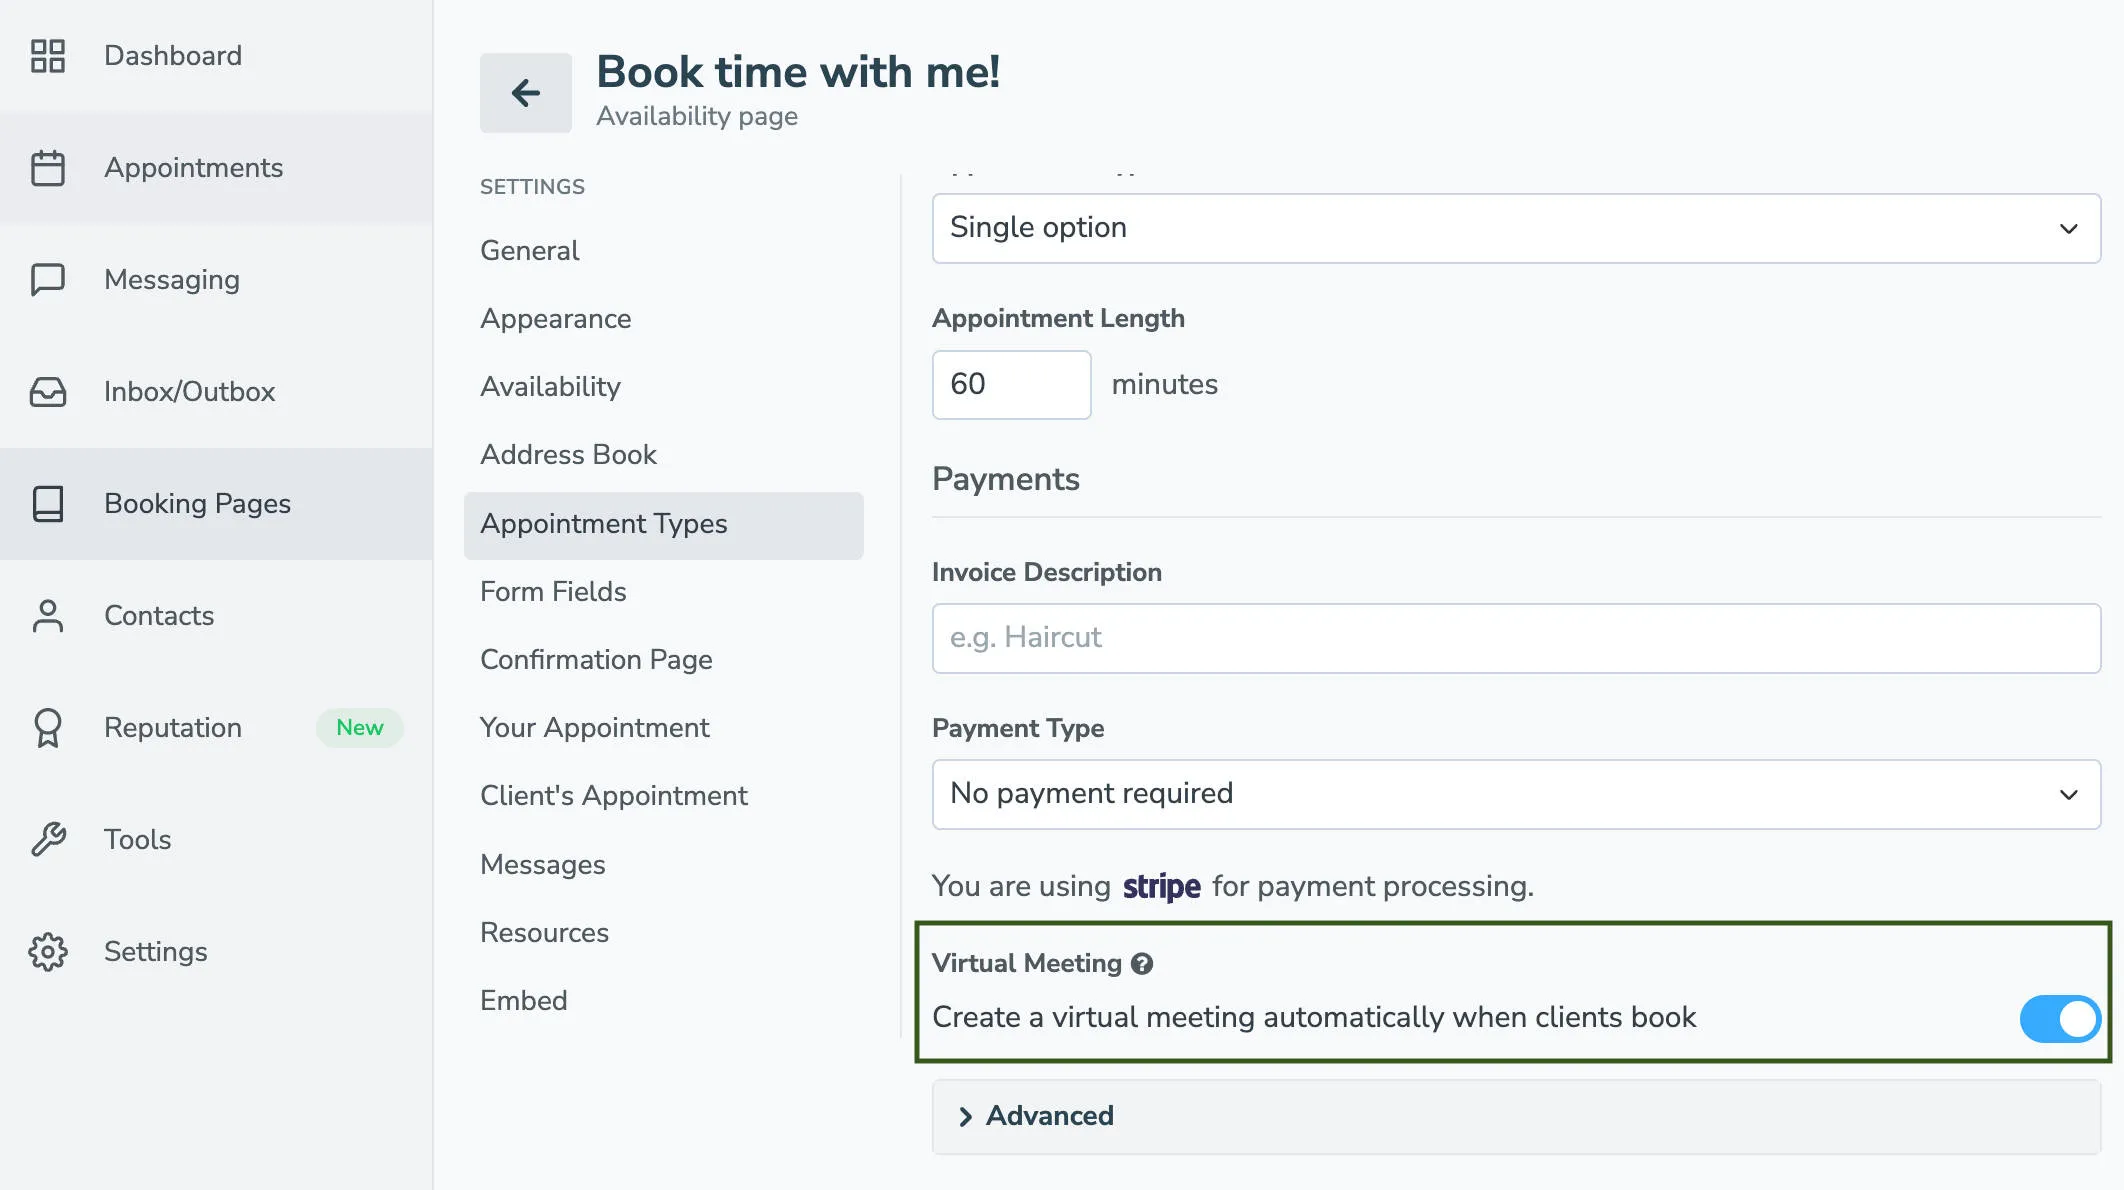
- Save: Click Save to save your changes.
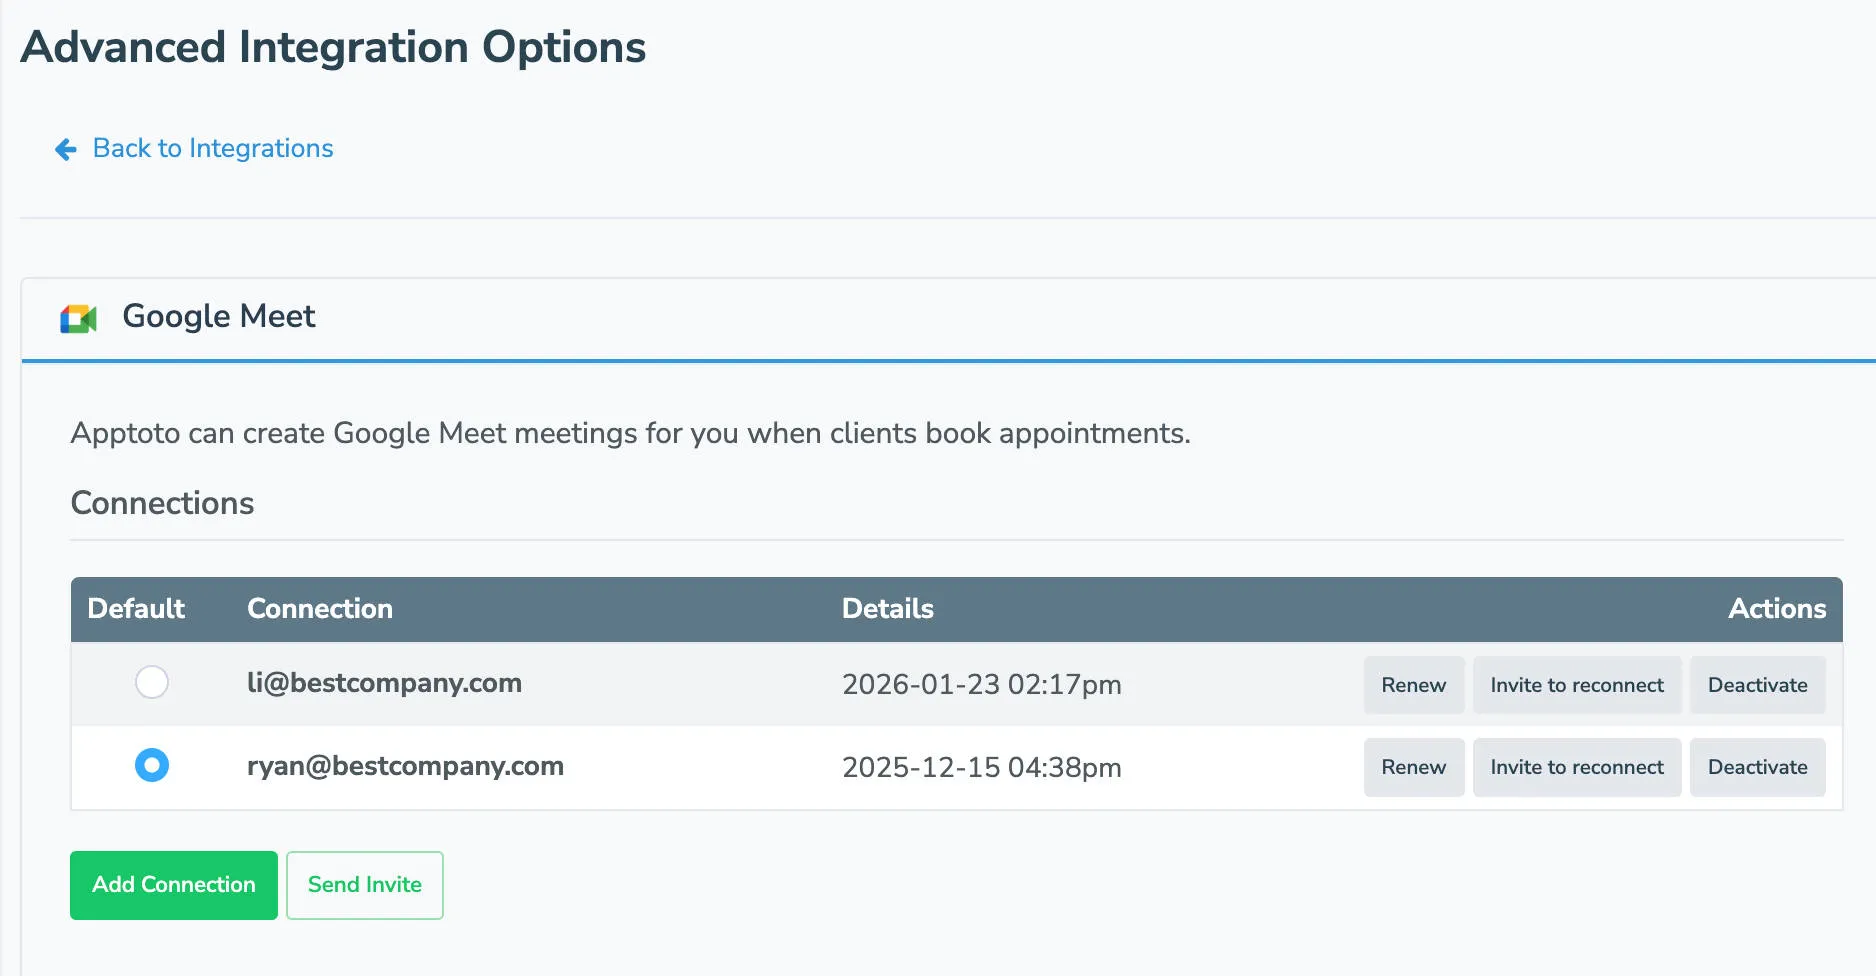
Managing multiple Google Meet accounts
Section titled “Managing multiple Google Meet accounts”Add additional accounts under Settings > Integrations > Google Meet. Add new Google Meet accounts using the Add Connection button or set your default using the radio button.
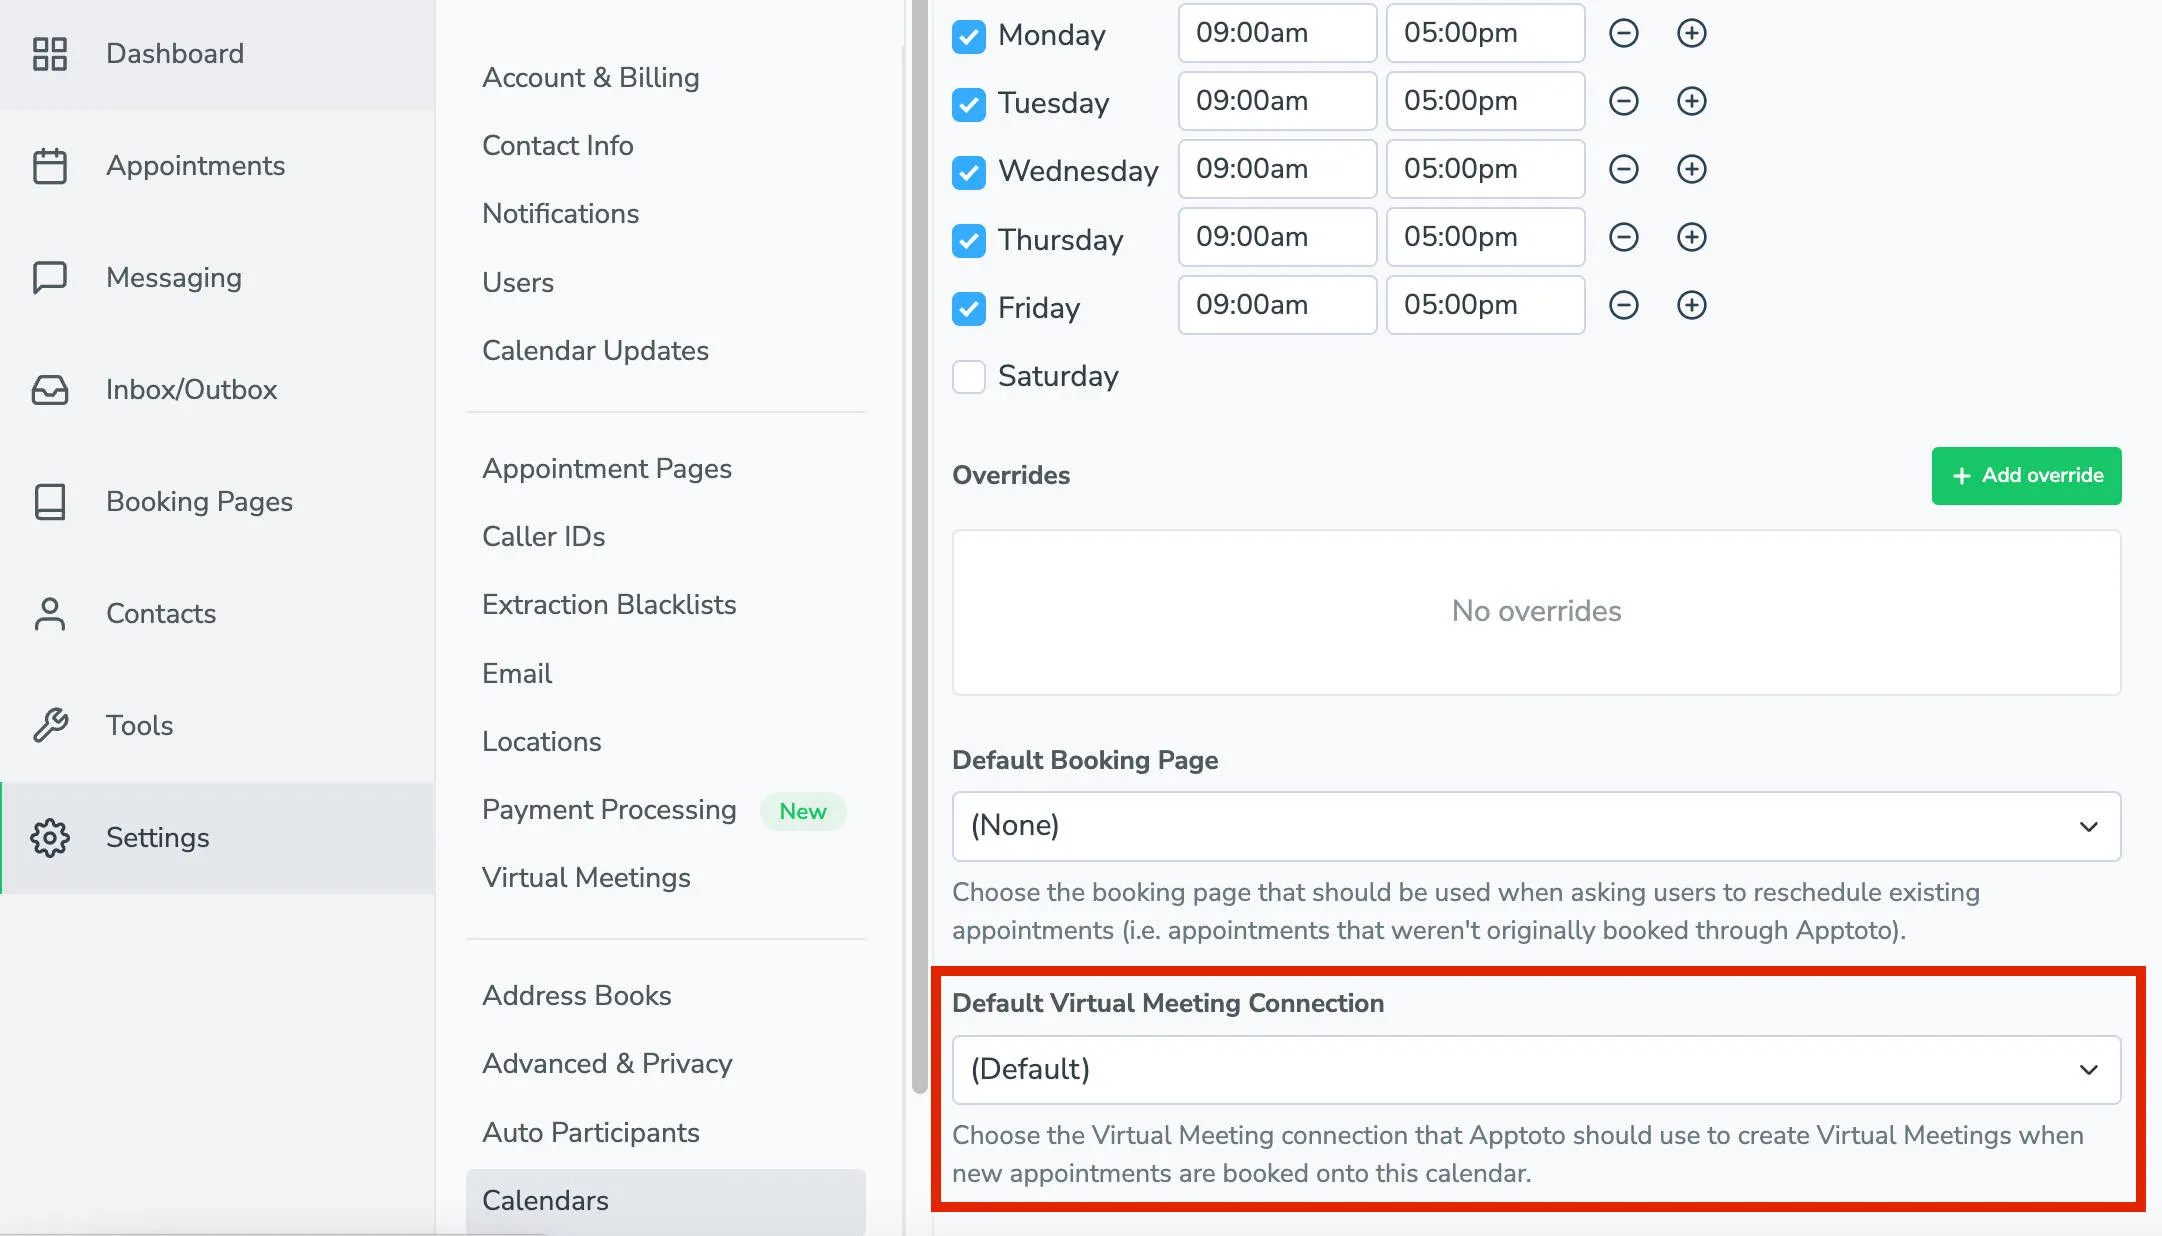
Or, you can assign specific Google Meet accounts to specific calendars under Settings > Calendars > Scheduling > Default Virtual Meeting Connection
Using Google Meet fields in messages
Section titled “Using Google Meet fields in messages”By default, Google Meet invite details appear in the calendar event (note: clients will need to click “Add to Calendar” when they receive the initial message after booking). However, Apptoto won’t automatically include Google Meet meeting information in your reminder messages or your appointment pages. To include them in reminder messages or Appointment Pages, use these fields:
| Field | What it inserts |
|---|---|
{{ event.join_meeting_link }} | The Google Meet meeting URL |
{{ event.join_meeting_button }} | A clickable button (emails and Appointment Pages only) |
{{ virtual_meeting.invite }} | Full invite text including dial-in numbers |
Use event.is_virtual_meeting as a condition in Auto Message rules to target only virtual appointments.
Automatic Google Meet appointment update and deletions
Section titled “Automatic Google Meet appointment update and deletions”Google Meet links created through Apptoto will stay in sync with your calendar events.
- If an appointment time changes, the Meet link stays valid and stays associated with the updated event.
- If you delete an appointment in Apptoto, the Google Meet link is removed from your calendar event.
Showing Google Meet info on Appointment Pages
Section titled “Showing Google Meet info on Appointment Pages”Appointment Pages are what clients see when they click the special Apptoto links in your Auto Messages. To make sure Google Meet details appear on the Appointment Page:
- Go to Settings > Appointment Pages.
- Edit the relevant page.
- Check Include Virtual Meeting Information.
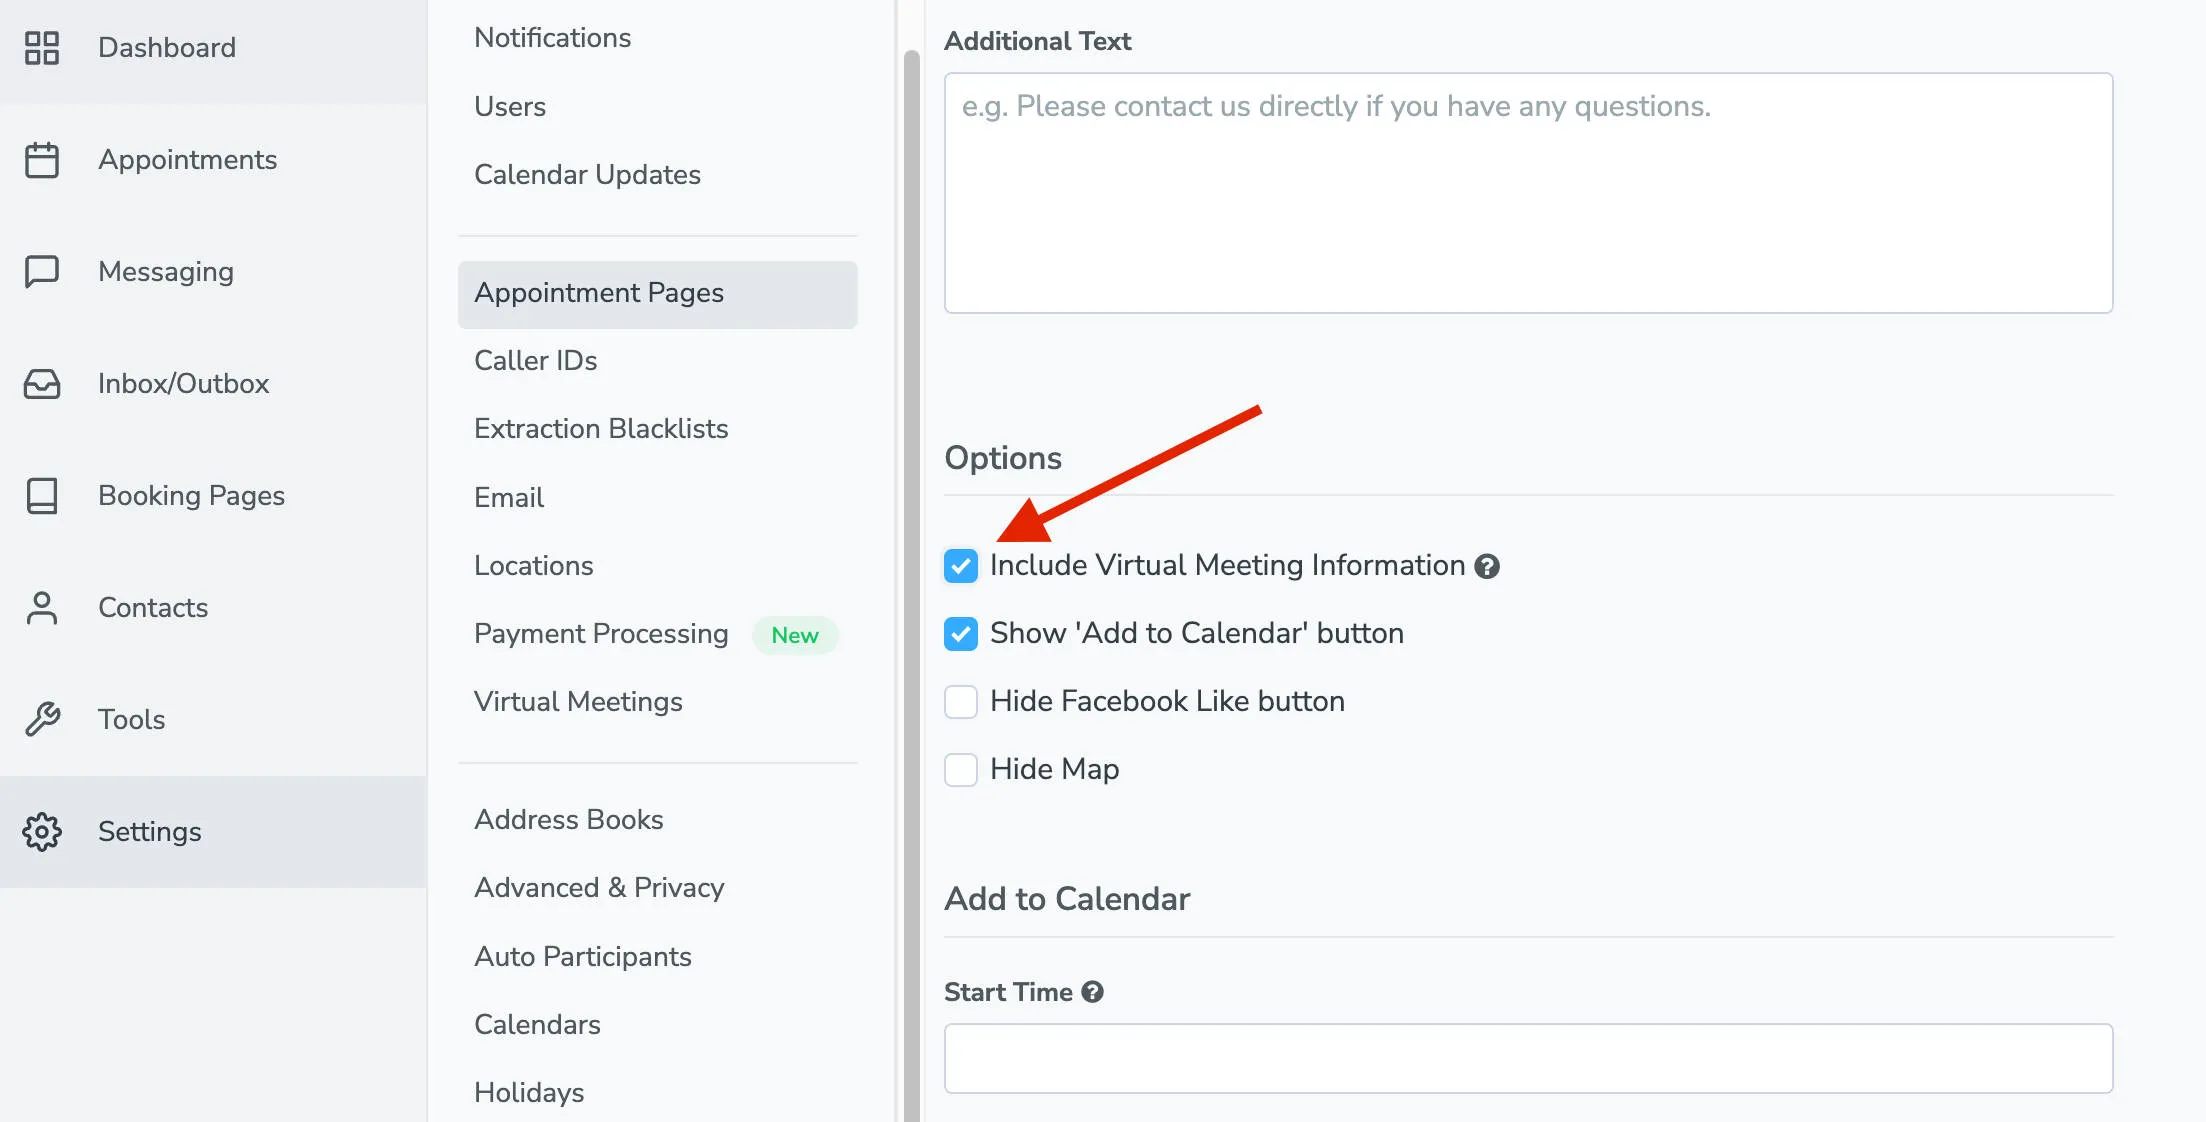
- Click “Save Changes”.
Disconnecting Google Meet
Section titled “Disconnecting Google Meet”Go to Settings > Virtual Meetings, find the Google Meet account, click Options, then Deactivate. Apptoto will stop generating new Meet links for that account.