Apptoto’s Microsoft Teams integration allows you to create Apptoto Booking Pages that automatically create Microsoft Teams Meeting links when clients book appointments with you.
Getting Started
To get started using Microsoft Teams with Apptoto, navigate to the “Settings” > “Integrations” > “Meeting Integrations” > “Microsoft Teams” tab.
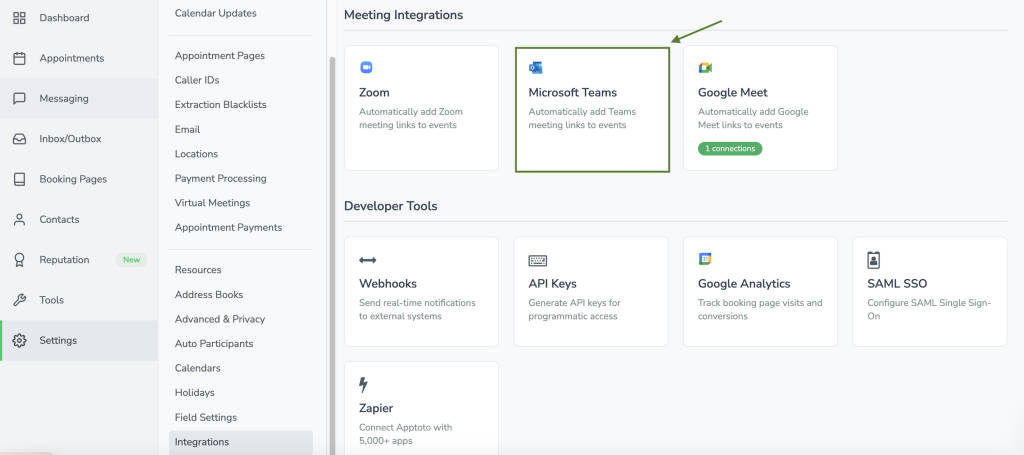
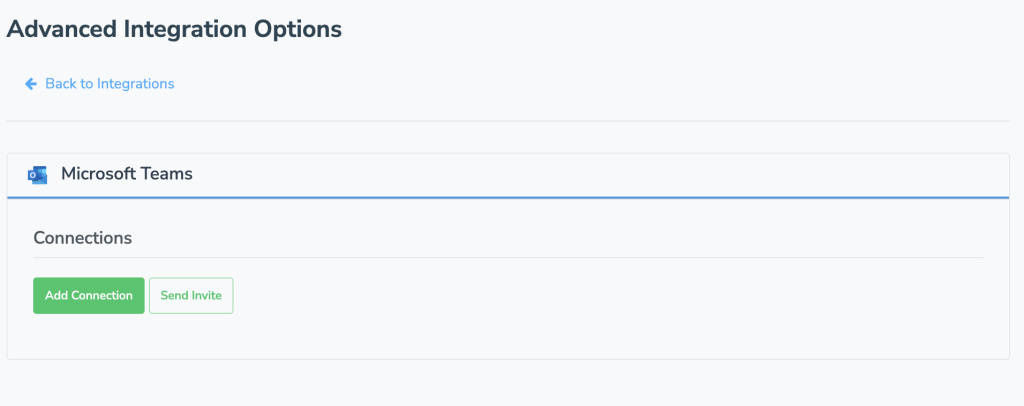
On the Microsoft Teams tab, click “Add Connection.”
Turning on the “Microsoft Teams Meeting” option
Once you connect your Microsoft Teams account to Apptoto, you can turn on Virtual Meetings for Booking Pages.
To get started, navigate to “Booking Pages” > Select a Booking Page > Click “Edit” on the page options menu (three dots). Click on the “Appointment Types” tab, and under the “Virtual Meetings” section, toggle “Create a virtual meeting automatically when clients book” to on. Be sure to click “Save Changes”
Alternatively, if you have multiple appointment types on your Booking Page, you can edit each Appointment Type and turn on “Virtual Meetings.”

Once you’ve enabled the “Create Virtual Meeting” feature for your booking pages, Apptoto will automatically create Microsoft Teams meeting links whenever someone books time with you through the associated Booking Page.
Managing Multiple Microsoft Teams Accounts
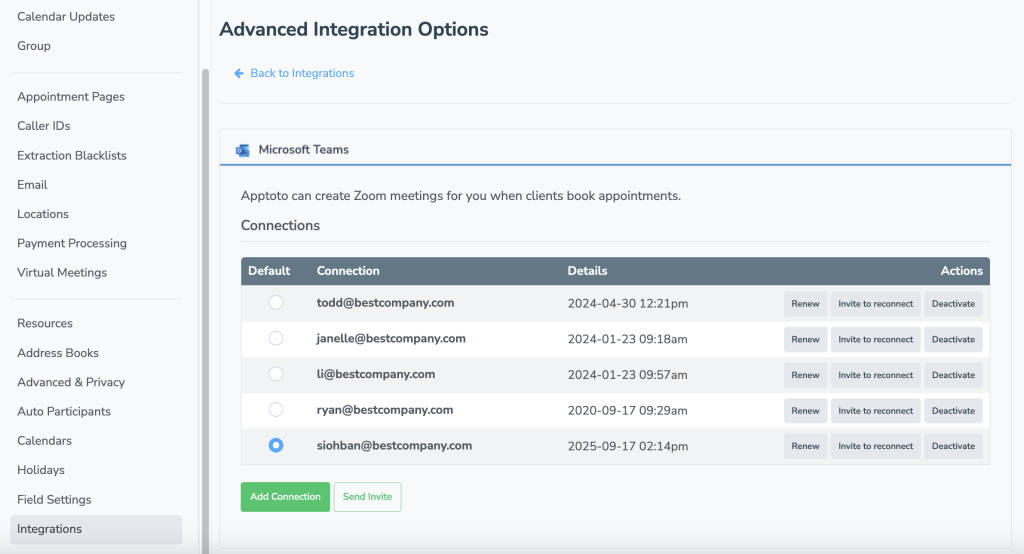
If your organization has multiple Microsoft Teams accounts, you can add additional accounts on the “Settings” > “Integrations” > Meeting Integrations” > “Microsoft Teams” tab.
By default, Apptoto will create Microsoft Teams meetings using the “Default” Microsoft Teams connection. You can set your default Microsoft Teams connection by clicking the appropriate radio button next to your preferred connection.
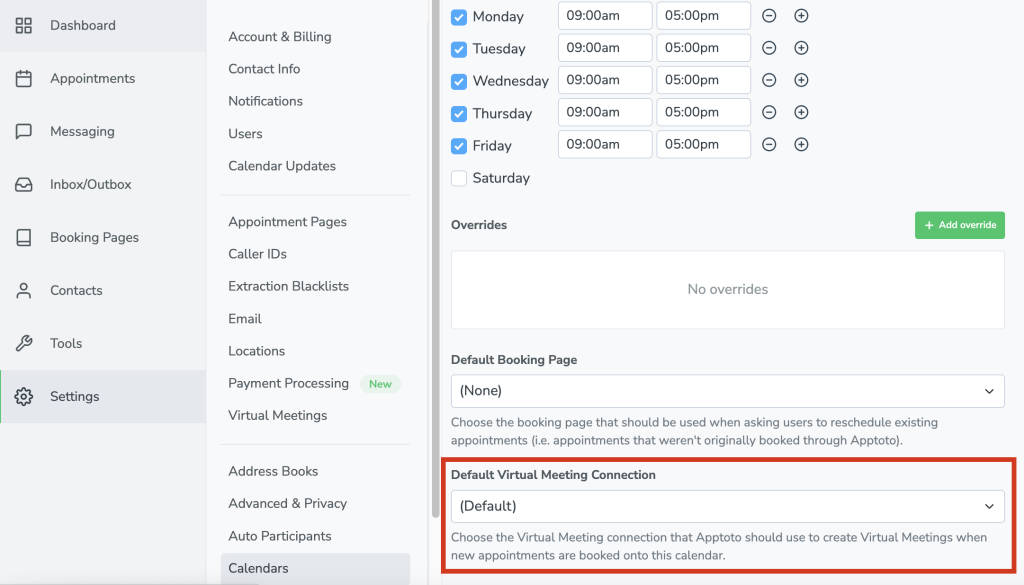
If you need Apptoto to create Microsoft Teams meetings using different Microsoft Teams accounts based on which calendar the appointment is booked on, then navigate to “Settings” > “Calendars.” Next, click the “Scheduling” tab and find the “Default Virtual Meeting Connection” setting. Select the Microsoft Teams account you wish to use. Finally, click “Save.”
Fields for Messages
By default, Apptoto will include the “Microsoft Teams Invite” information in the appointment that is created on your calendar and on the event created on your client’s calendar (note: they will need to click “Add to Calendar” when they receive the initial message after booking). However, Apptoto won’t automatically include Microsoft Teams meeting information in your reminder messages or appointment pages. If you want to do that, you can now the following fields:
- {{ event.join_meeting_link }}
- {{ event.join_meeting_button }} (for emails and appointment pages)
- {{ virtual_meeting.invite }} (contains all of the call-in numbers and link info)
You can also use the following fields in the Auto Message rules
- event.is_virtual_meeting
Note: the above fields work for existing events on your calendar too! So even if Microsoft Teams meetings weren’t booked through Apptoto, you can use those fields to set up Auto Messages and Appointment Pages. The “virtual_meeting.invite” field only works if the appointment was booked through Apptoto.
Managing Microsoft Teams Meetings
Microsoft Teams meetings booked through Apptoto will automatically be updated if the start time of the appointment changes (either through Apptoto or the source calendar). For example, if a client books an appointment with you for Wednesday at 3 p.m., and then you move that appointment to 4 p.m., the Teams meeting will be updated.
Showing Micorosft Teams Info on the Appointment Page
“Appointment Pages” are what users see when they click on the special Apptoto links sent in Auto Messages. If you want to ensure that the information is included on the Appointment Page, then make sure that “Include Virtual Meeting Information” is checked on the Appointment Page settings here:

Uninstalling Microsoft Teams
Disconnect your Microsoft Teams account from Apptoto by clicking “Settings > “Virtual Meetings.” Find the connection/email you wish to disconnect. Click the “Options” button and then “Disconnect.”