Knowledge Base

  1. Home
  2. Knowledge Base
  3. Online Booking Pages
  4. Signup Pages
  5. Signup Page Customization

Signup Page Customization

Signup Pages allow you to show your clients a list of group appointments/events they can select from and attend. This can be a single event (such as a one-time seminar) or a recurring series of events.

These pages can be generated and customized before you’ve scheduled any upcoming events, or you can create a Signup page automatically when you create a new calendar event in Apptoto.

Customizing your Signup Page

If you want to customize your Signup Page, you have several settings you can configure, including the appearance, linked address books, form fields, and more.

Some settings and configurations are similar or identical to Availability Pages. Please see our shared help articles on Address Books, Form Fields, Confirmation Pages, Templates, Previewing Pages, and Embedding to customize these options. All other customization options are included below!
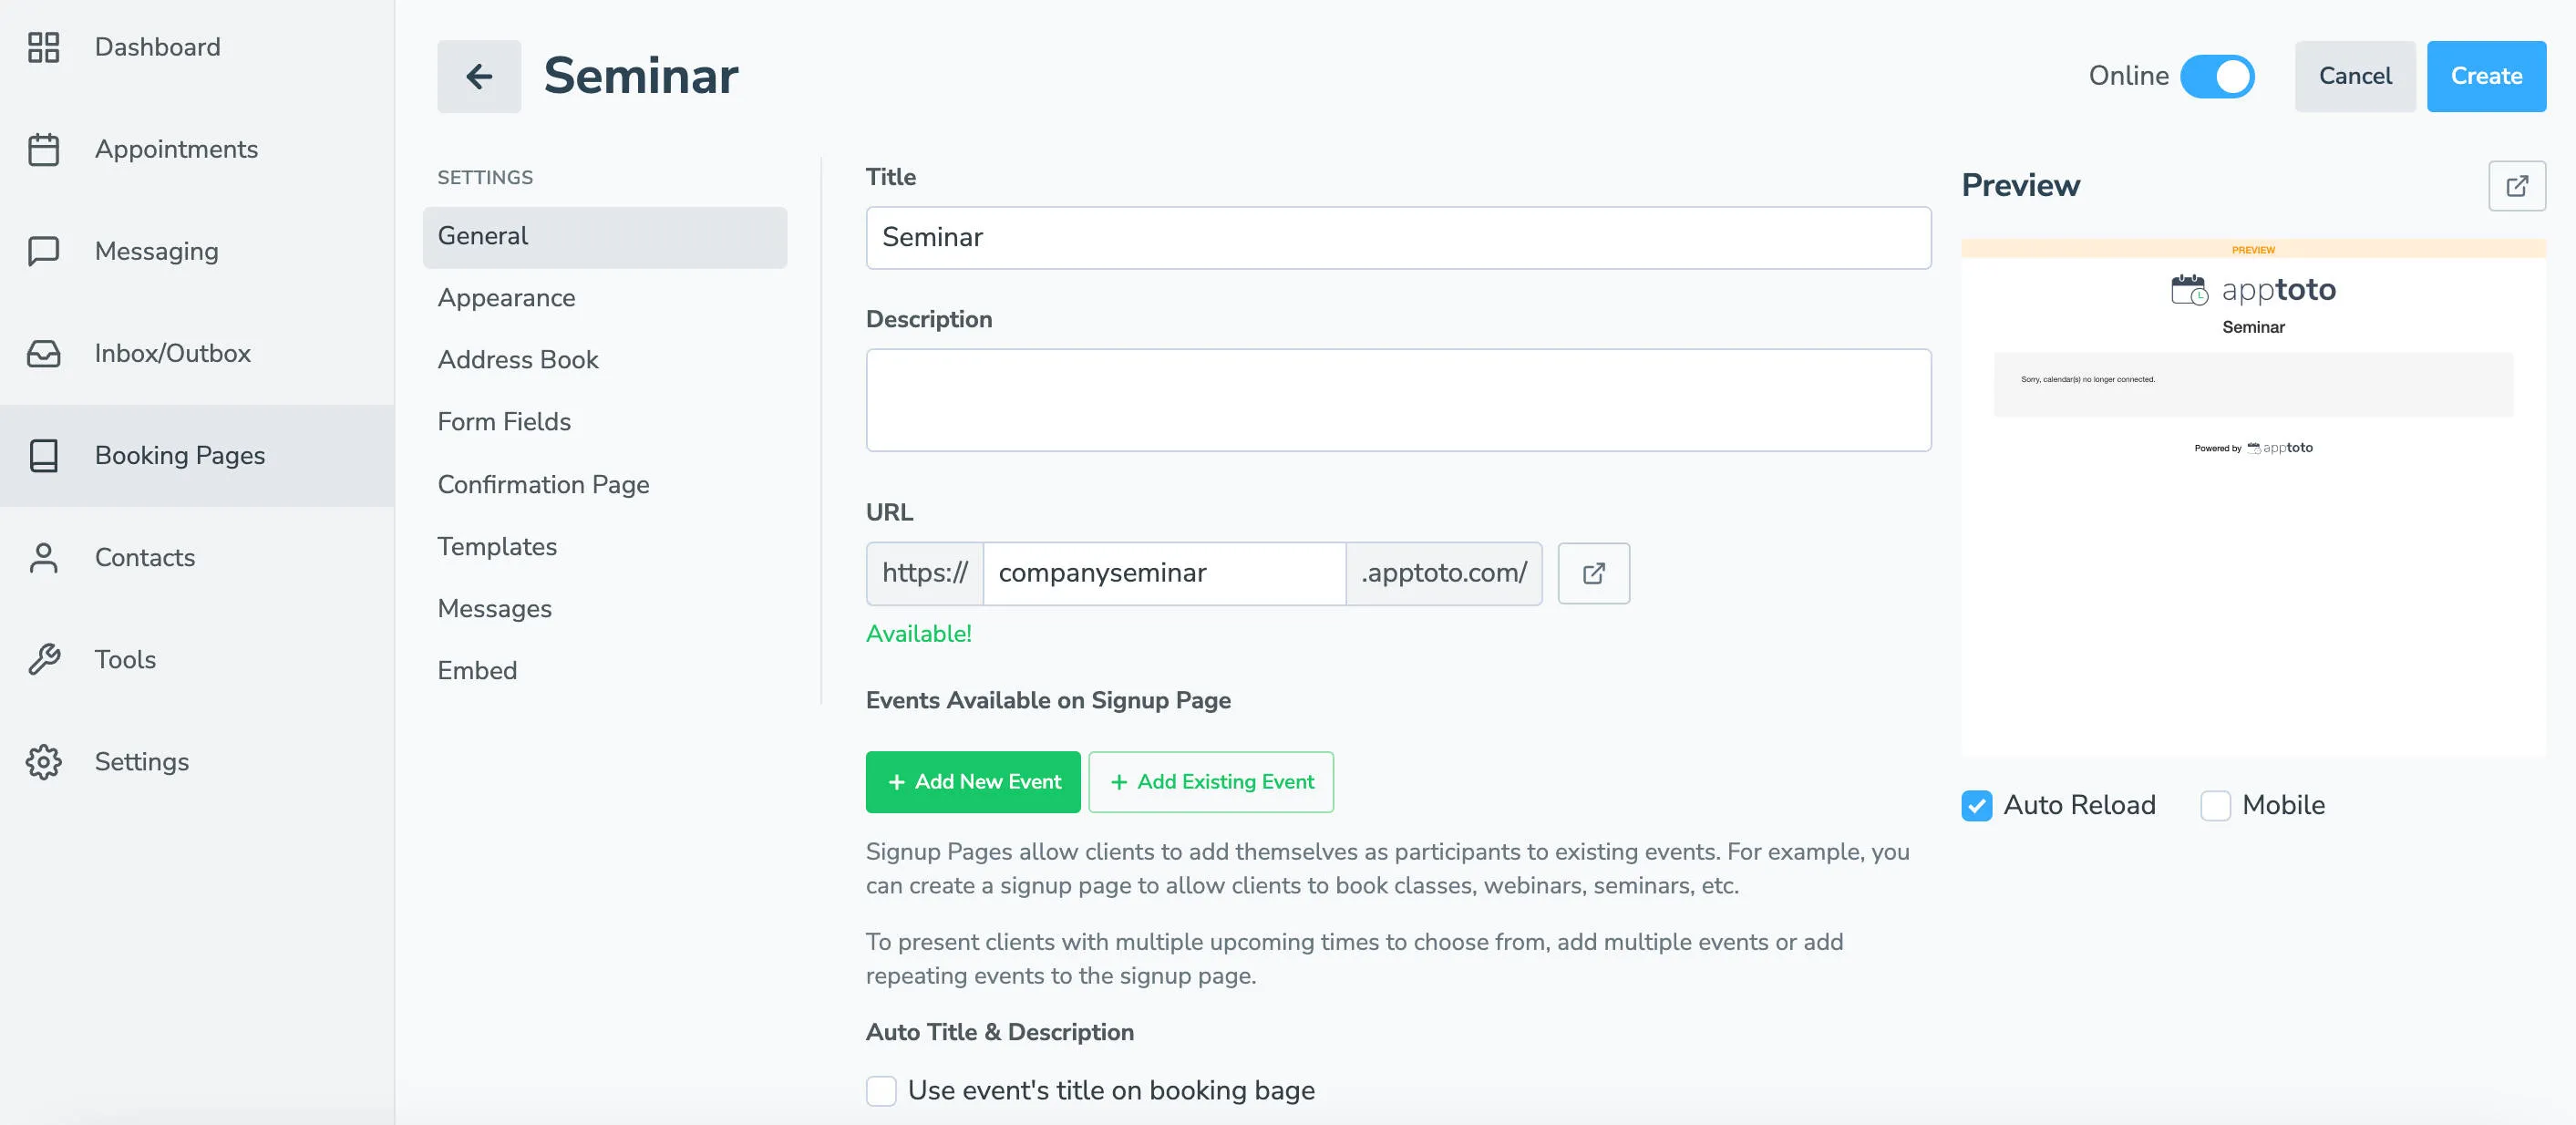
General Settings

Create a Signup page to invite multiple people to an event in Apptoto.

To edit general settings on your Signup page, such as Title, description, and URL, navigate to the “Booking Pages” tab. If the page was already created, find the Signup page you want to update and click edit. The standard settings are detailed below:

  1. Title: Specify the title of your online Signup Page. This title will appear at the top of the Signup Page, and it will be used as the title of the website (i.e., it will show up in the browser tab). An example title is “Investment Seminar”
  2. Description: Specify a description. The description will appear below the title on the Signup Page.
  3. URL: Enter the subdomain you want to use for your Signup Page. Your page will be available at the url http://SUBDOMAIN.apptoto.com/ . The Subdomain can include numbers, letters, and underscores. The Subdomain has to be more than 5 characters long.
  4. Events Available on Signup Page: Signup Pages allow clients to add themselves as participants to upcoming events such as classes or seminars. You need to link one or more events to your Signup page to give your clients an event time/date to choose.
    1. +Add New Event: Selecting this will cause a new “Event Editor” screen to appear. Enter the details of your new event, and it will be added directly to the calendar you choose and linked to the Signup Page.
    2. +Add Existing Event: Selecting this will cause an event search box to appear. Search for an already created upcoming event to link to your page.
  5. Auto Title & Description: If you want your Signup Booking Page to inherit the title or description from the calendar event you created (rather than editing them in the General Settings), you can utilize these options:
    1. Use event’s title on booking page
    2. Use event’s content as description on booking page.
  6. Max Participants: Set the maximum number of participants that can attend your event.
  7. Limit Available Events to: Set the maximum number of days in the future that a client can schedule themselves for an upcoming event.
  8. Payments: If you collect a fee or deposit to attend an event, you can “Set Up Payments” while editing your Signup page. Make sure you have already connected your payment processor, and then follow these directions to add payments to your signup pages.
Advanced Settings (expand to see):
  • Disable Indexing: By default, your signup pages are not indexed by search engines and show up in search results. Toggle this setting from on to off to allow search engines to index your pages.
  • Fixed Time Zone: Normally, Apptoto will show event times to clients in the timezone their browser is in/set to. If you would prefer that Apptoto shows event times in one timezone, toggle this setting on. Then, select which timezone you’d like to set as the fixed time zone.

Appearance

All Apptoto Booking Pages feature an Appearance tab, which allows you to customize the look of your Signup Pages.

customize Apptoto signup pages' appearance

  1. Logo & Logo Size: Click “Upload Logo” to add your business’s logo to a booking page. Set the size you want the logo to appear using “Logo Size.”
  2. Layout: In the “Layout” dropdown, you can select from the following options:
    1. All-In-One
    2. Week-View
    3. Month View
    4. Legacy Original
    5. Legacy – One Column Customized
    6. Legacy – Two-Column Customized
    7. Legacy – Two-Column Even
      1. Note: The two-column customized and even options will present you with a column editor to further customize the contents of your booking page on the right and left columns.
  3. Accent Color: The newer booking page templates (All-in-One, Week View, and Month View) will allow you to select an accent color that appears on the page when a user hovers over an appointment time.
  4. Additional Color and Font Styling: The legacy booking page templates will allow you to customize multiple elements on your booking page along with any custom content you provide on the page.
Advanced Settings (expand to see):
  • Remove “Powered by Apptoto”: Apptoto customers can remove the words “powered by Apptoto” from the booking page by toggling this setting so long as they are not using the free trial or starter plan.
  • Custom CSS: If you are familiar with CSS, you can now include your own CSS coding to further customize the booking page appearance. For example, you can restrict the logo size to 150 pixels wide by using: .logo-img { max-width: 150px; }. Your web developer or IT professional may have more info on this should you have questions.

Messages

Booking actions allow you to specify actions taken after a client signs up for an event with you.

After Booking Messages

Navigating to the new Booking Pages > Messages tab will allow you to control the notifications sent to your clients/patients after they sign up to attend an event with you.

signup_page_message_customization

Email Notifications

Under the “Email Notifications” section of the Booking Pages > Messages tab, you can also customize email messages sent to you (i.e., the calendar owner) or the client/patient. Clicking the checkbox next to the four listed options will allow you to enable/disable email notifications in the following circumstances:

  • Send email to calendar owner/admin
  • Send email to customer upon booking
  • Send email to customer and guests upon cancellation
  • Send email. to customer and guests upon rescheduling
Text Notifications

Under the “Text Notifications” section of the Booking Pages > Messages tab, you can customize the text message sent to your clients after they sign up to attend an event.

  • Send text to customer
Adding Fields to Email and Text Notifications

Please note that the fields you can use in Booking Page notifications include all of the fields documented on these two pages:

  1. Standard Message Fields
  2. Booking Appointment Template Fields