Manual Contact Entry
Use manual contact entry to create new contacts in your address book with name, phone, email, and per-contact communication preferences.
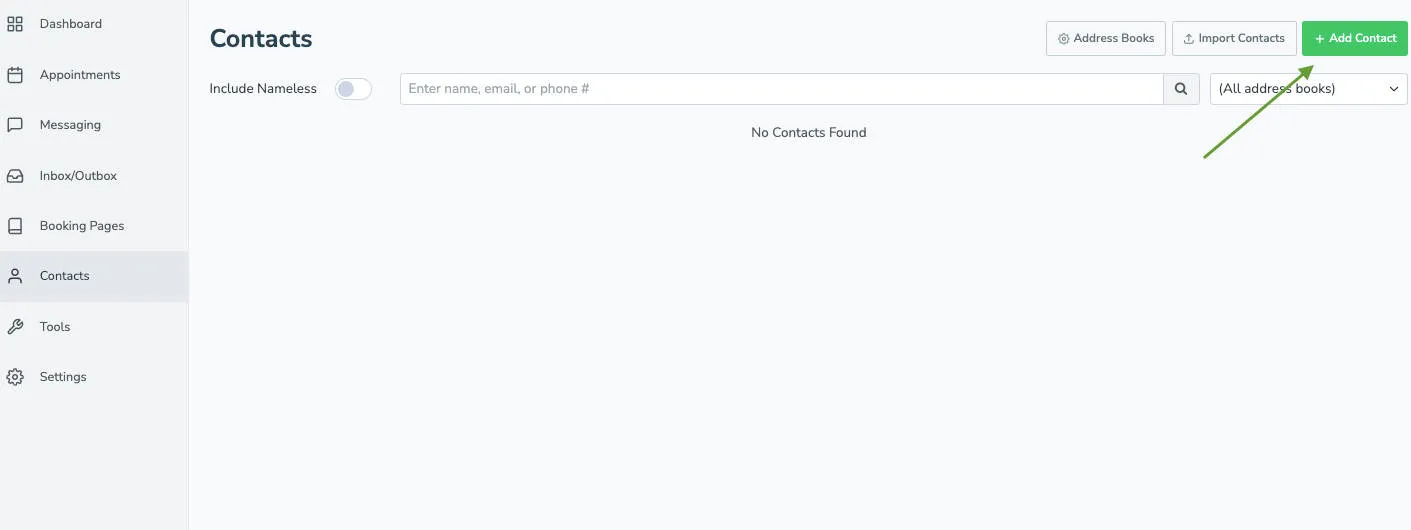
To add a contact manually, go to your Contacts tab and select the + Add Contact button in the top-right corner.
This opens the New Contact Info page where you can enter the contact’s name, phone number, email address, and select which address book to add them to. The page also includes preference settings where you can specify if the contact prefers not to receive text messages, calls, or emails — these preferences apply to all future appointments involving that contact.
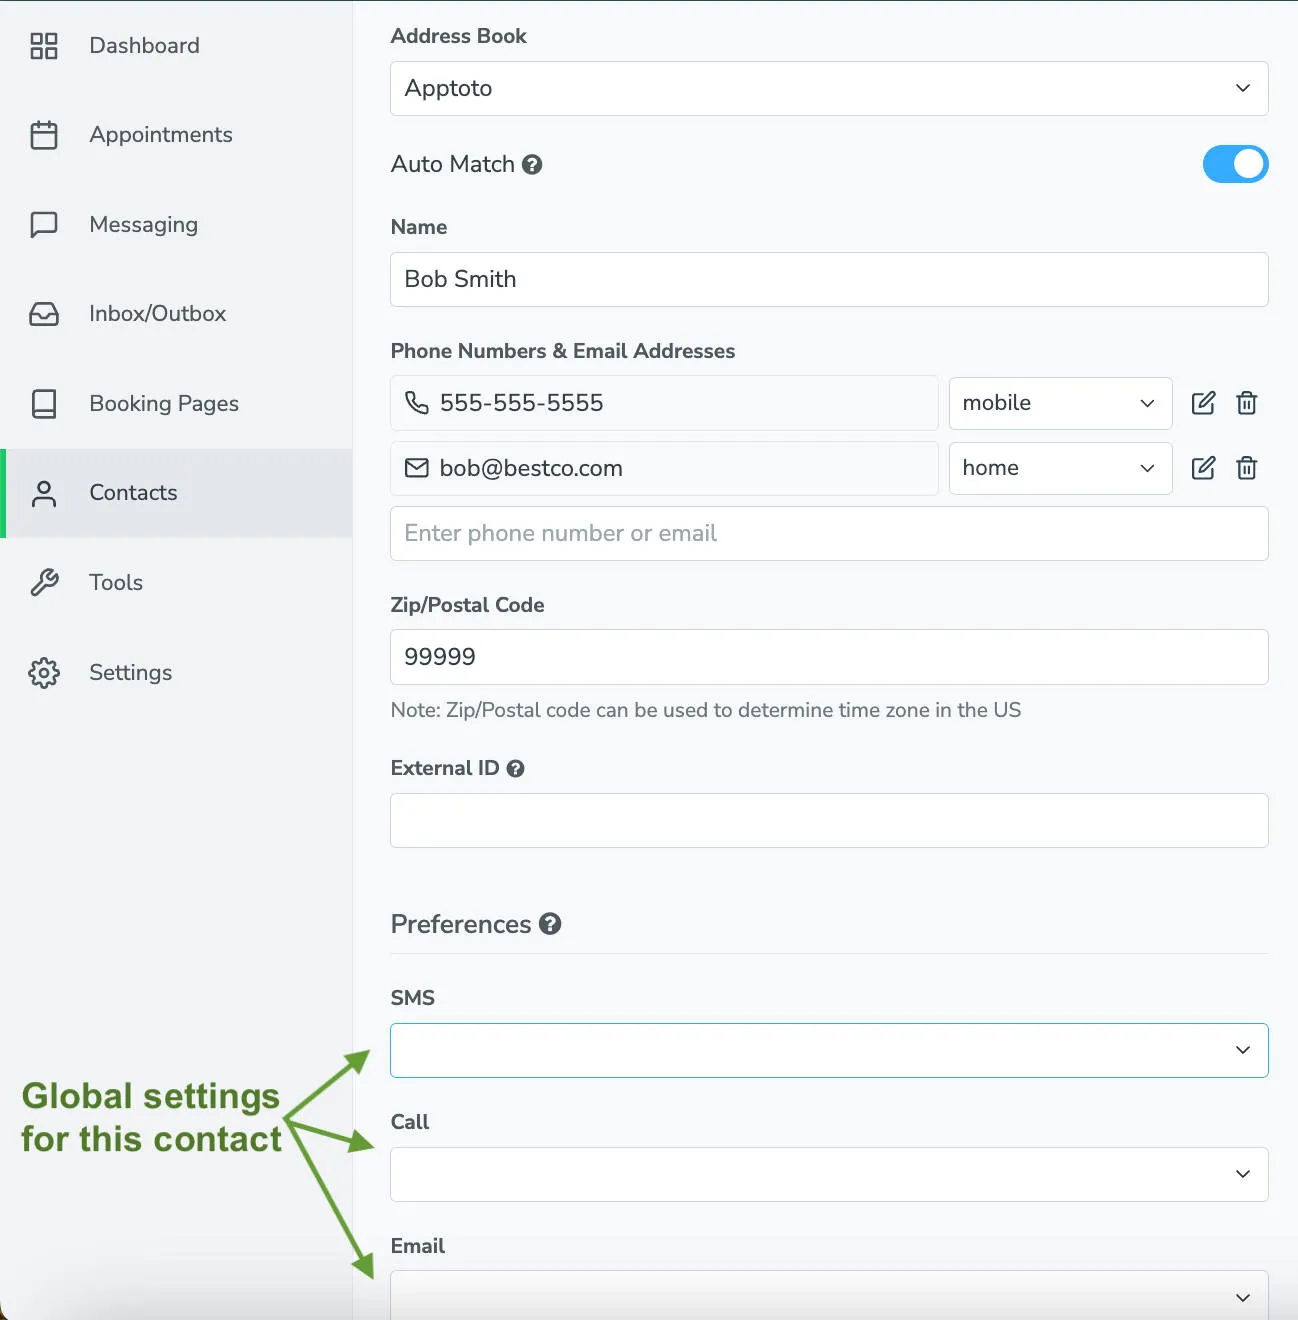
After filling in their details and setting preferences, click Create Contact to add them to your selected address book. They’ll then be available for matching to upcoming appointments.