This article will walk you through how to get started using Apptoto with Google Calendar. Once you complete these steps, Apptoto will work in the background, automatically sending reminders and messages to your clients.
Signing up with your Google Account
Apptoto connects to your Google Calendar/Contacts. For this to happen you should sign up with Apptoto using the Google Account that has access to the calendar(s) you want reminders sent out for.
So, make sure you are signed into Google with that account, and then click the blue “Sign In” button:

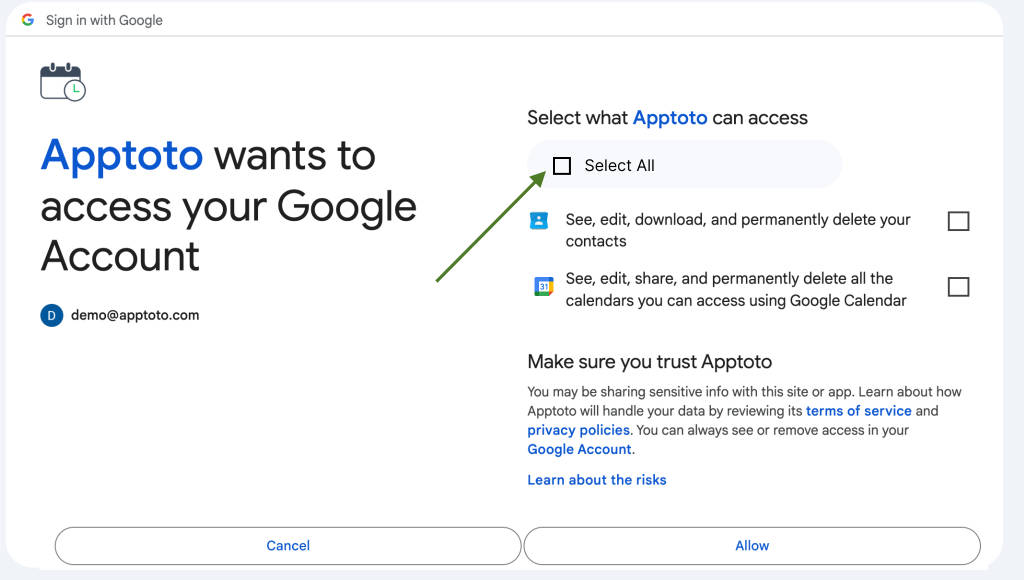
Clicking that button will pop up a series of Google prompts, asking you to give Apptoto permission to access your Google Calendar/Contacts.
You will need to grant consent to Apptoto to access your Google contacts and Calendar, or else Apptoto will not function properly. You can always revoke this access later if you decide not to use Apptoto. Here is what the access/consent steps may look like:
Step 1.1: Sign In With Your Google Email

Step 1.2: Enter Your Password

Step 1.3: Grant Permission to Google to Share Your Info with Apptoto

Step 1.4: Allow Apptoto to access your Google Calendar and Contacts by Checking “Select All”
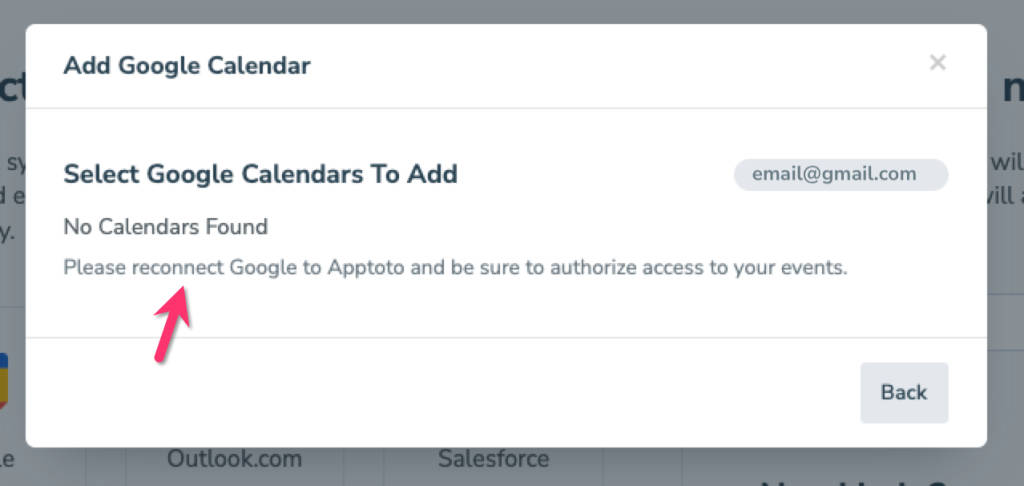
If you do not grant Apptoto access to your Google Calendar and Contacts, you will see an error that looks like the one below when you try to add your first calendar.
Step 2: Connecting your first Google Calendar
Because you signed up using your Google Account, Apptoto will assume you want your Google Calendar connected. Don’t worry. Apptoto will not send messages automatically until you tell it to do so.
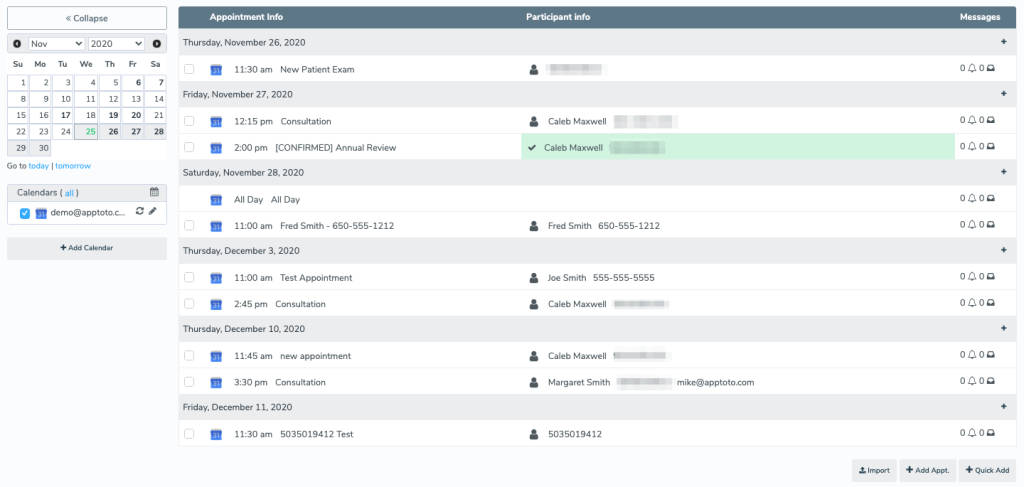
After the calendar has been added, you will be taken to your Appointments tab. Here, you can see the upcoming appointments that Apptoto has found and the contact information extracted from them. The Appointment Info column displays the title of the appointment, and the Participant Info will display the extracted contact information.
Connecting a Google Calendar After Signup
To reconnect your Google Calendar after you initially sign up or to connect a new Google Calendar, please follow the steps below:
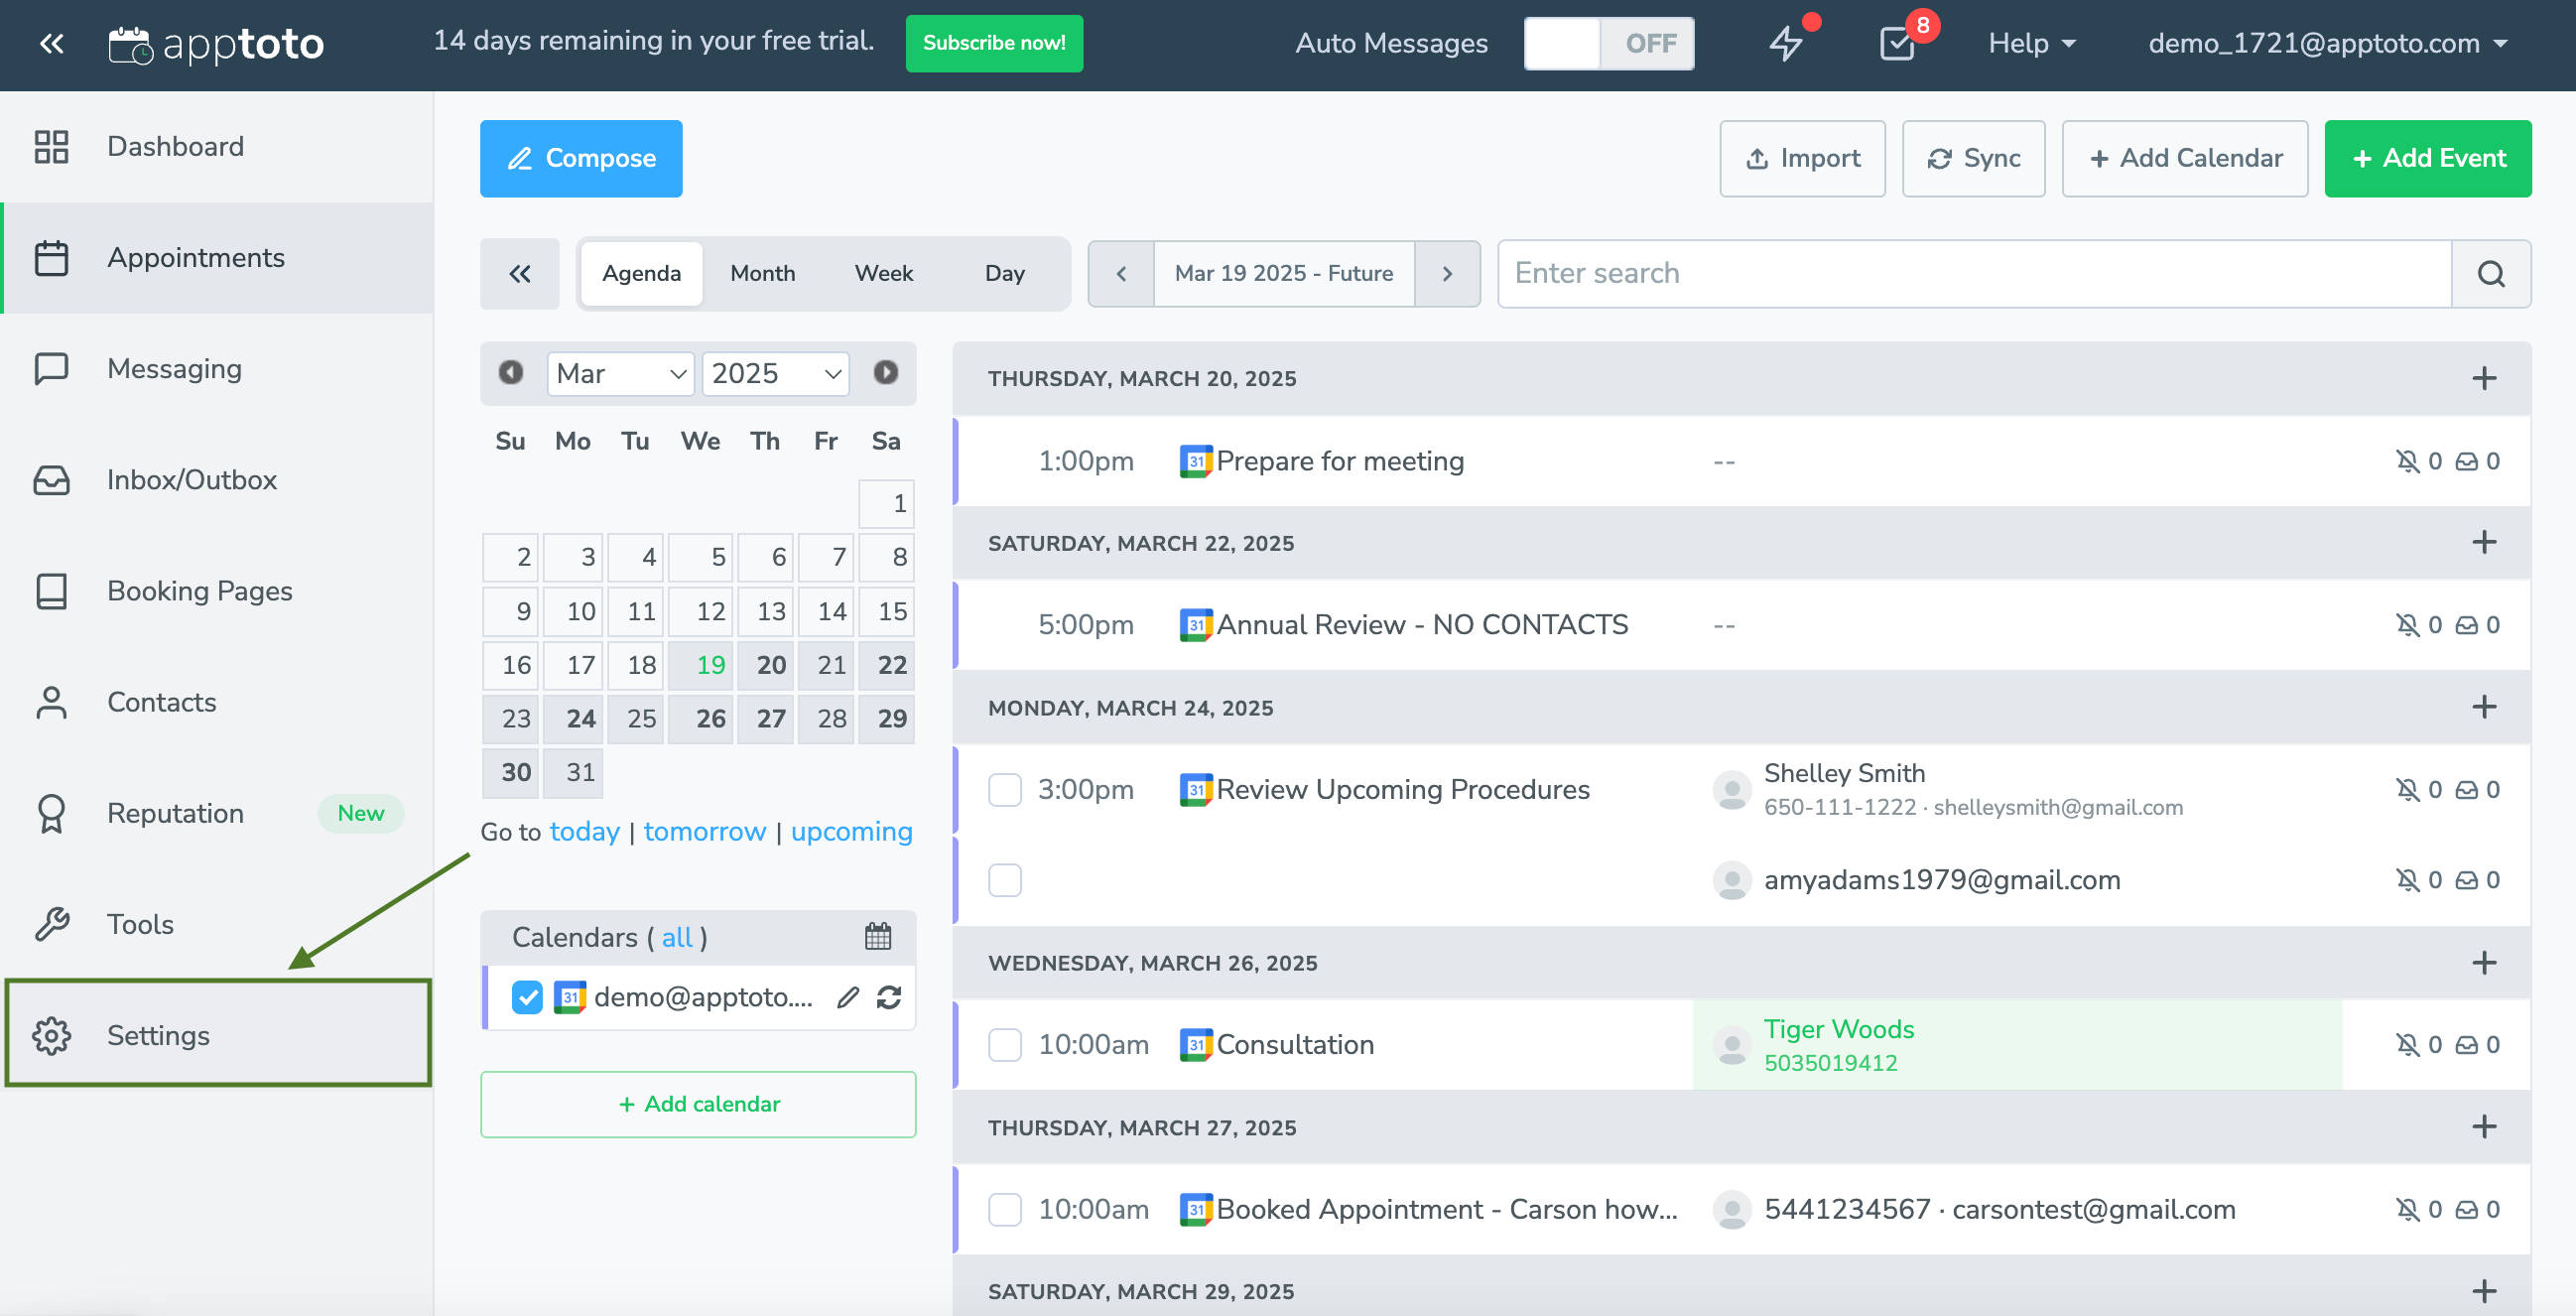
- Log into Apptoto and click the “Settings” tab.
- Click the “Calendars” tab.
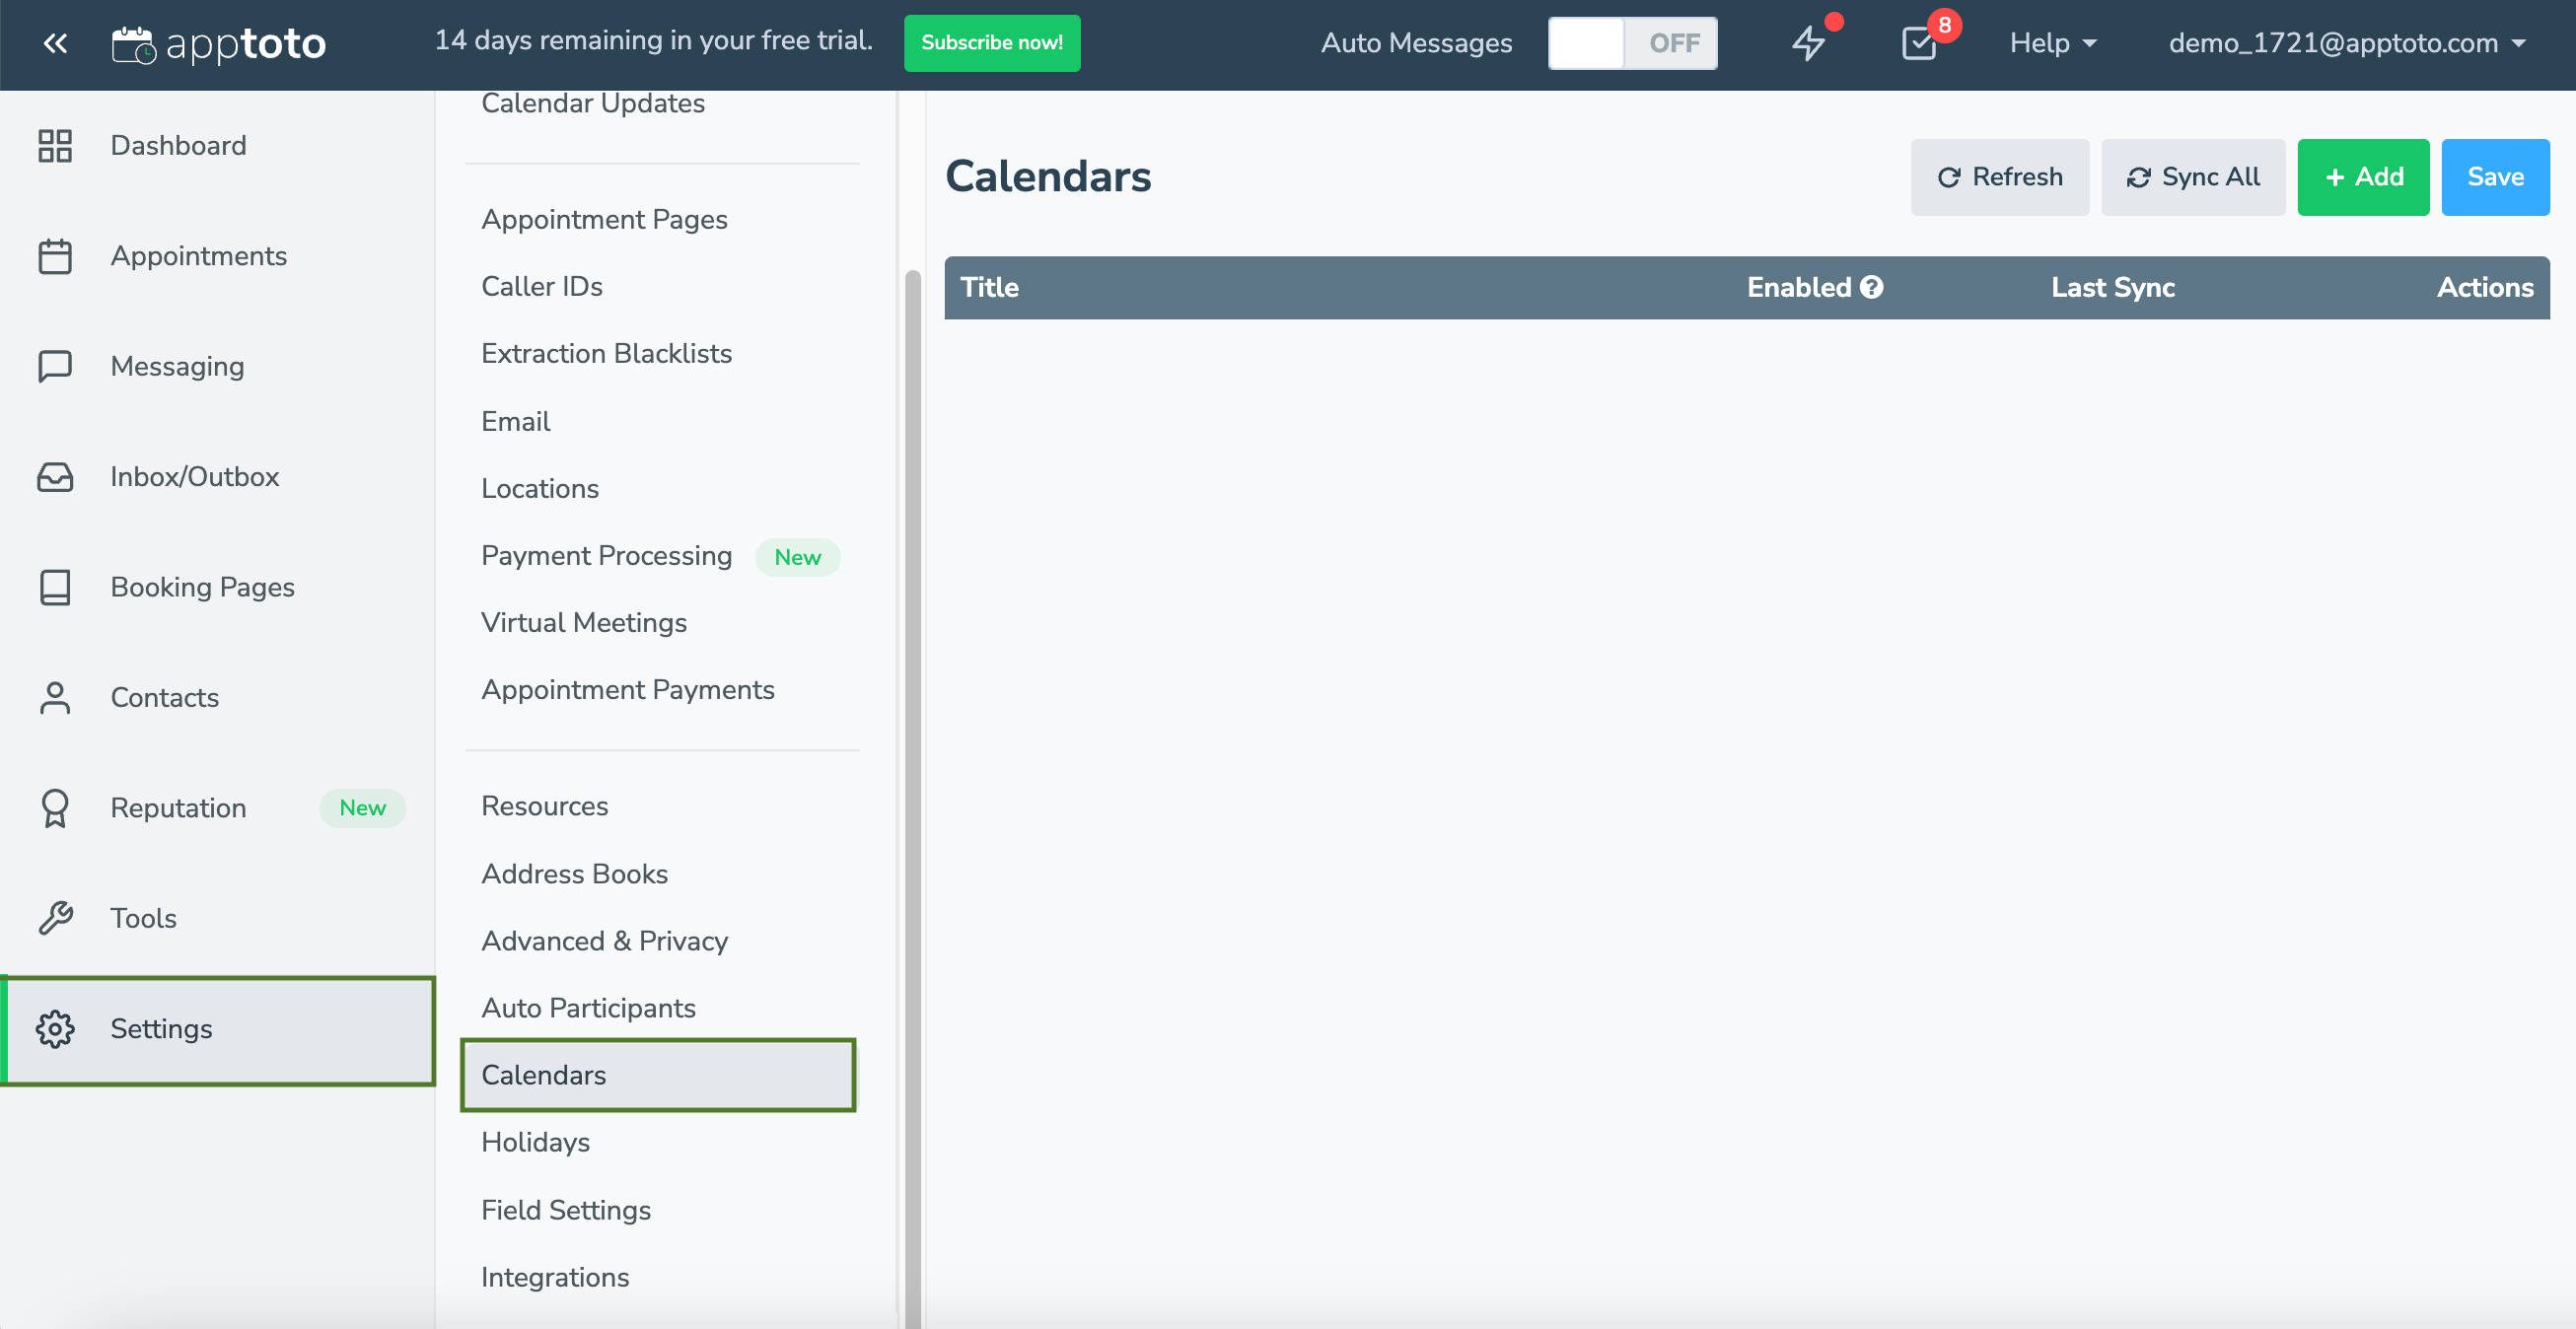
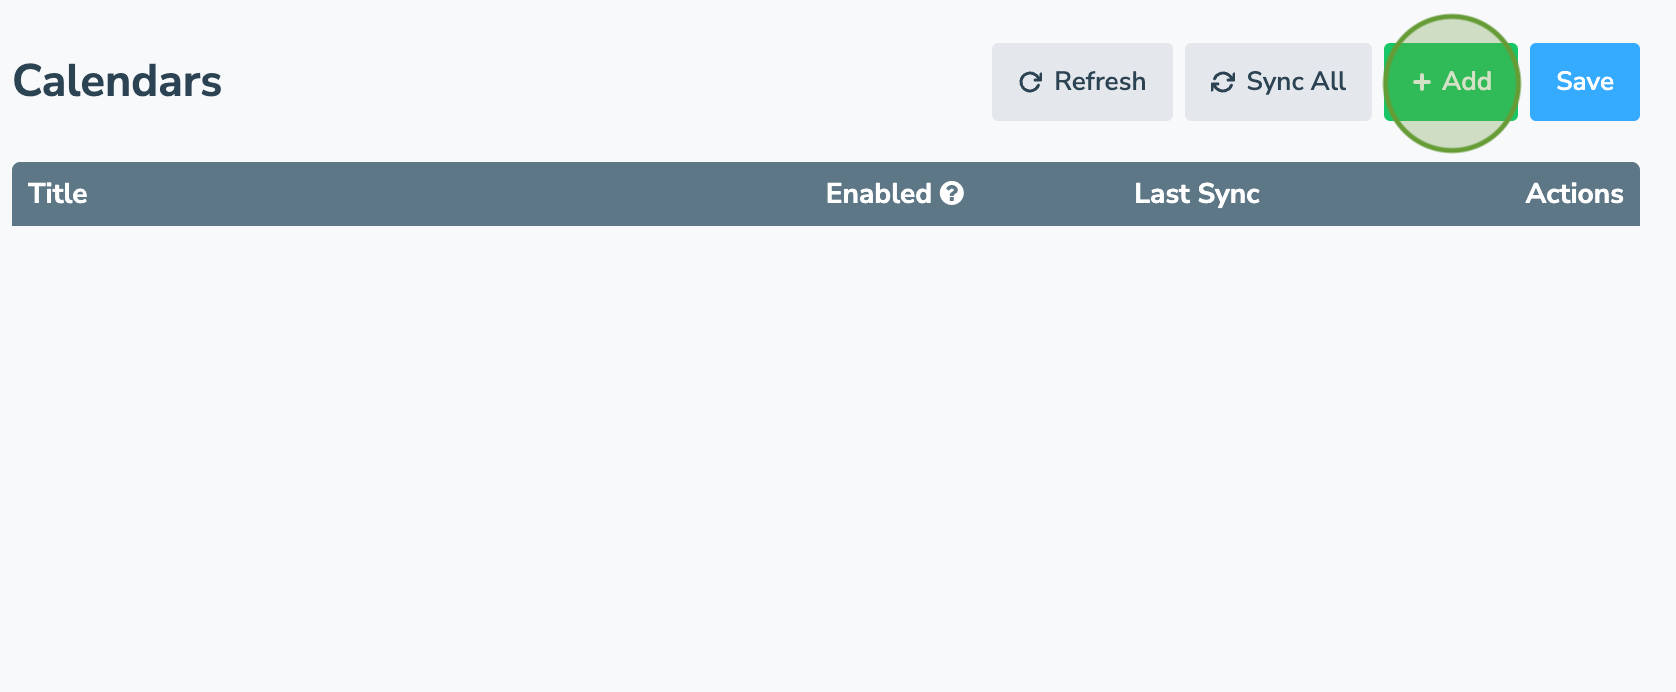
- Click “+Add” to add a new appointment calendar to Apptoto.
- Select Google as the type of calendar that you use.

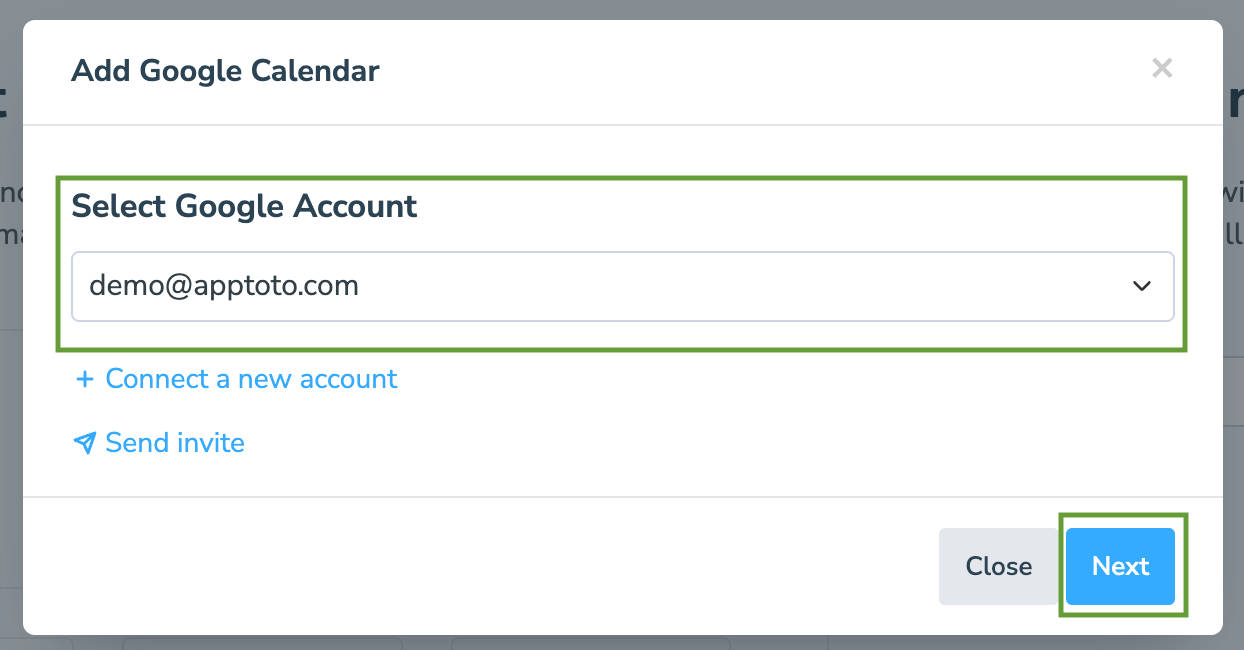
- If prompted, choose the Google Account that owns the calendar you want to connect and grant Apptoto the appropriate permissions to see and edit your Calendars and Contacts.

- Back in Apptoto, select the Google Account you want to link to Apptoto from the drop-down and click Next.
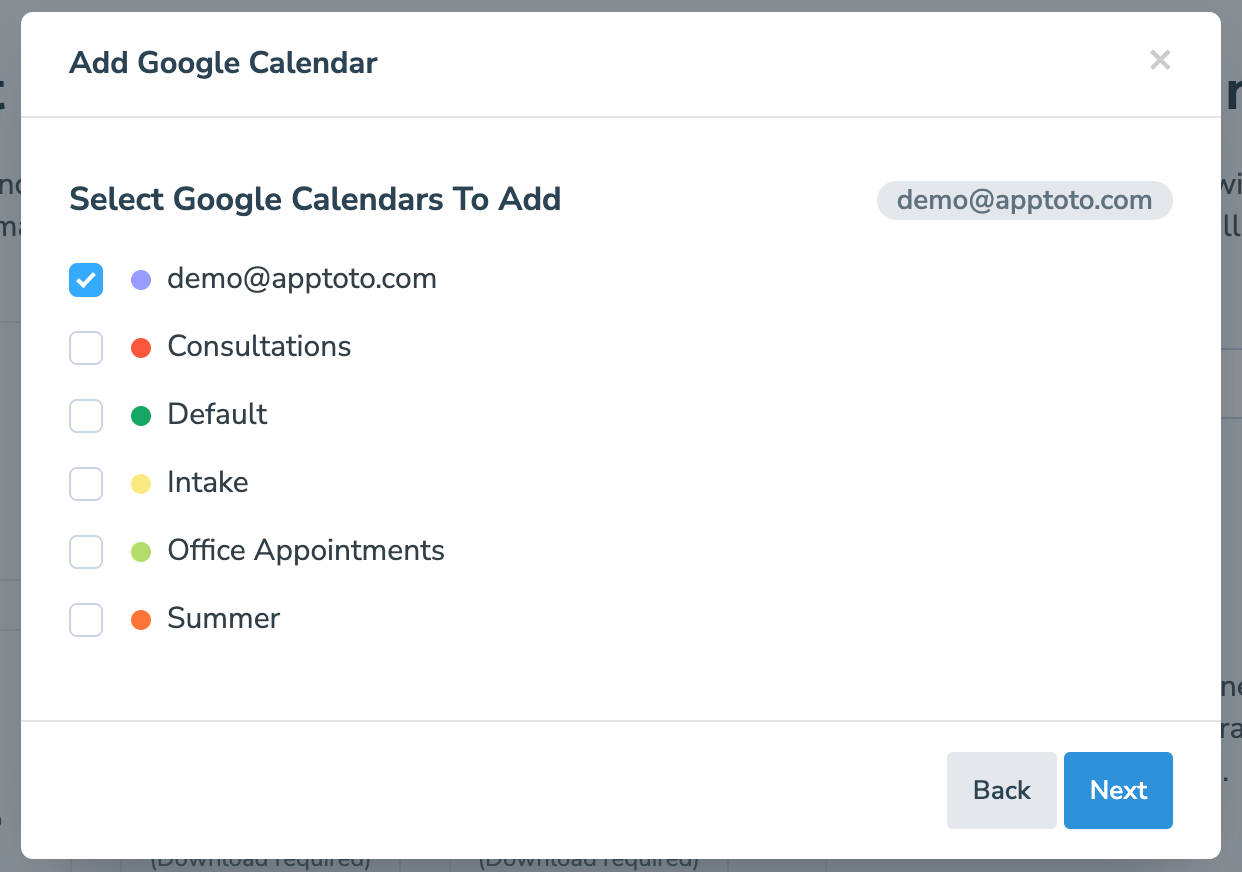
- You’ll be provided a list of all the Calendars associated with that Google Account. Select which calendars you’d like to sync and click “Next.”
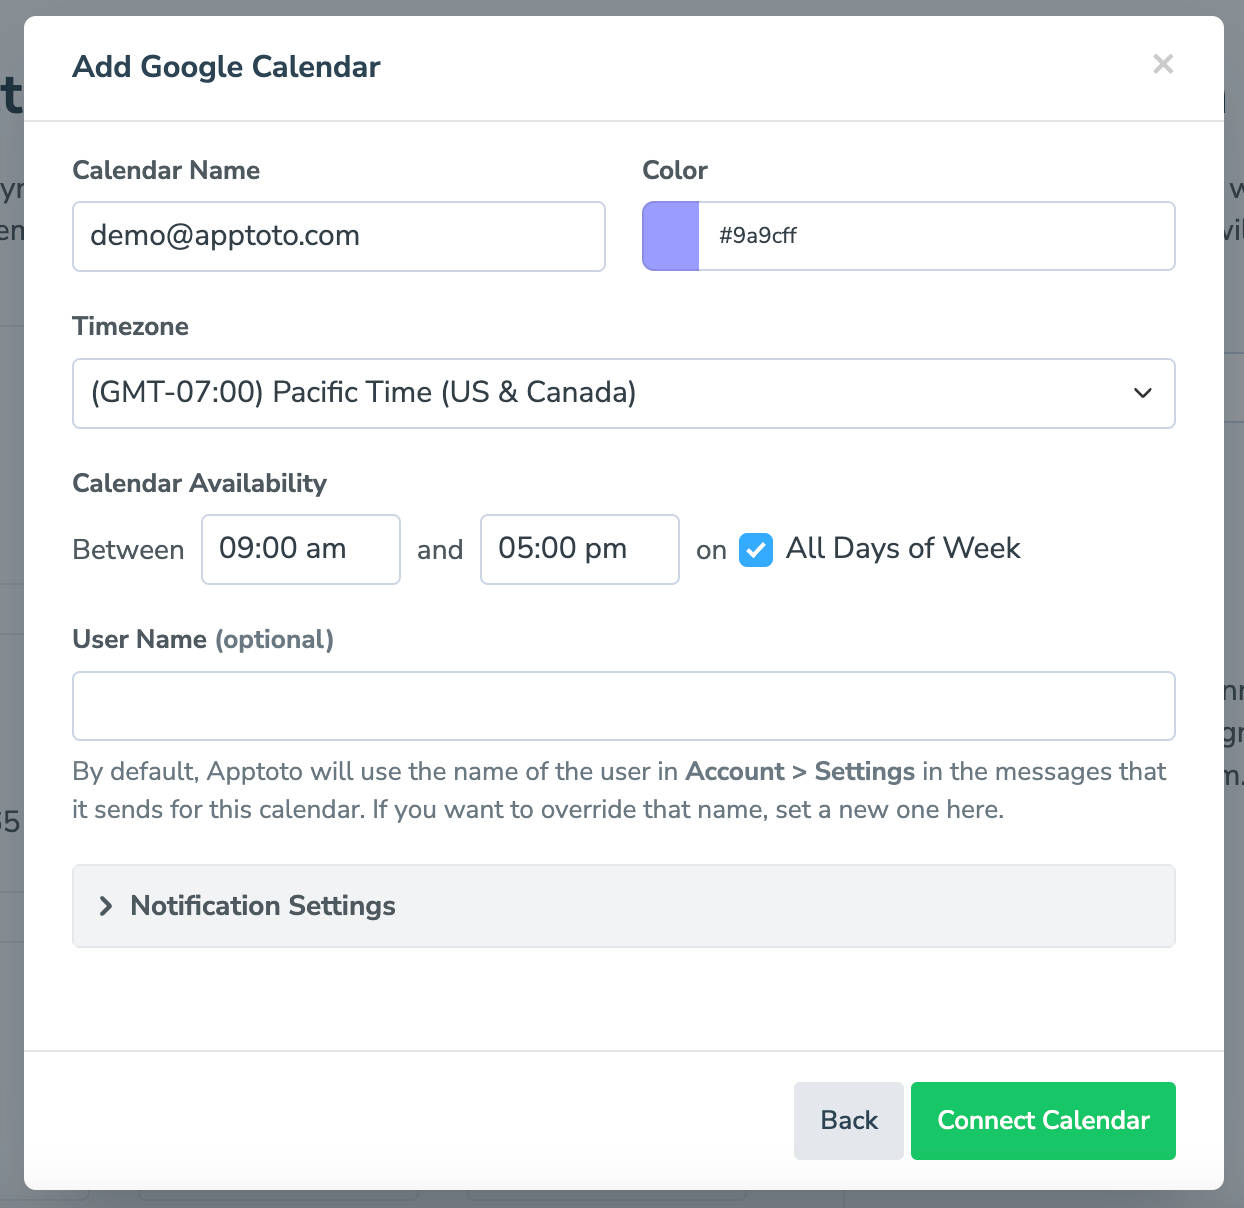
- Enter additional details for your calendar, such as Calendar Name, timezone, availability, user name, and notification settings, and then click “Connect Calendar.”
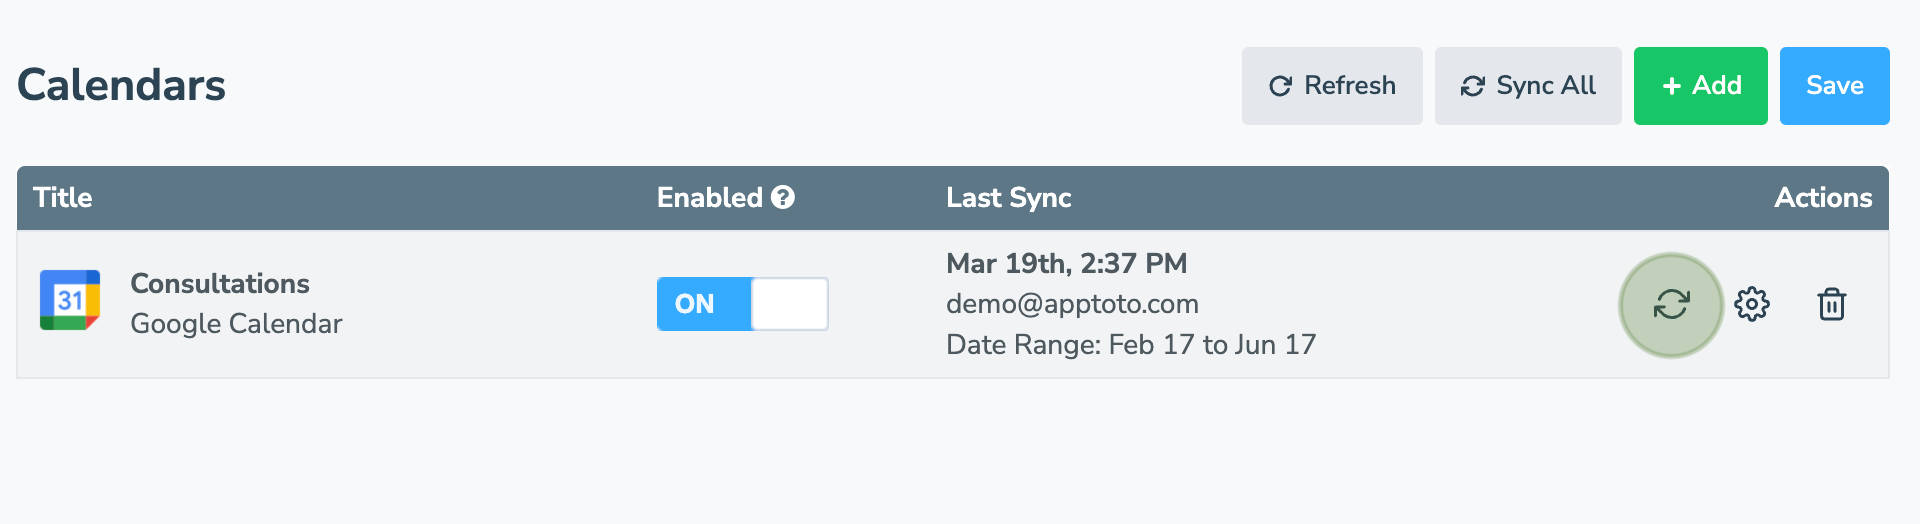
- Your calendar is now listed on the Settings > Calendars tab. Syncing will happen hourly automatically (and in real-time for Google Calendars). If you want to force Apptoto to sync your calendar to get the latest updates, you can click the Sync button here:
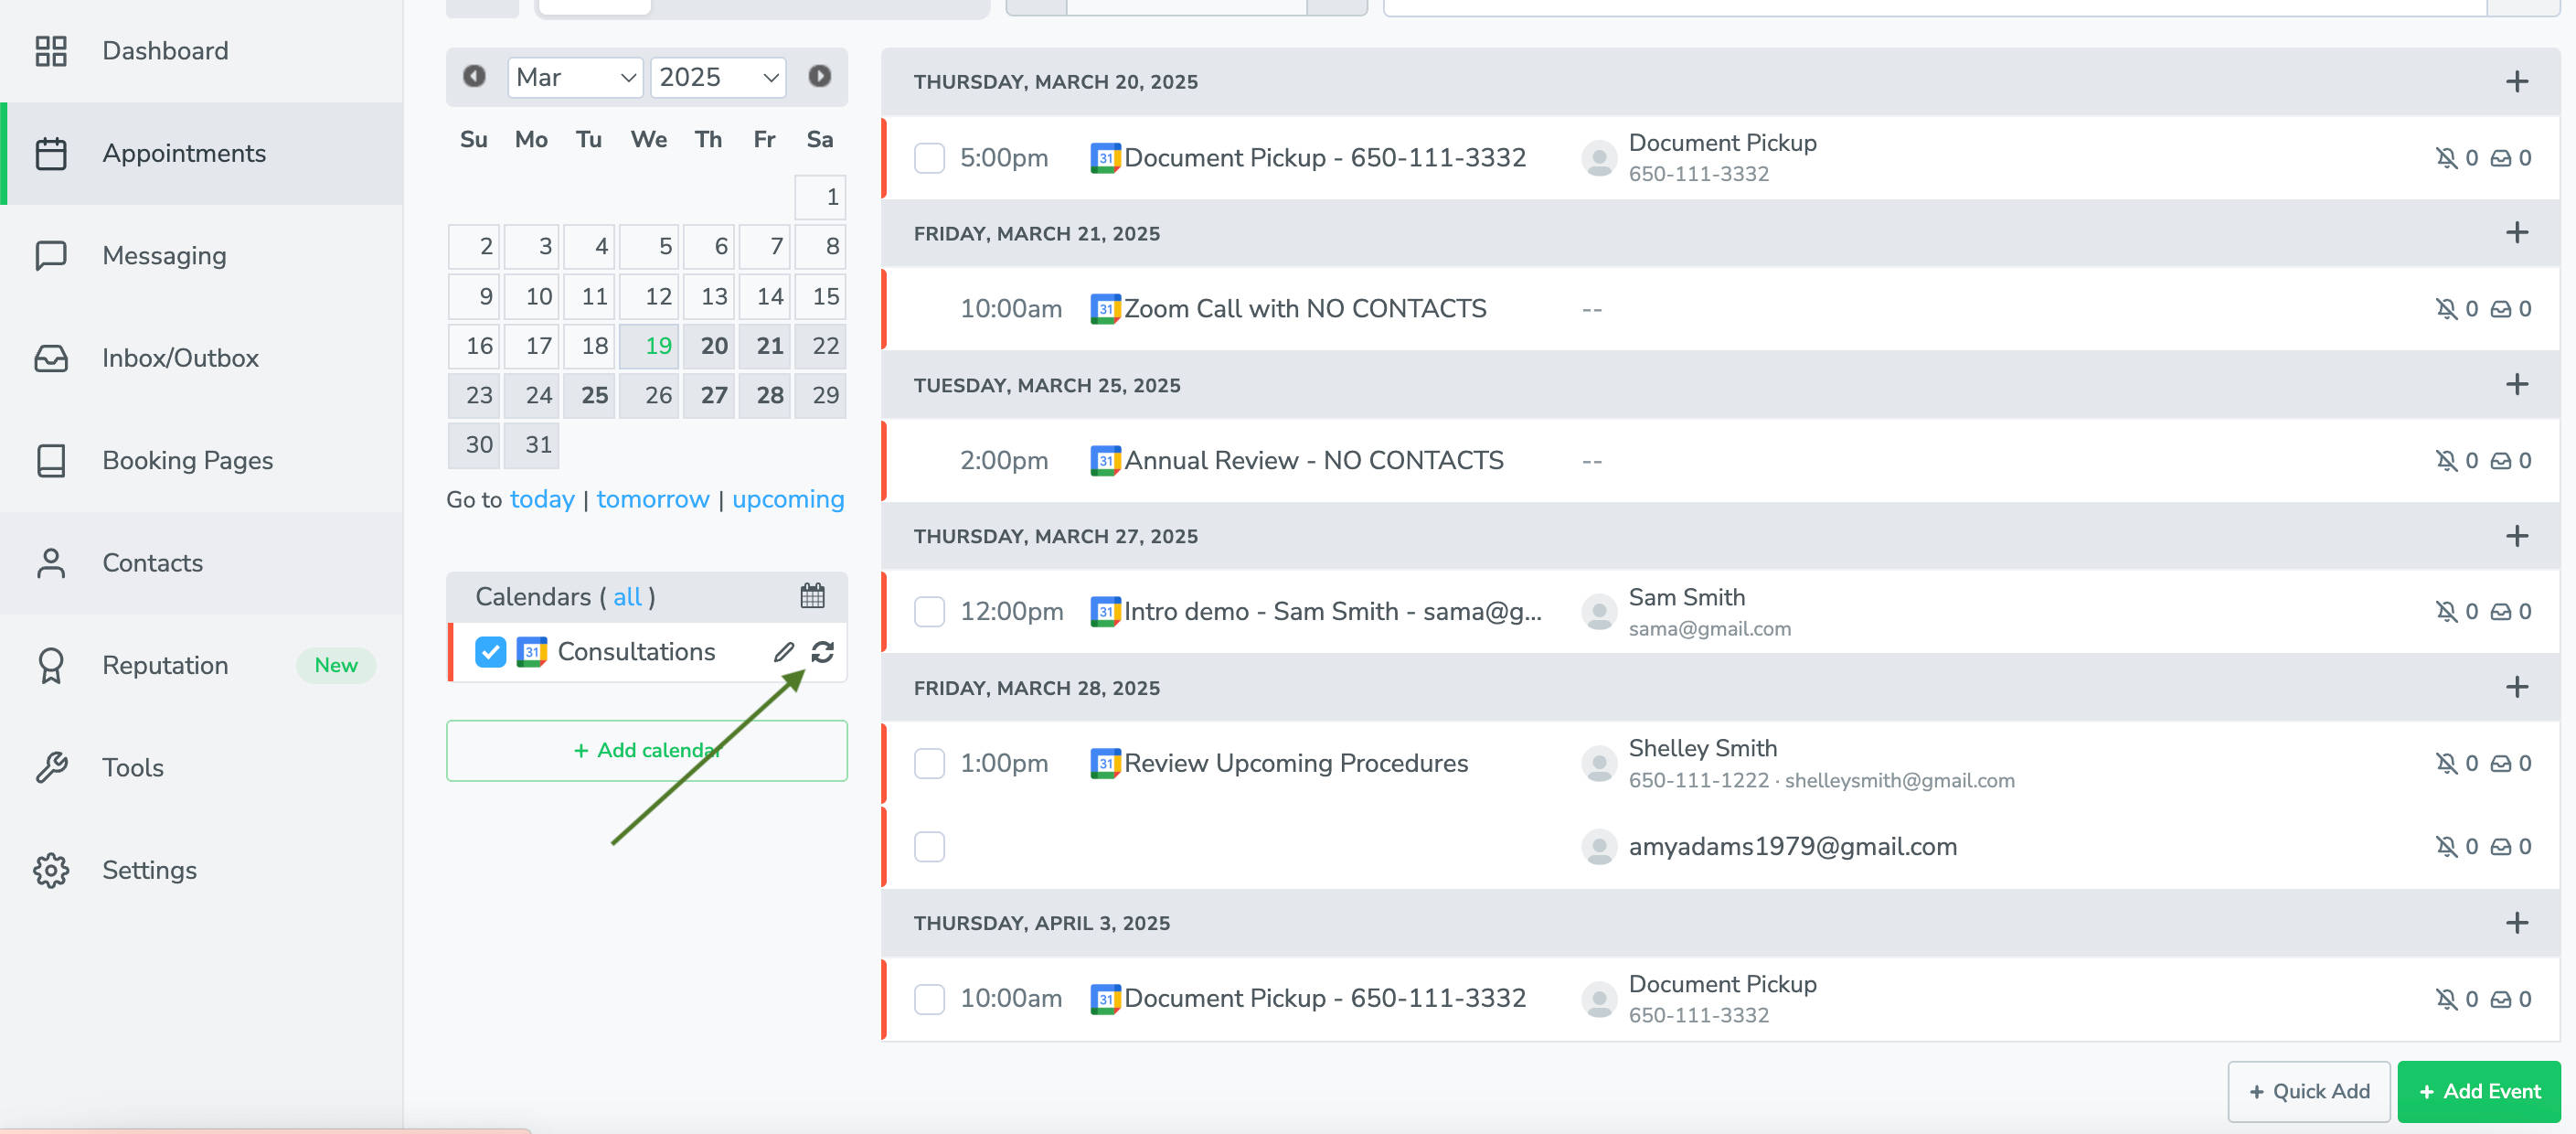
- To review the appointments that Apptoto has synced, click on the top-level “Appointments” tab.

- You can also tell Apptoto to sync the calendar from the Appointments tab here:
Google Calendar Troubleshooting
It’s possible that Apptoto may not find any appointments initially. That might be because Apptoto hasn’t synced enough of your calendar yet. Reload the page or click the “Sync” button to ask Apptoto to sync immediately. Apptoto will automatically sync with your calendar once an hour.
It’s also possible that you schedule your appointments on a different calendar than the default Google calendar for your account. If that is the case, click the “Add Calendar” button and then “Google” to add a calendar.
Now that you’ve connected your calendars, the next step is to set up your default messages. For a walkthrough of that, see message setup.