Microsoft Outlook
Before installing this sync agent
Section titled “Before installing this sync agent”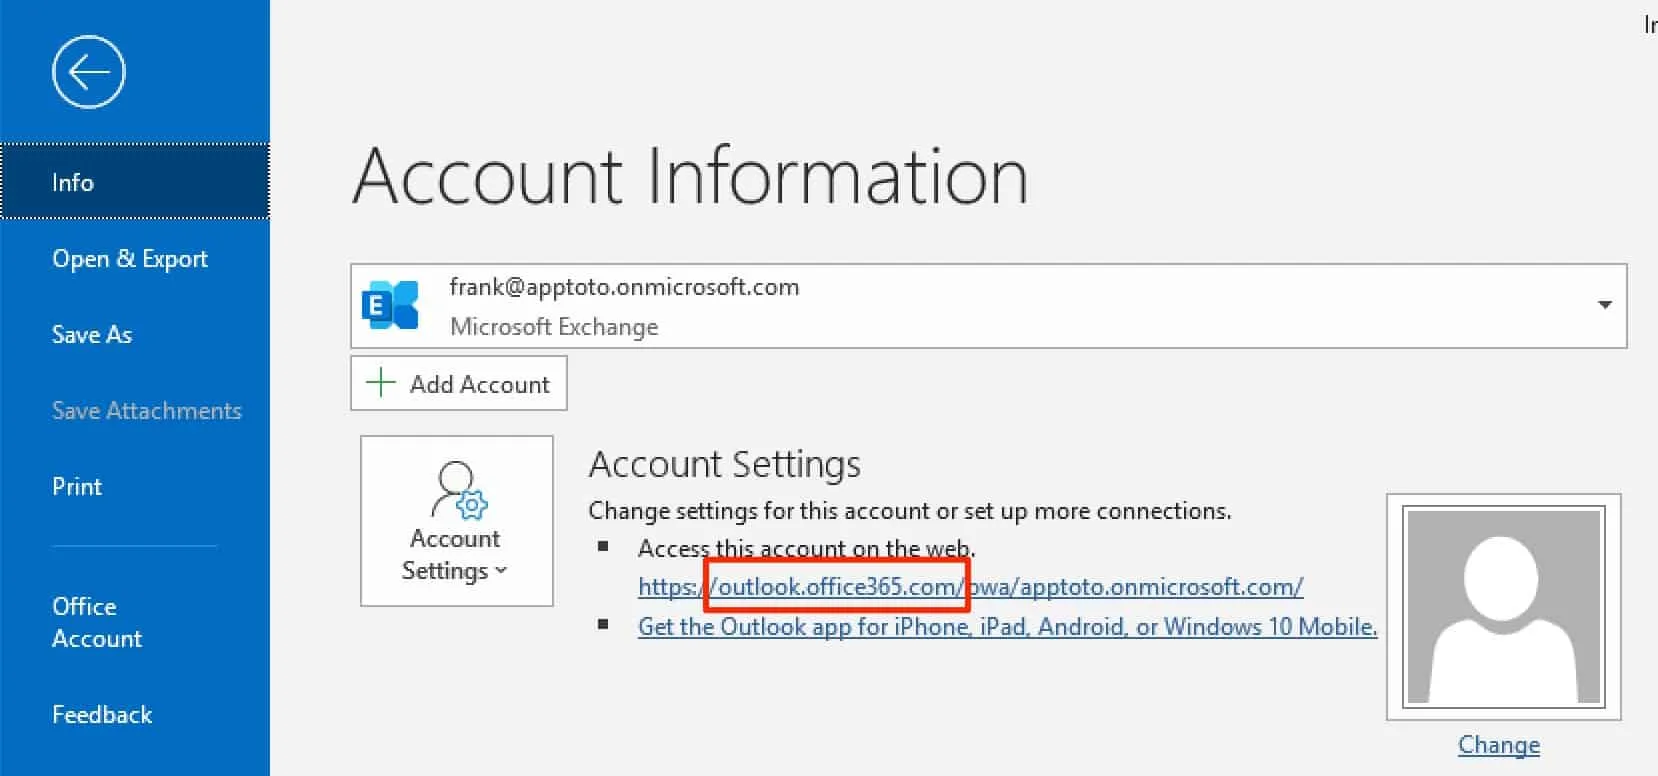
If you’re not on an Office 365 account, follow the directions below.
Installing the Apptoto/Outlook connector
Section titled “Installing the Apptoto/Outlook connector”-
Download the installer. Click here: Setup.exe.
Works with Outlook 2007, 2010, and 2013. Use your password (or the API key on the Account tab as your password).
Save the
setup.exefile to your hard drive. -
Install the connector. Double-click the
setup.exefile and complete the installation wizard.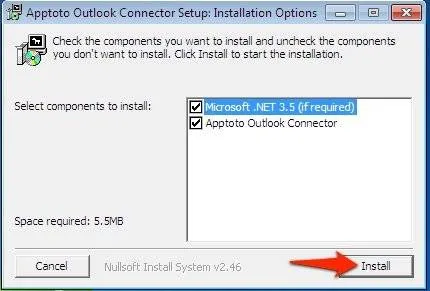
-
Click Login in the Apptoto menu. Open Outlook after installation completes. You should see an Apptoto menu. Click Login and sign in using your Apptoto username and password (or API Key from the Account tab on apptoto.com if you signed in using Google).

-
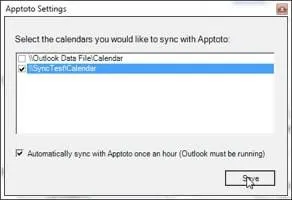
Choose the calendar to sync in the settings dialog.
-
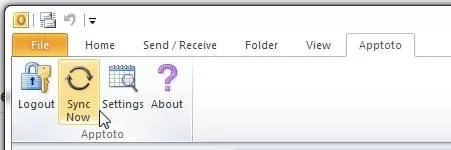
Click Sync. In Outlook, click the Sync Now button to sync your calendar with Apptoto.
-
Verify in the Appointments tab. Go to apptoto.com, click My Account in the top right, then click the Appointments tab. Confirm that your calendars appear in Apptoto.
After connecting
Section titled “After connecting”Once your calendar is connected, Apptoto syncs automatically once per hour. You do not need to keep the Outlook Connector window open. It runs in the background as long as your Windows session is active.
Now that your calendars are connected, the next step is to configure your default messages. See Message Setup for a walkthrough.