SQL Database
Apptoto offers a Sync Agent that runs on Windows desktops to synchronize calendar and address book information between Apptoto and your SQL database.
Requirements
Section titled “Requirements”- An on-premises database (cloud-hosted databases may require a VPN or hosting the Sync Agent within the cloud provider’s infrastructure)
- A Windows computer running continuously with network access to your SQL database at least 90% of the time (automatic hourly syncing requires the machine to be powered on)
- The connection string for your database
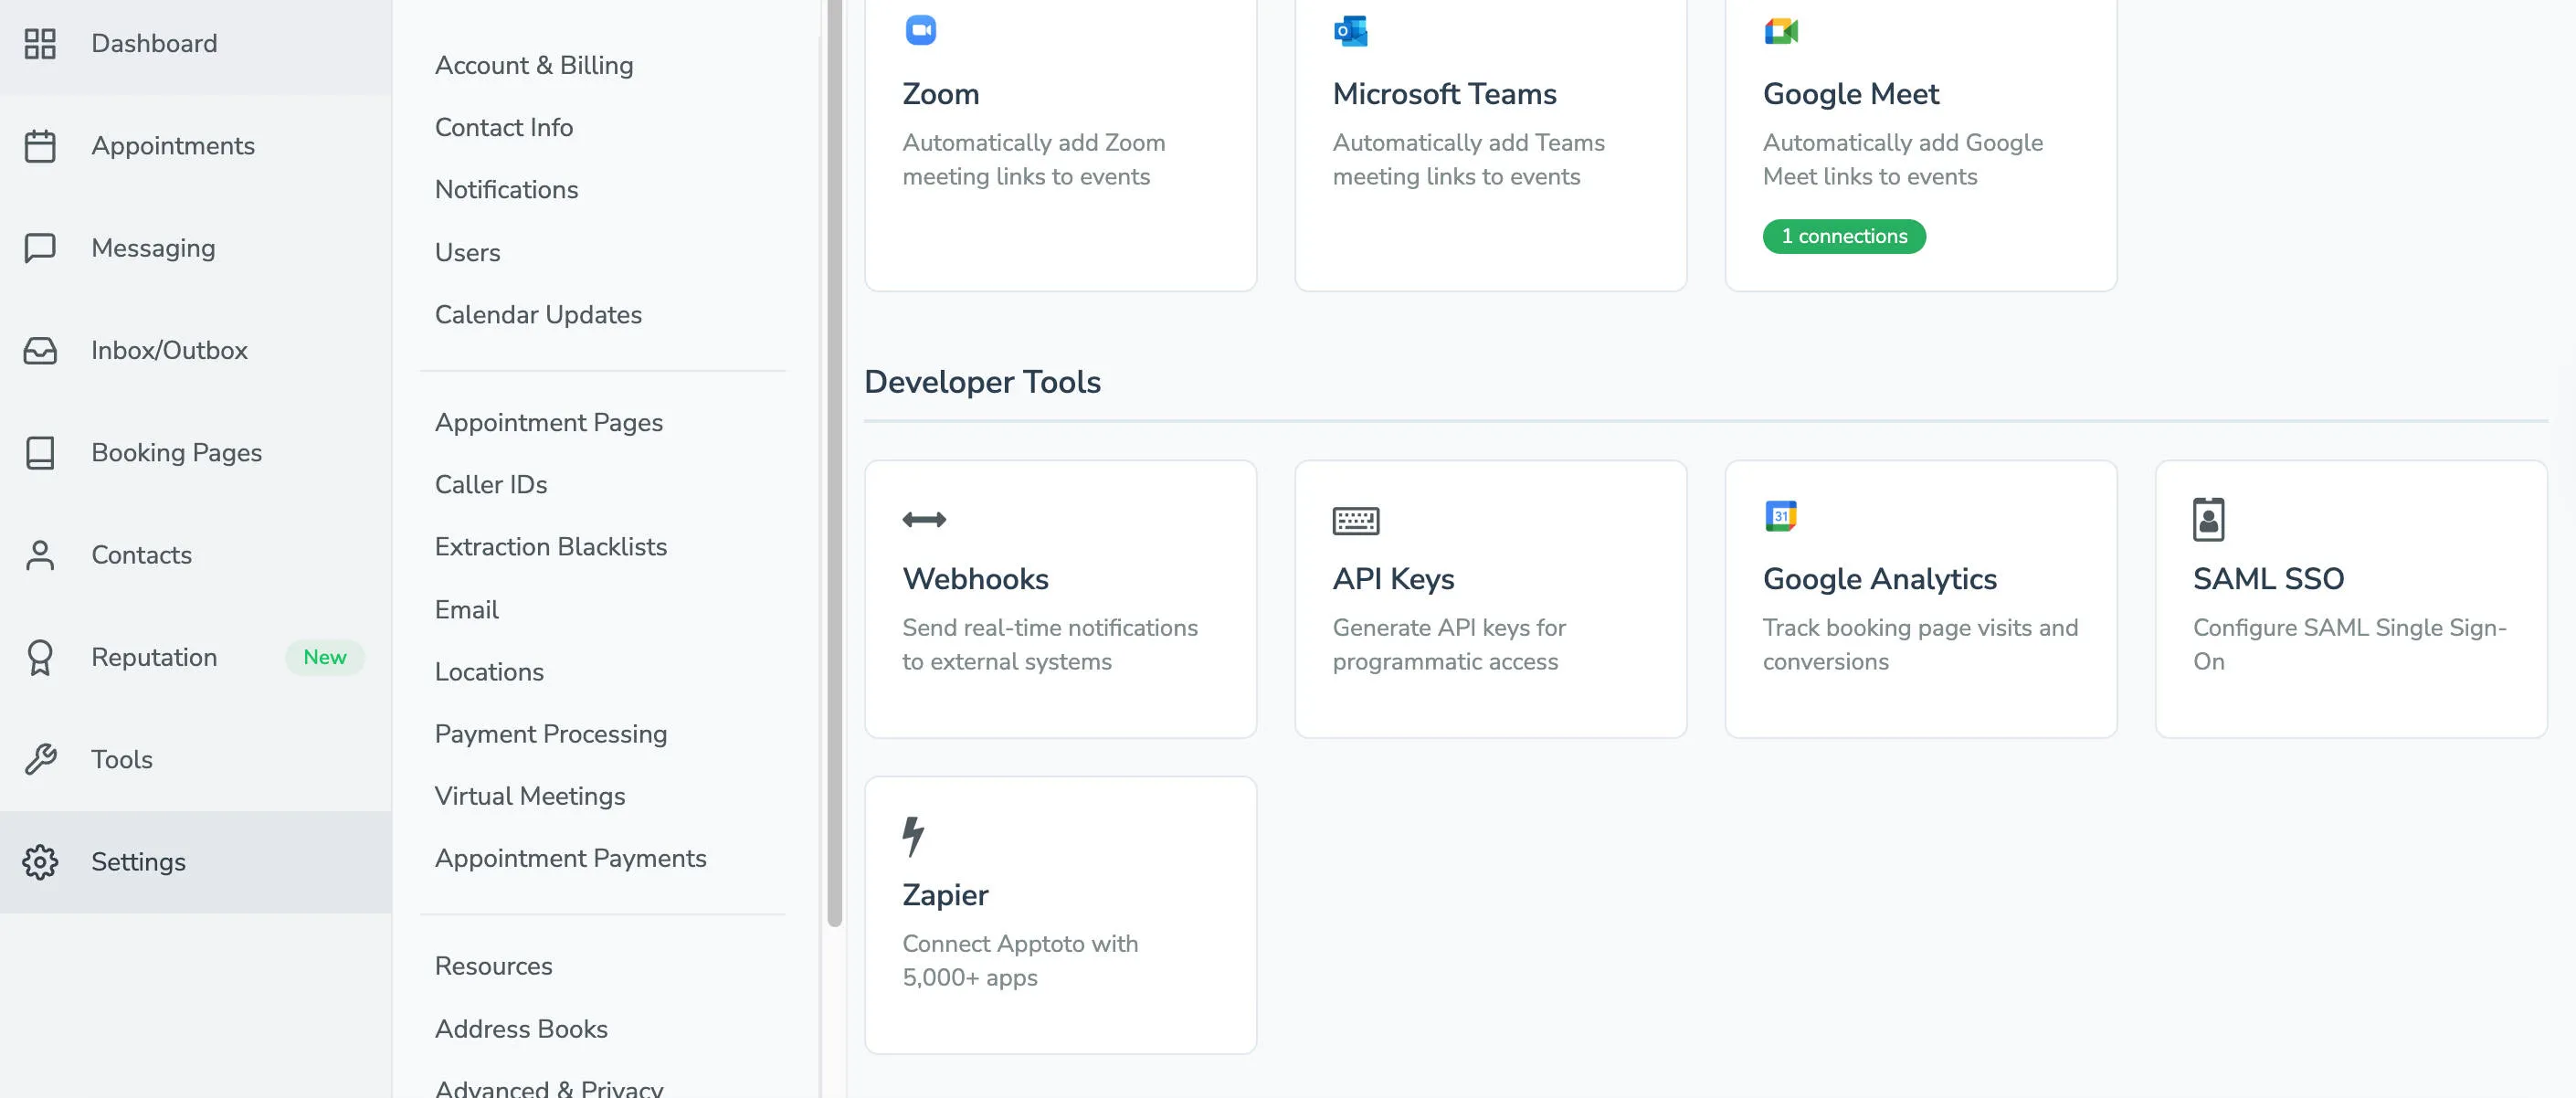
- Your Apptoto username, password, and API key (found at Settings > Integrations > Developer Tools > API Keys
Installation
Section titled “Installation”-
Download and run the installer. Contact support@apptoto.com for instructions on obtaining the
setup.exefile. Run the installer and allow it to complete. -
Launch the Sync Agent. From the Windows Start menu, open Apptoto > Apptoto Sync Agent. If the shortcut doesn’t appear, run
C:\Program Files (x86)\Apptoto\ApptotoAgent\ApptotoTray.exedirectly. -
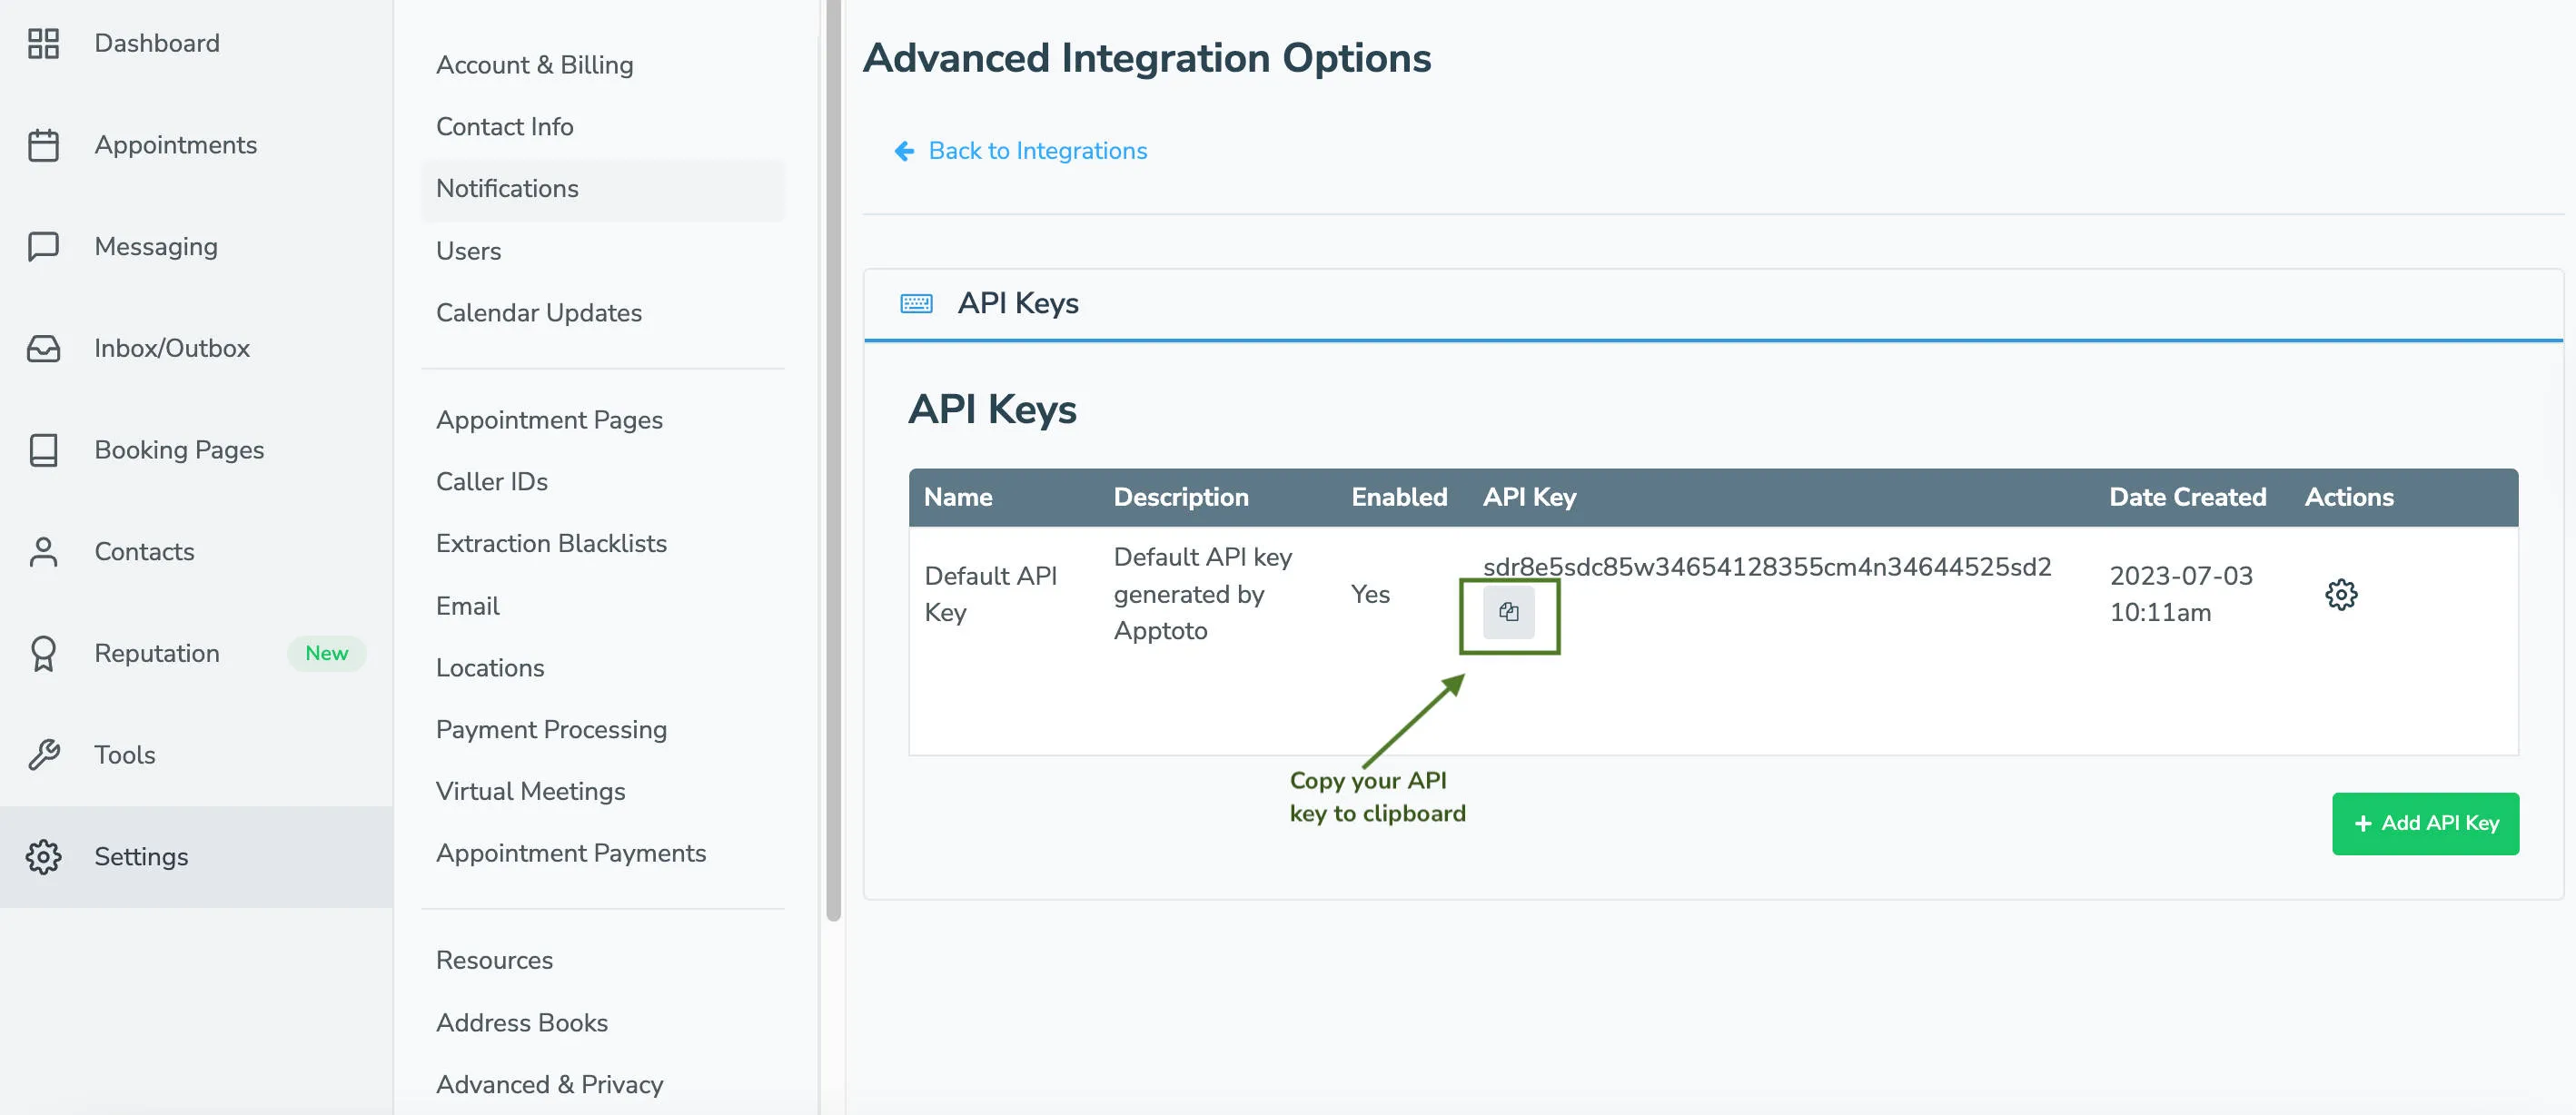
Log into Apptoto. Use your API Key instead of your password for better stability. Find your API Key at Settings > Integrations tab > Developer Tools section > API Keys.

-
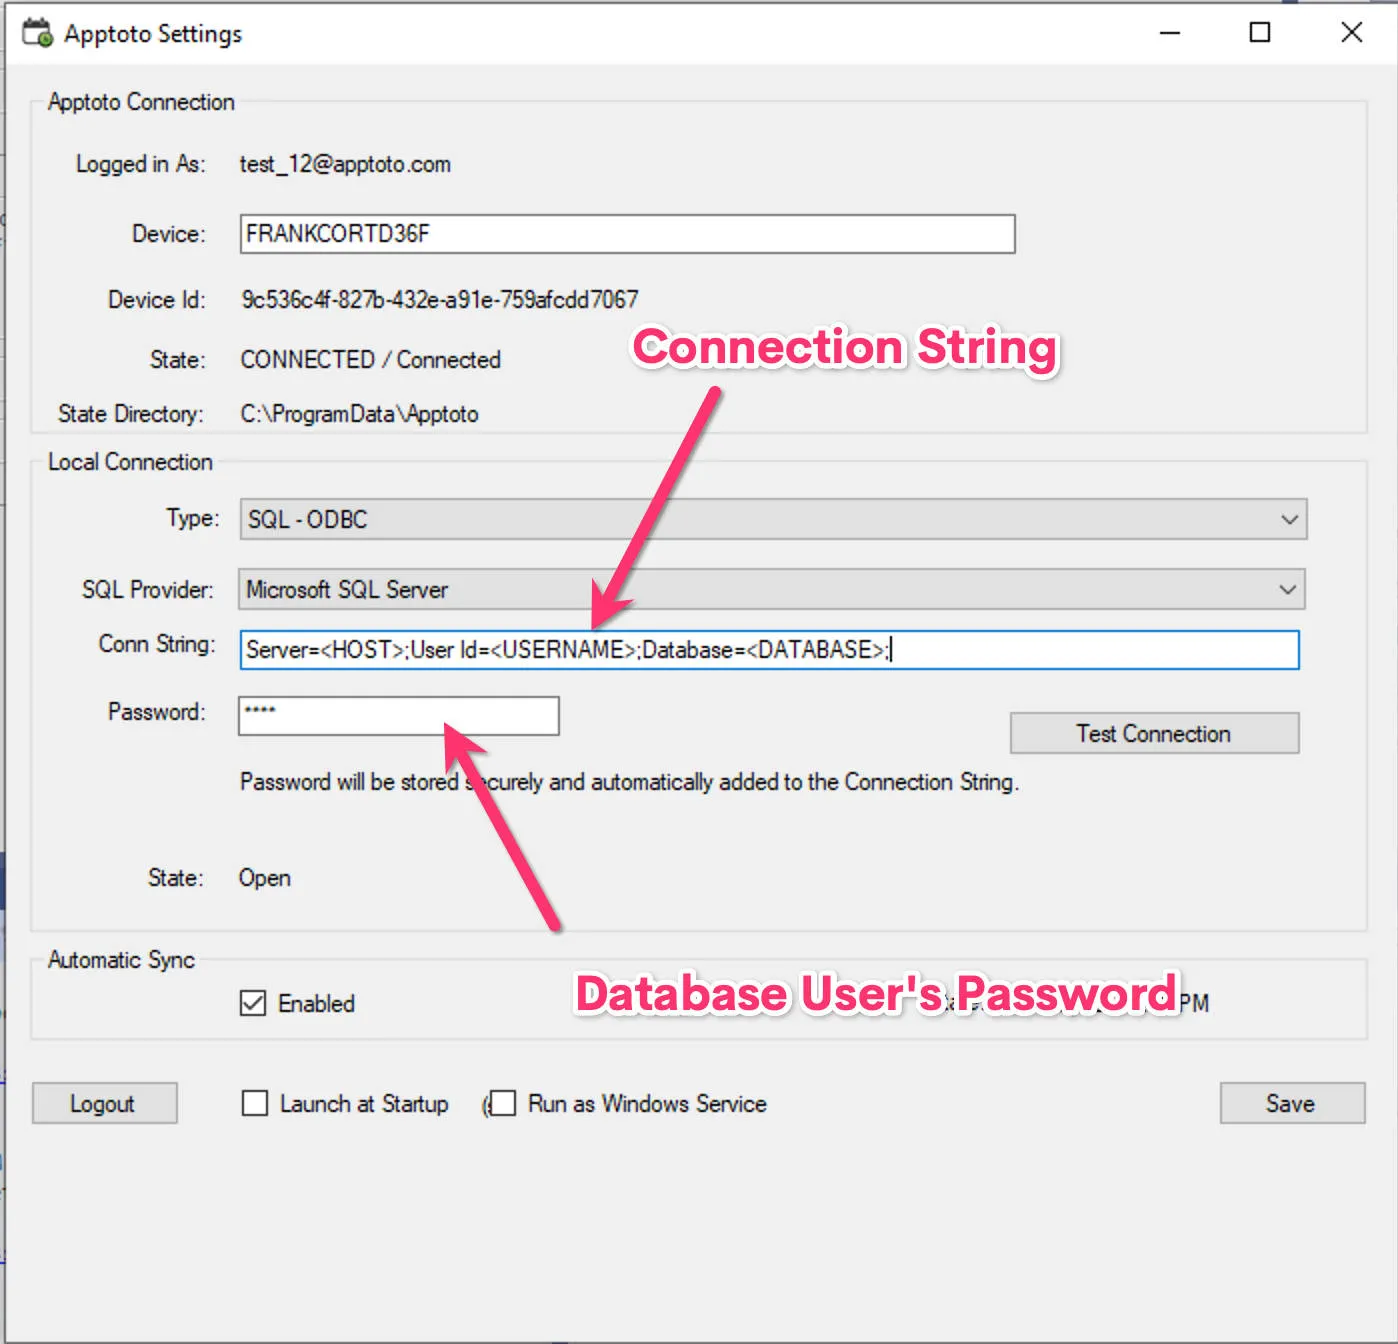
Configure SQL database connection. Select SQL – ODBC as the connection type and enter the appropriate connection string.
For Microsoft SQL Server:
Server=<HOST>;User Id=<DBUSERNAME>;Database=<DATABASE>;Enter the database password in the Password field.
For ODBC connections: Keep SQL Provider as ODBC and use:
DSN=<ODBCDSNNAME>;Uid=<DBUSERNAME>;Enter the database password in the Password field. If no username is required:
DSN=<ODBCSOURCENAME>;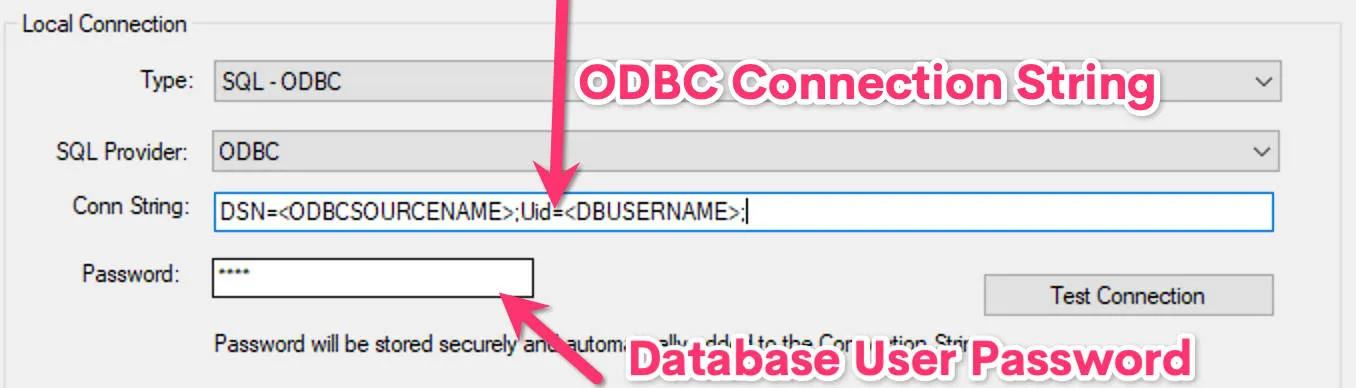
-
Test connection and save. Click Test Connection. If successful, click Save. Consider checking Launch at Startup to ensure the agent runs after restarts.
-
Configure calendar. Contact support@apptoto.com to request assistance. An Apptoto support representative will configure calendars based on your SQL schema.
Running as a Windows Service
Section titled “Running as a Windows Service”If the “Run as Windows Service” checkbox is not greyed out, click the checkbox and click “Save.” You can skip the steps below.
If the checkbox remains grey, to run the sync agent as a Windows Service (allowing operation without logged-in users), follow the steps below:
- Close the Apptoto Sync Agent in the system tray.
- Rerun it as Administrator.
- Check Run as Windows Service and click Save, then follow prompts.
If the checkbox remains greyed out:
- Close the Sync Agent.
- Open Command Prompt and navigate to
c:\Program Files (x86)\Apptoto\ApptotoAgent. - Run
ApptotoService.exe -install. - Click Yes when prompted.
- Open the Services console and set Apptoto Sync Agent Service to Automatically (Delayed Start).
- Manually start the service initially.
To update the settings, run the Apptoto Sync Agent tray application again. Save the settings, and then follow the steps above to copy the settings over to the correct profile.
Running multiple sync agents (on the same machine)
Section titled “Running multiple sync agents (on the same machine)”To run multiple agents on one machine for different calendars or databases:
- Create a shortcut to
c:\program files (x86)\Apptoto\ApptotoAgent\ApptotoTray.exe. - Set command line arguments to
--profile <PROFILENAME>(use only alphanumeric characters). Replace<PROFILENAME>with the 2nd Apptoto’s username, or the 2nd database name. Only use alpha-numeric characters. - Launch using that shortcut and sign in again.
- Running as a Windows Service (recommended) will create a new service with the profile name.
You can create as many shortcuts with different profile names as you like.
Read query
Section titled “Read query”Once configured, Apptoto support sets up calendars using SQL queries. Queries run hourly, syncing appointments (using the designated Start Time field) 7 days in the past and 30 days into the future in weekly chunks. That time range and chunk size can be adjusted.
Standard fields include:
- Unique identifier for the appointment (
external_id) [REQUIRED] - Title of the appointment (title)
- Created date/time - datetime field (created)
- Updated date/time - datetime field (updated)
- Description/body/notes of the appointment (content)
- Start time - datetime field (start_time) [REQUIRED]
- End time - datetime field (end_time)
- Participant name (
participant_0_name) - Participant phone (
participant_0_phone) [PHONE OR EMAIL REQUIRED] - Participant email (
participant_0_email) [PHONE OR EMAIL REQUIRED]
Multiple phone/email addresses are supported; the system prioritizes mobile, then home, then work numbers.
For separate date and time fields, combine them:
CAST(Date as DATETIME) + CAST(Time AS DATETIME)Custom fields from your database can be stored as event custom fields and used in messages or conditions. E.g., if you have a field for the appointment type, we can stash it in event.custom.appt_type and use it in messages or conditions within Apptoto.
Update query (optional)
Section titled “Update query (optional)”Apptoto can write back to your database when clients respond. Support will create UPDATE statements to modify specific columns when an event occurs (such as a confirmations or cancellations), using the appointment ID in the WHERE clause.
Troubleshooting
Section titled “Troubleshooting”The Sync Agent won’t log into Apptoto
Verify that your firewall is not blocking outbound connections from the Apptoto Sync Agent process.
For more, see Exchange/SQL Sync Agent Troubleshooting.