Review Your Appointments
Learn where to find important information about your events and participants using the steps below.
Reviewing your Appointments in Apptoto
Section titled “Reviewing your Appointments in Apptoto”-
Once you’ve connected your calendars, Apptoto will attempt to determine your appointments’ contact information (i.e., name, phone, and email addresses). It will use that information to reliably send your messages to your appointment participants.
-
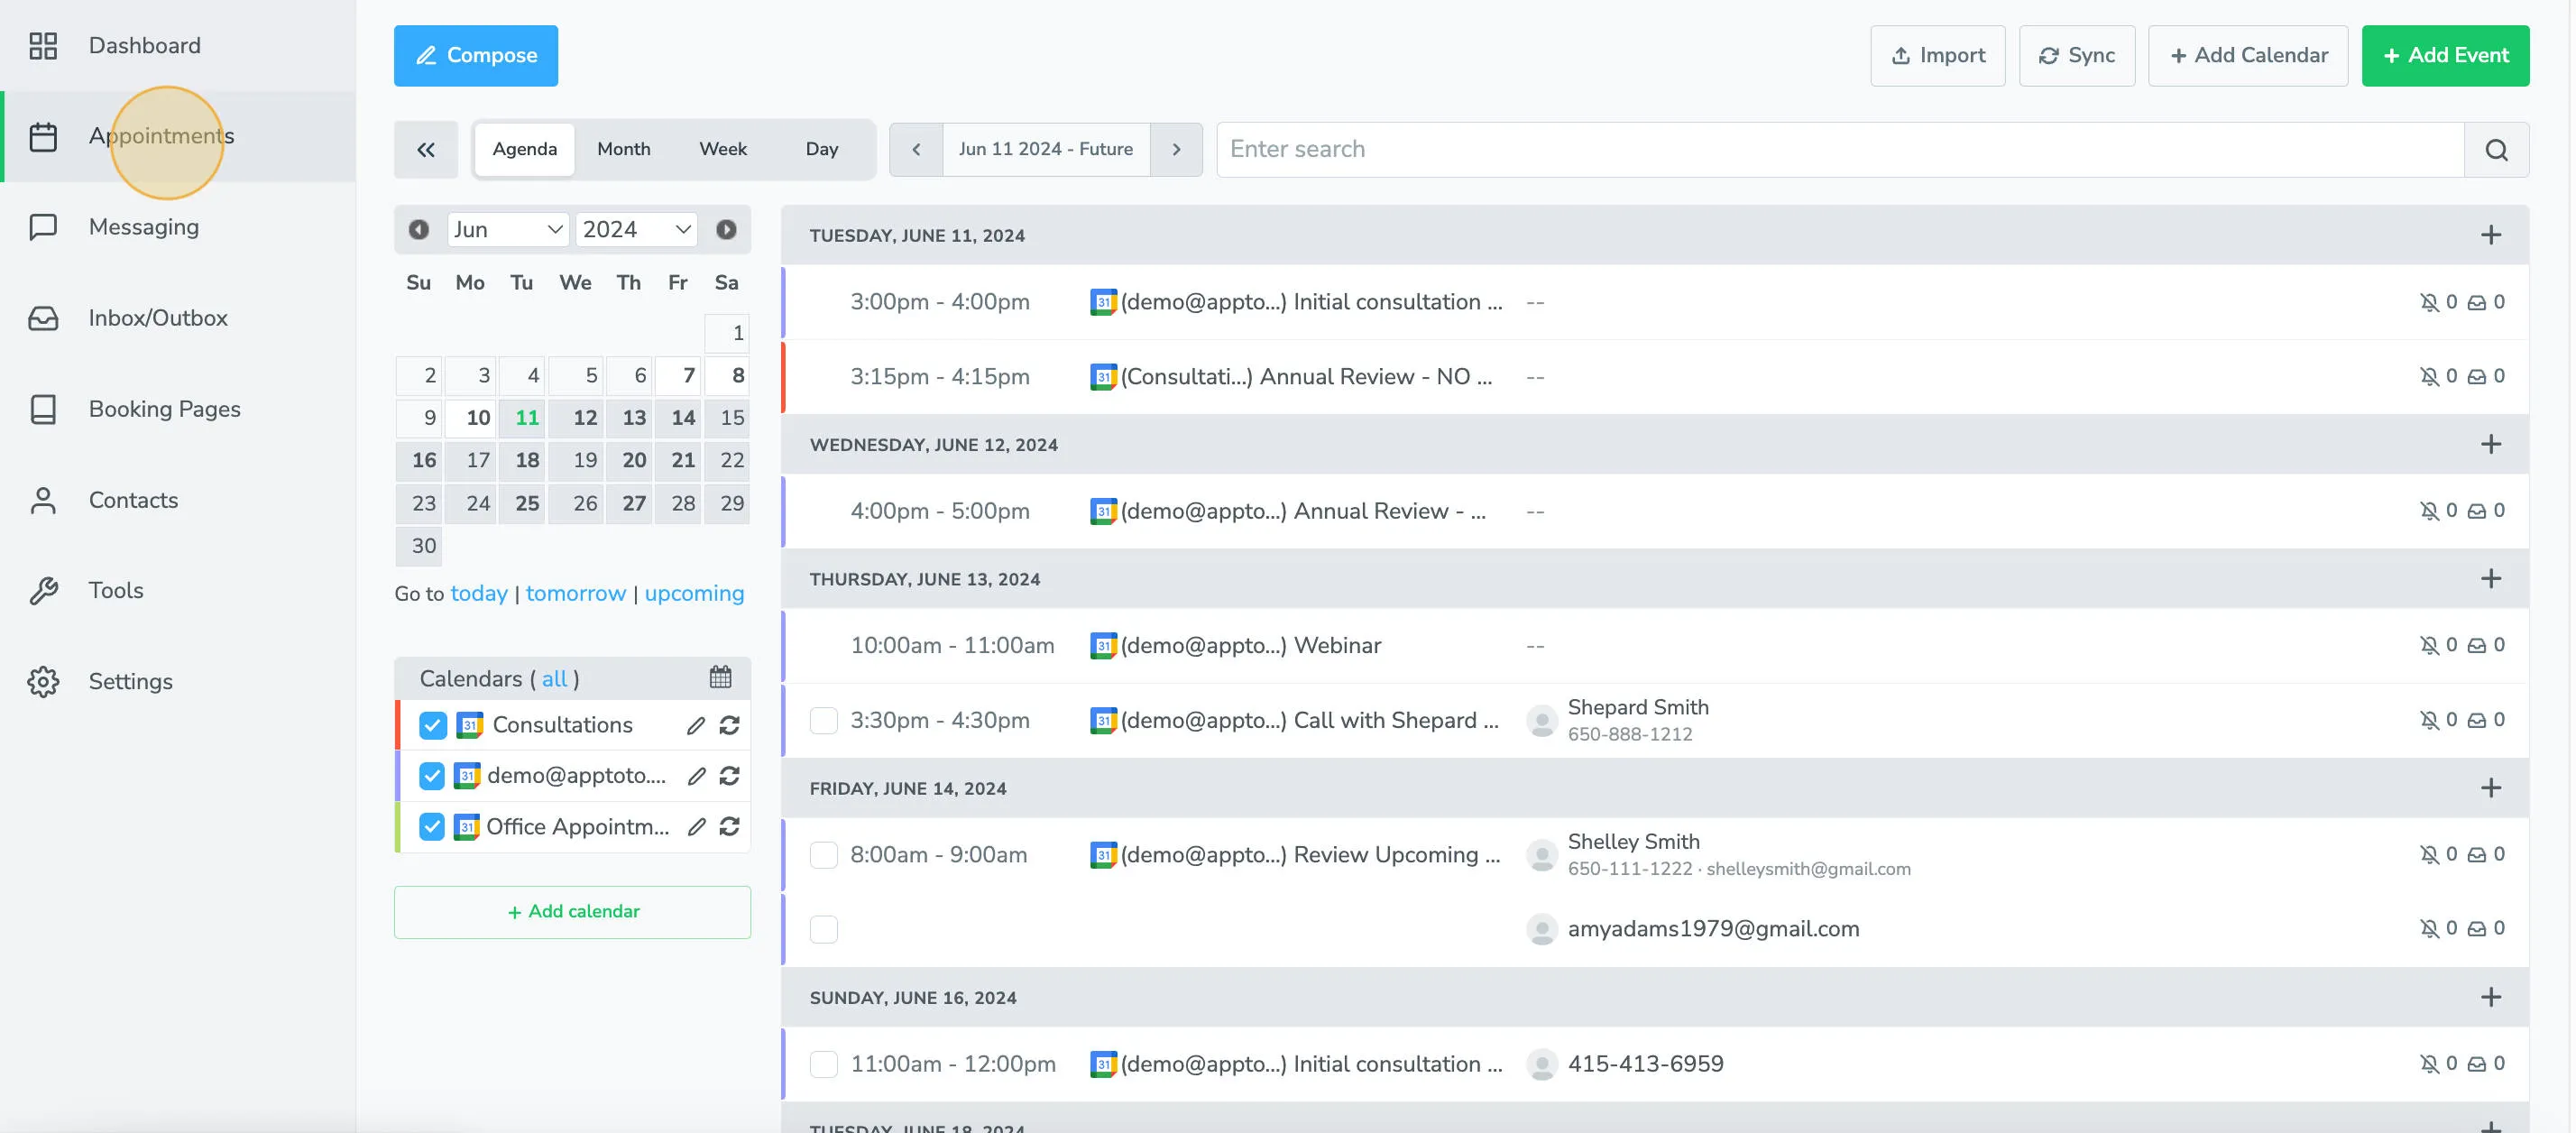
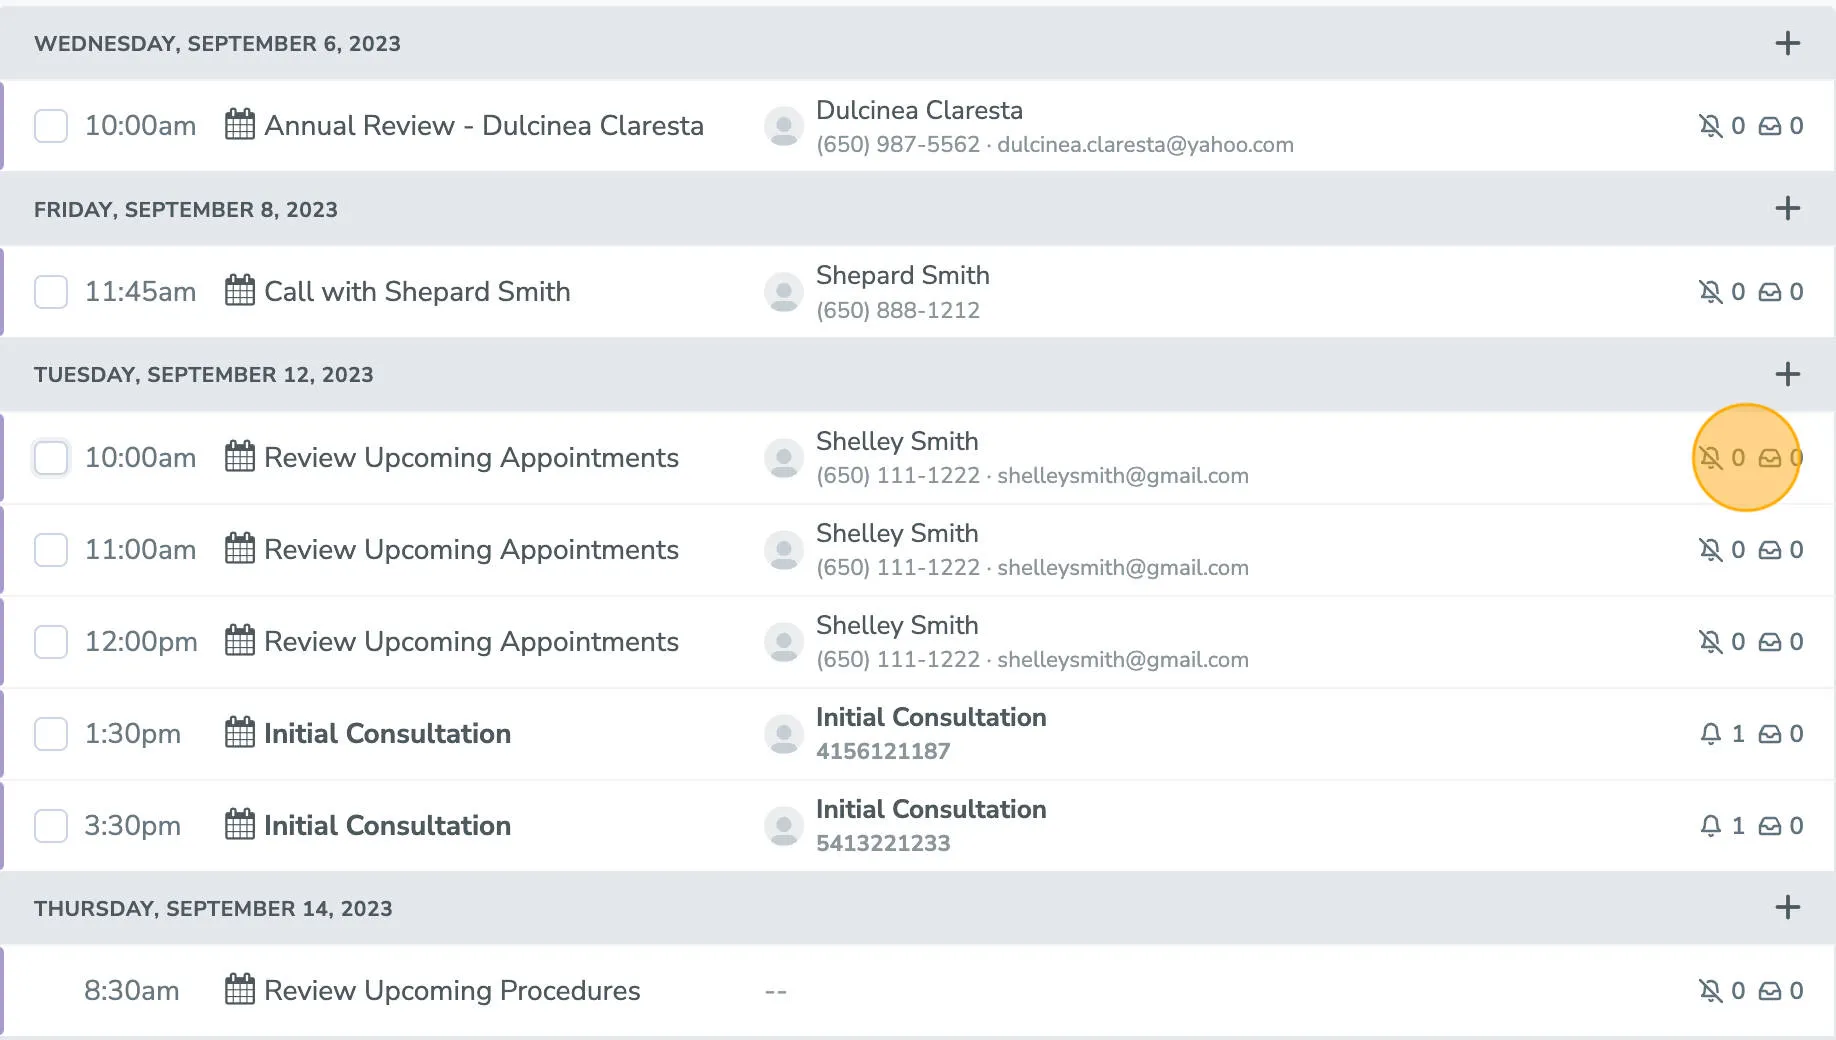
Click Appointments to see the appointments that Apptoto has synced (or that you have added manually). The main view we will cover is the Agenda view.
-
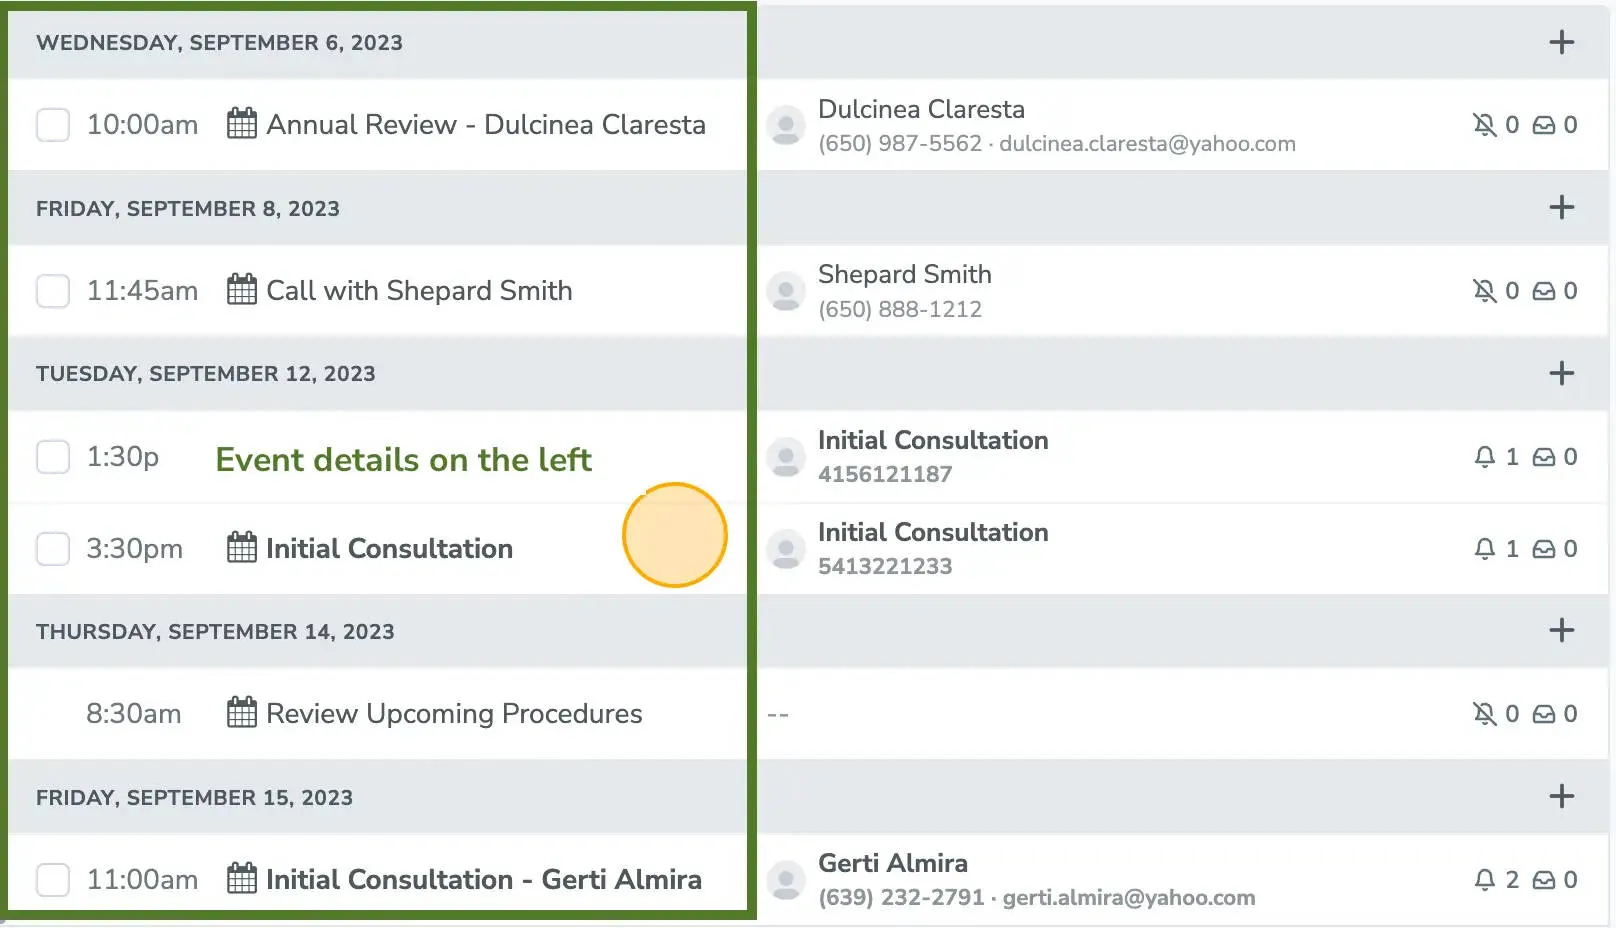
Event details appear on the left.
-
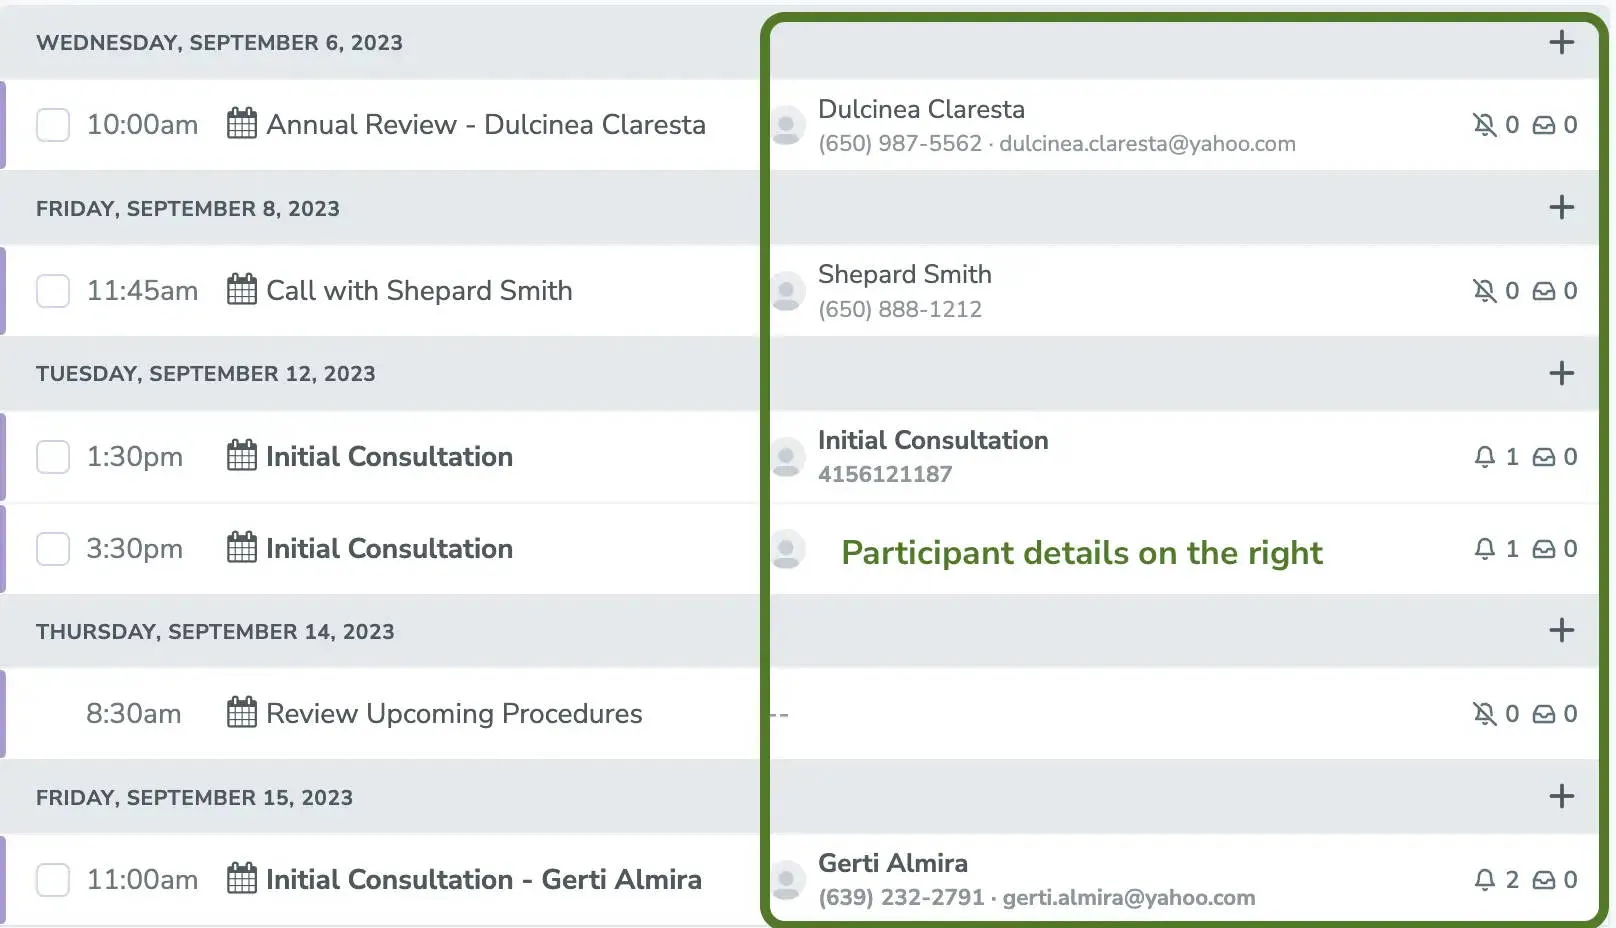
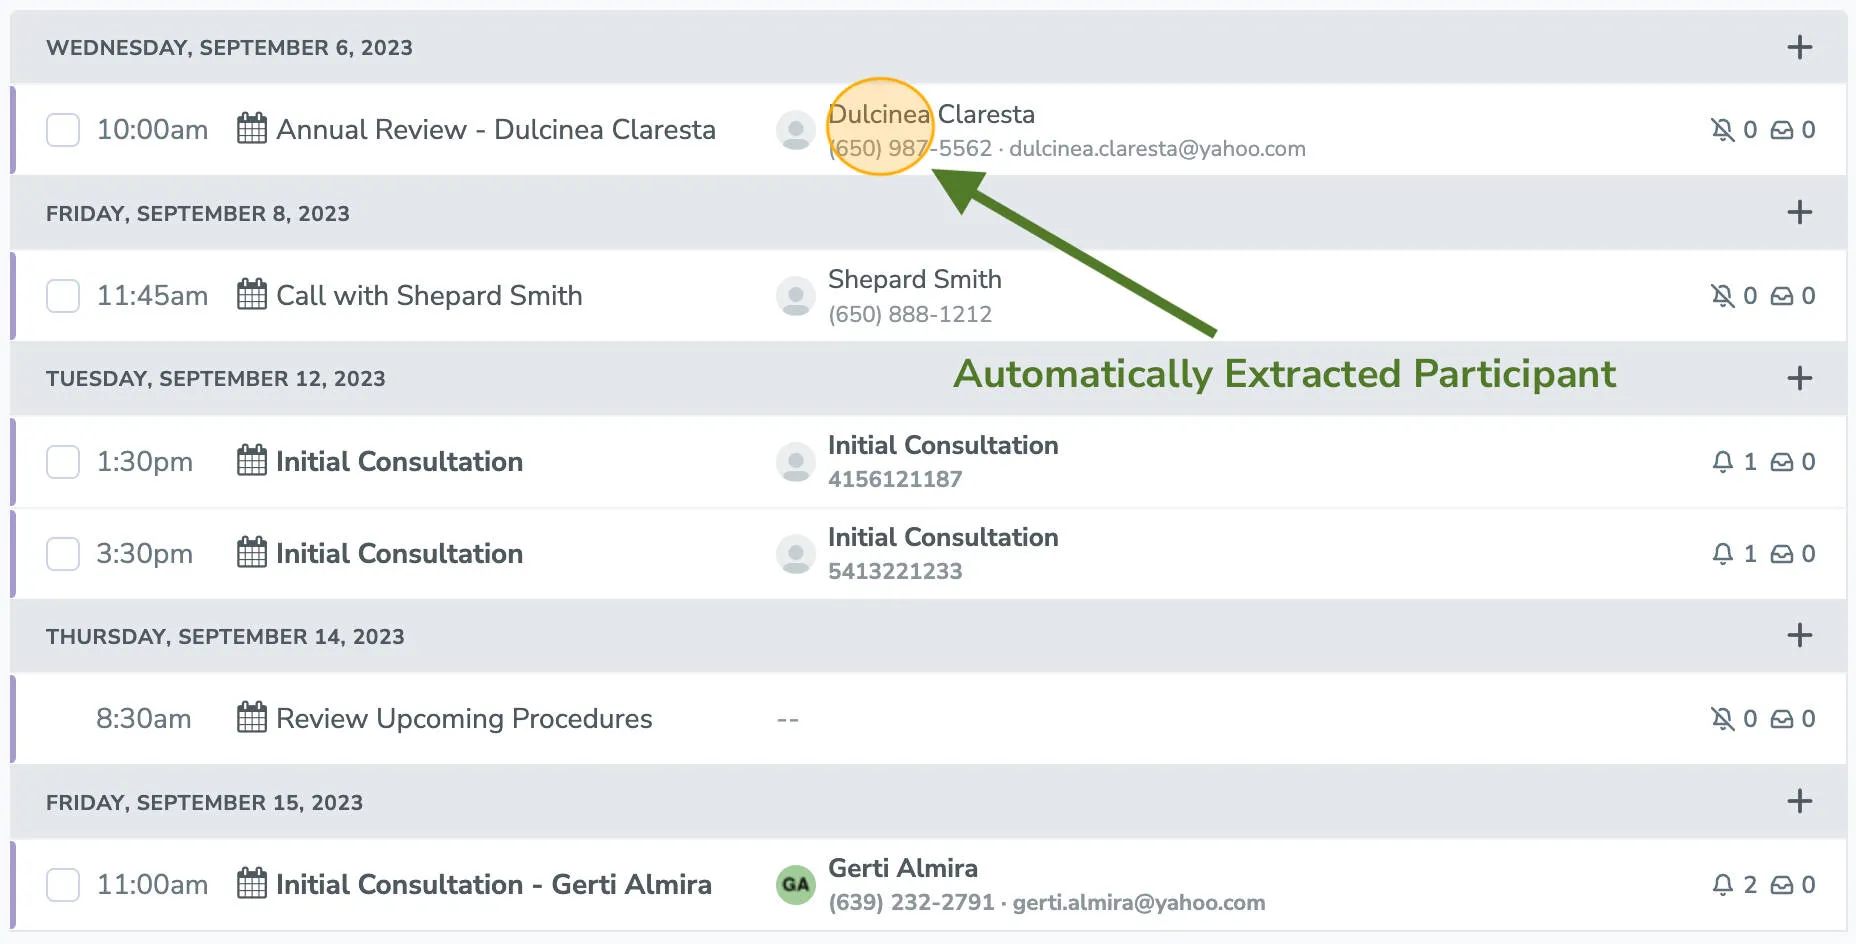
Participant information that Apptoto has found will appear on the right.
-
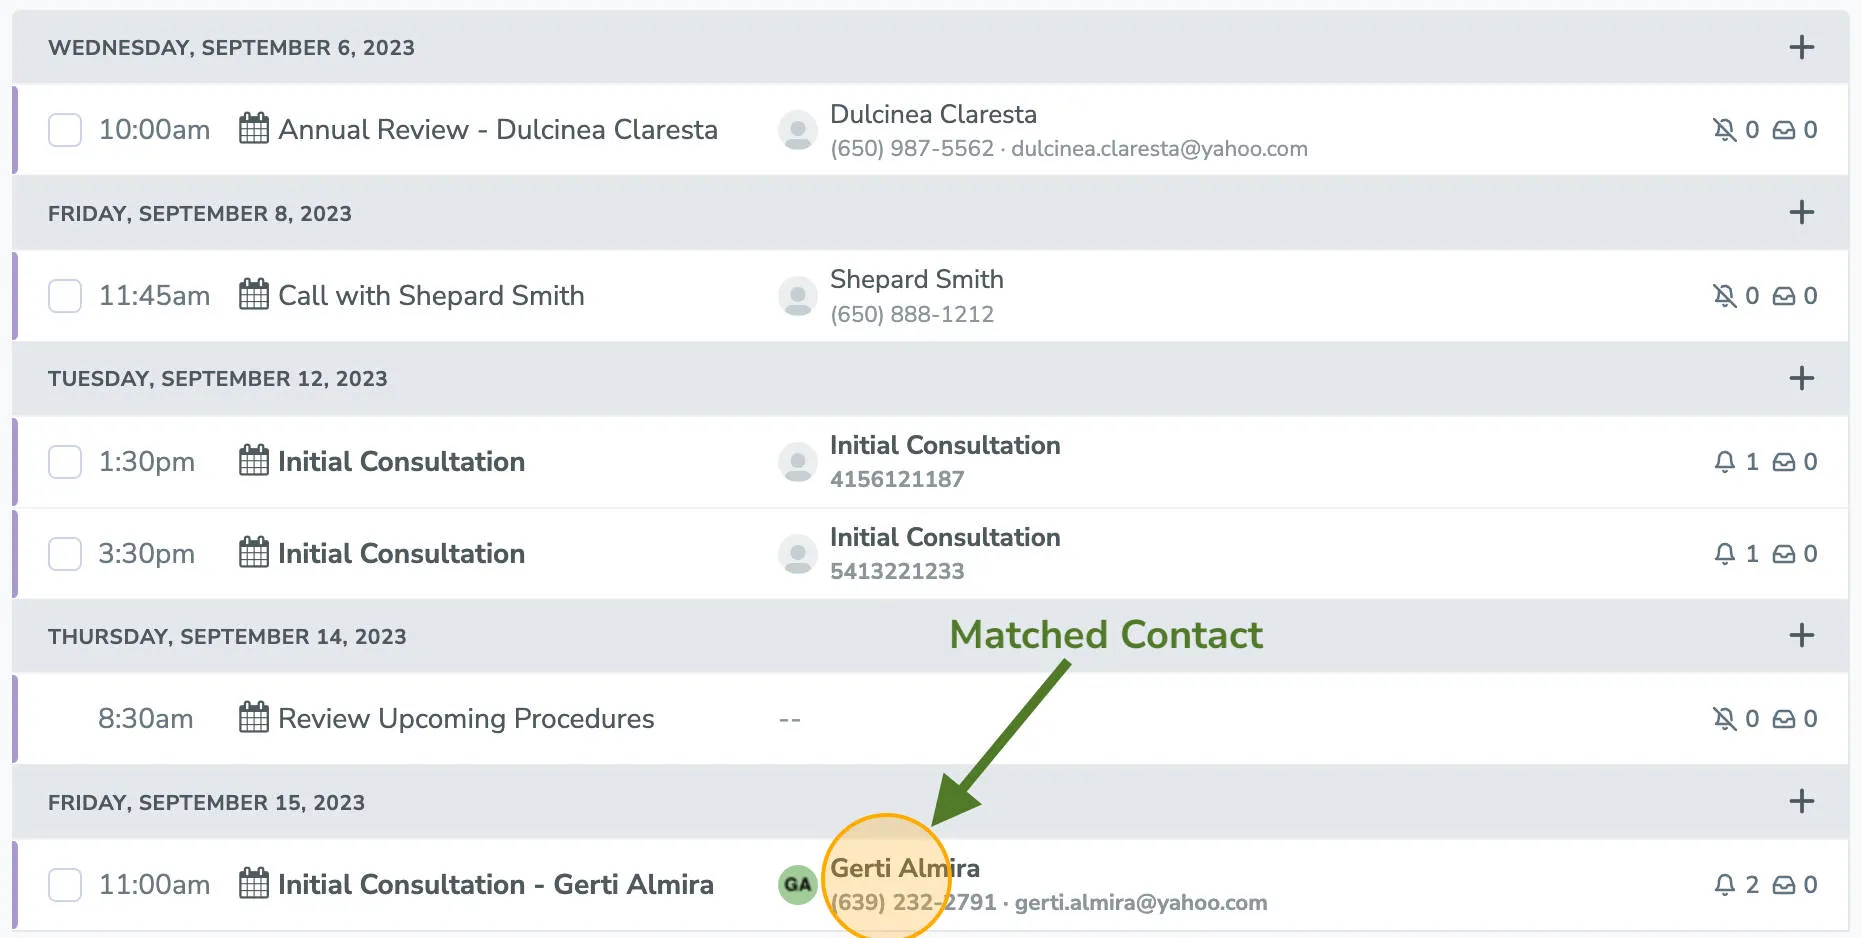
Apptoto extracts participant information automatically using two methods. It will either match appointments to existing contacts (by name, email, or phone number). Those matches will have either a display image or initials for a picture.
-
Or, Apptoto will extract names, phone numbers, and email addresses directly from the content of the events. Those participants will have a silhouette as a display image.
-
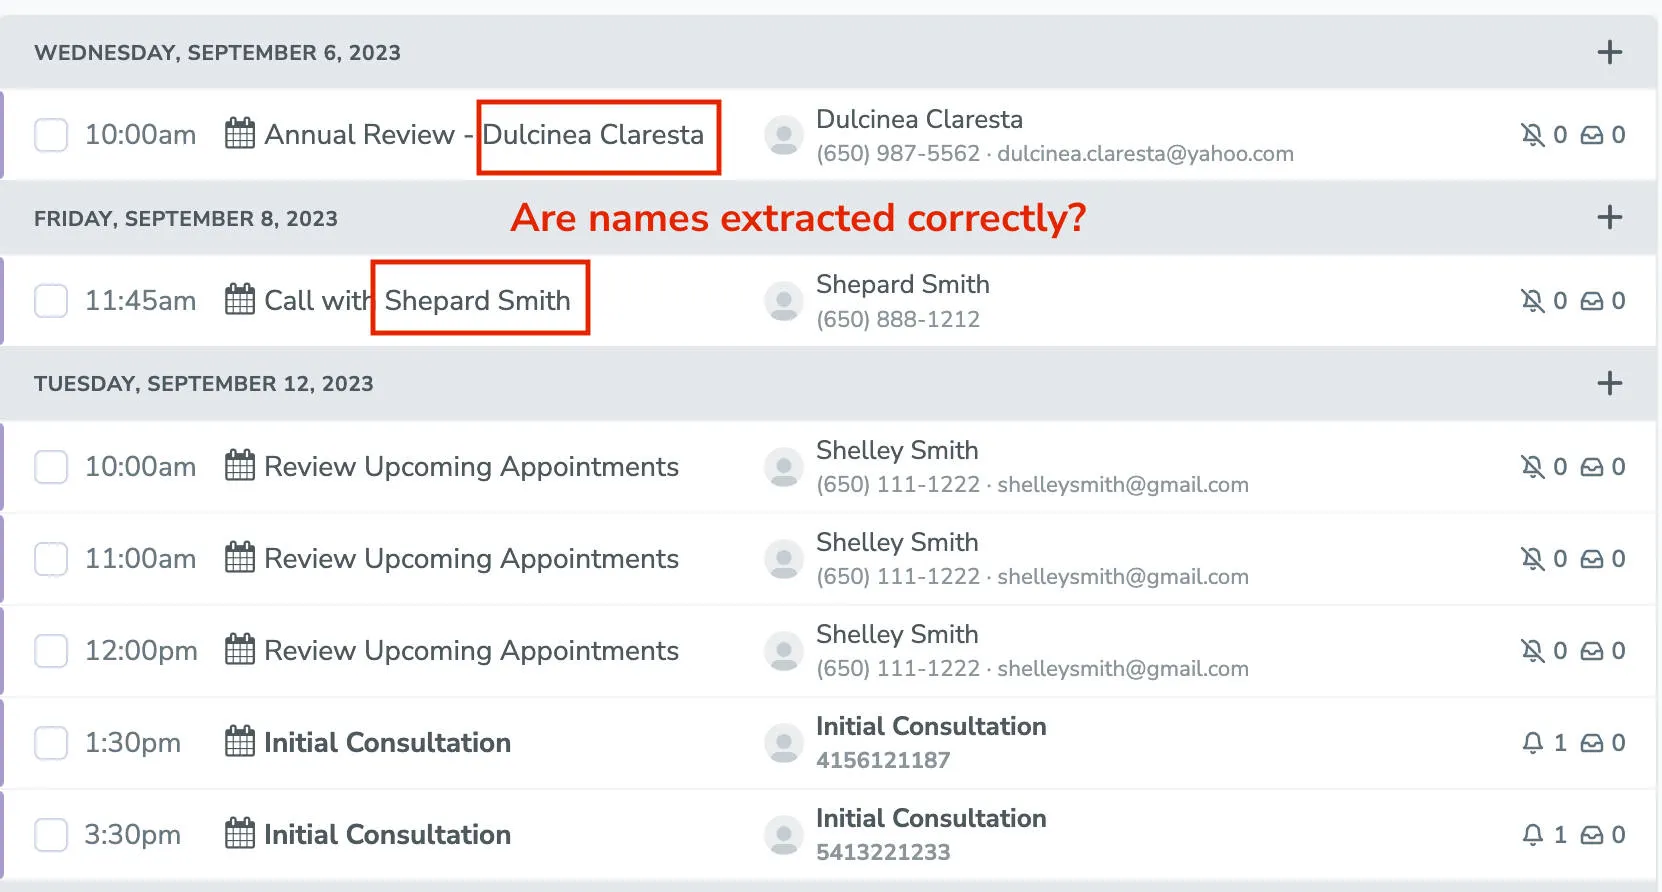
If names aren’t reliably extracted, contact support@apptoto.com, and we can tune your account to extract them properly.
-
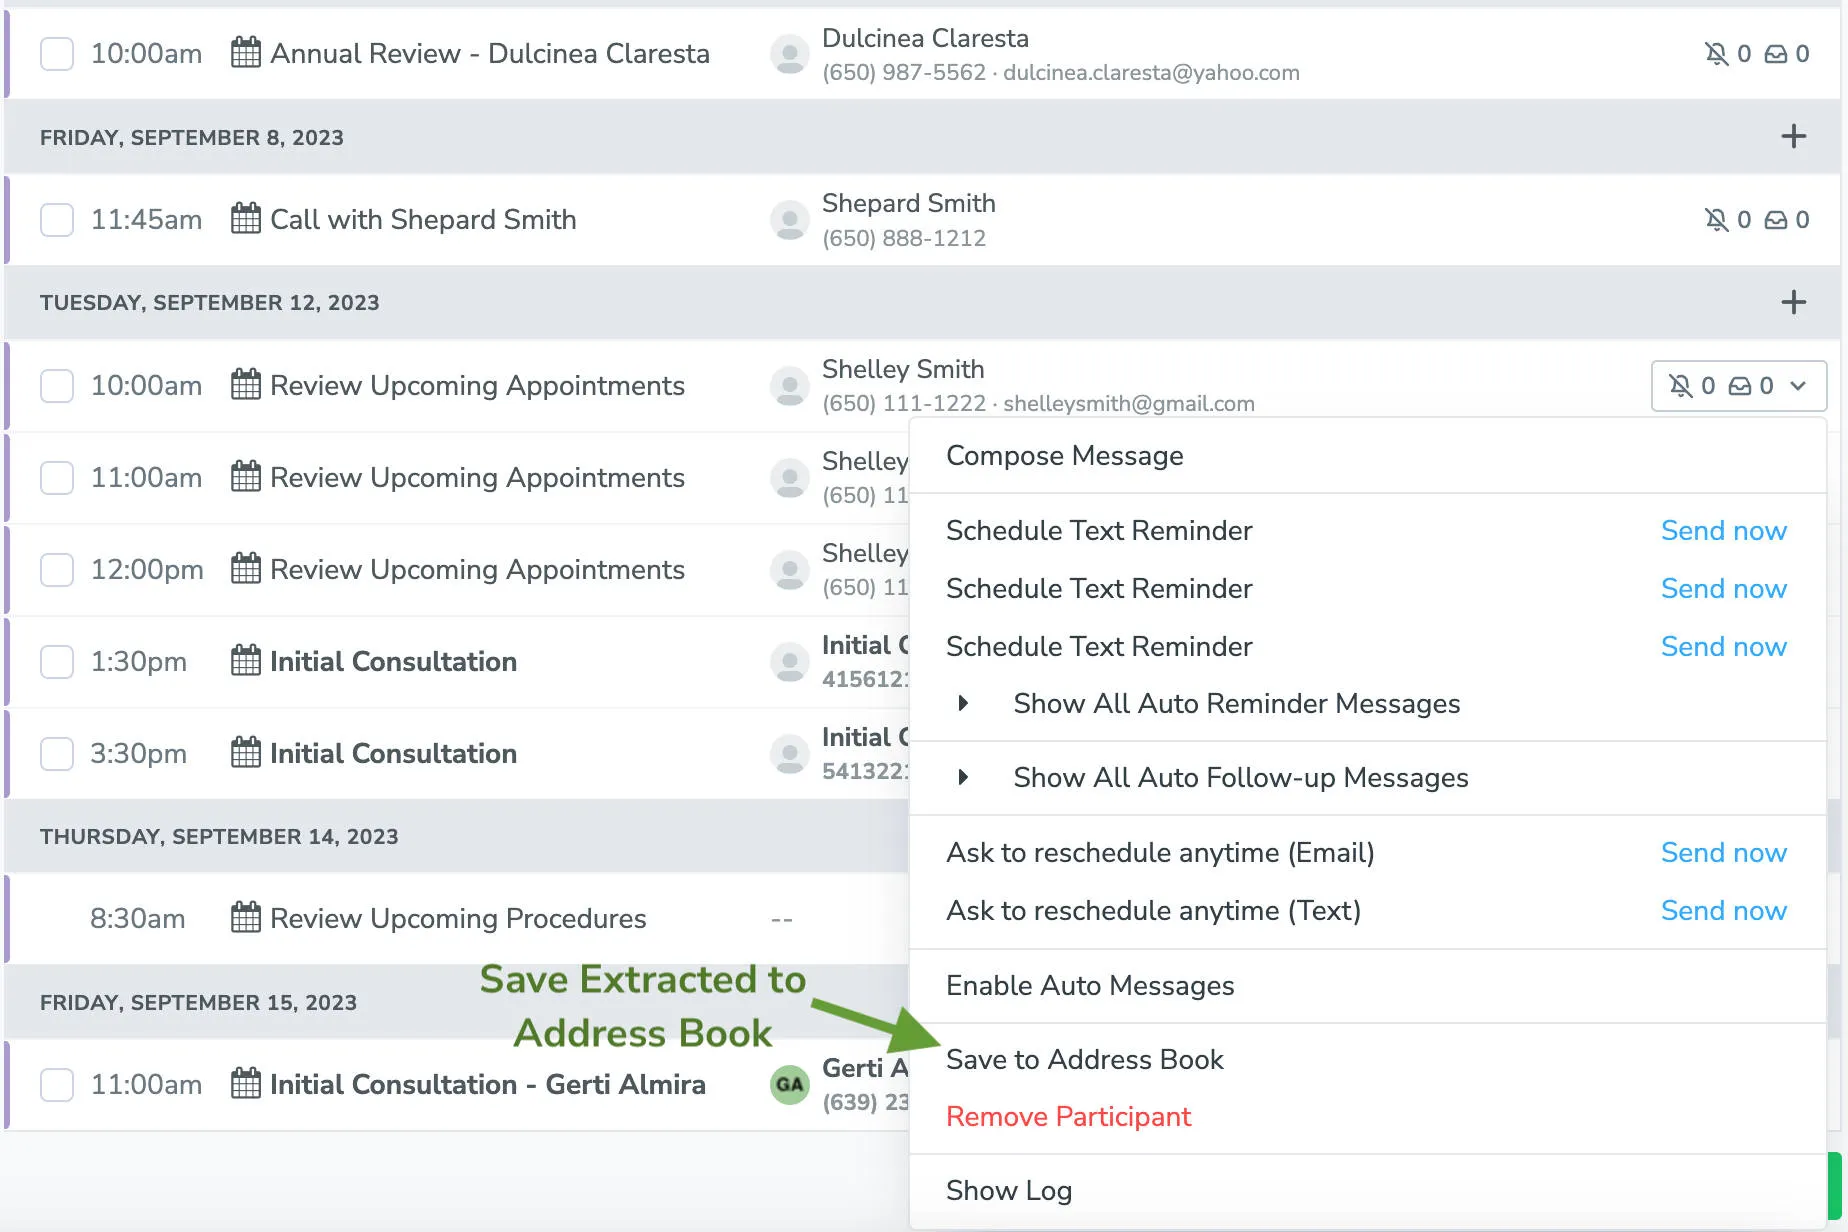
Extracted contacts can easily be saved to your Address Book if needed.
-
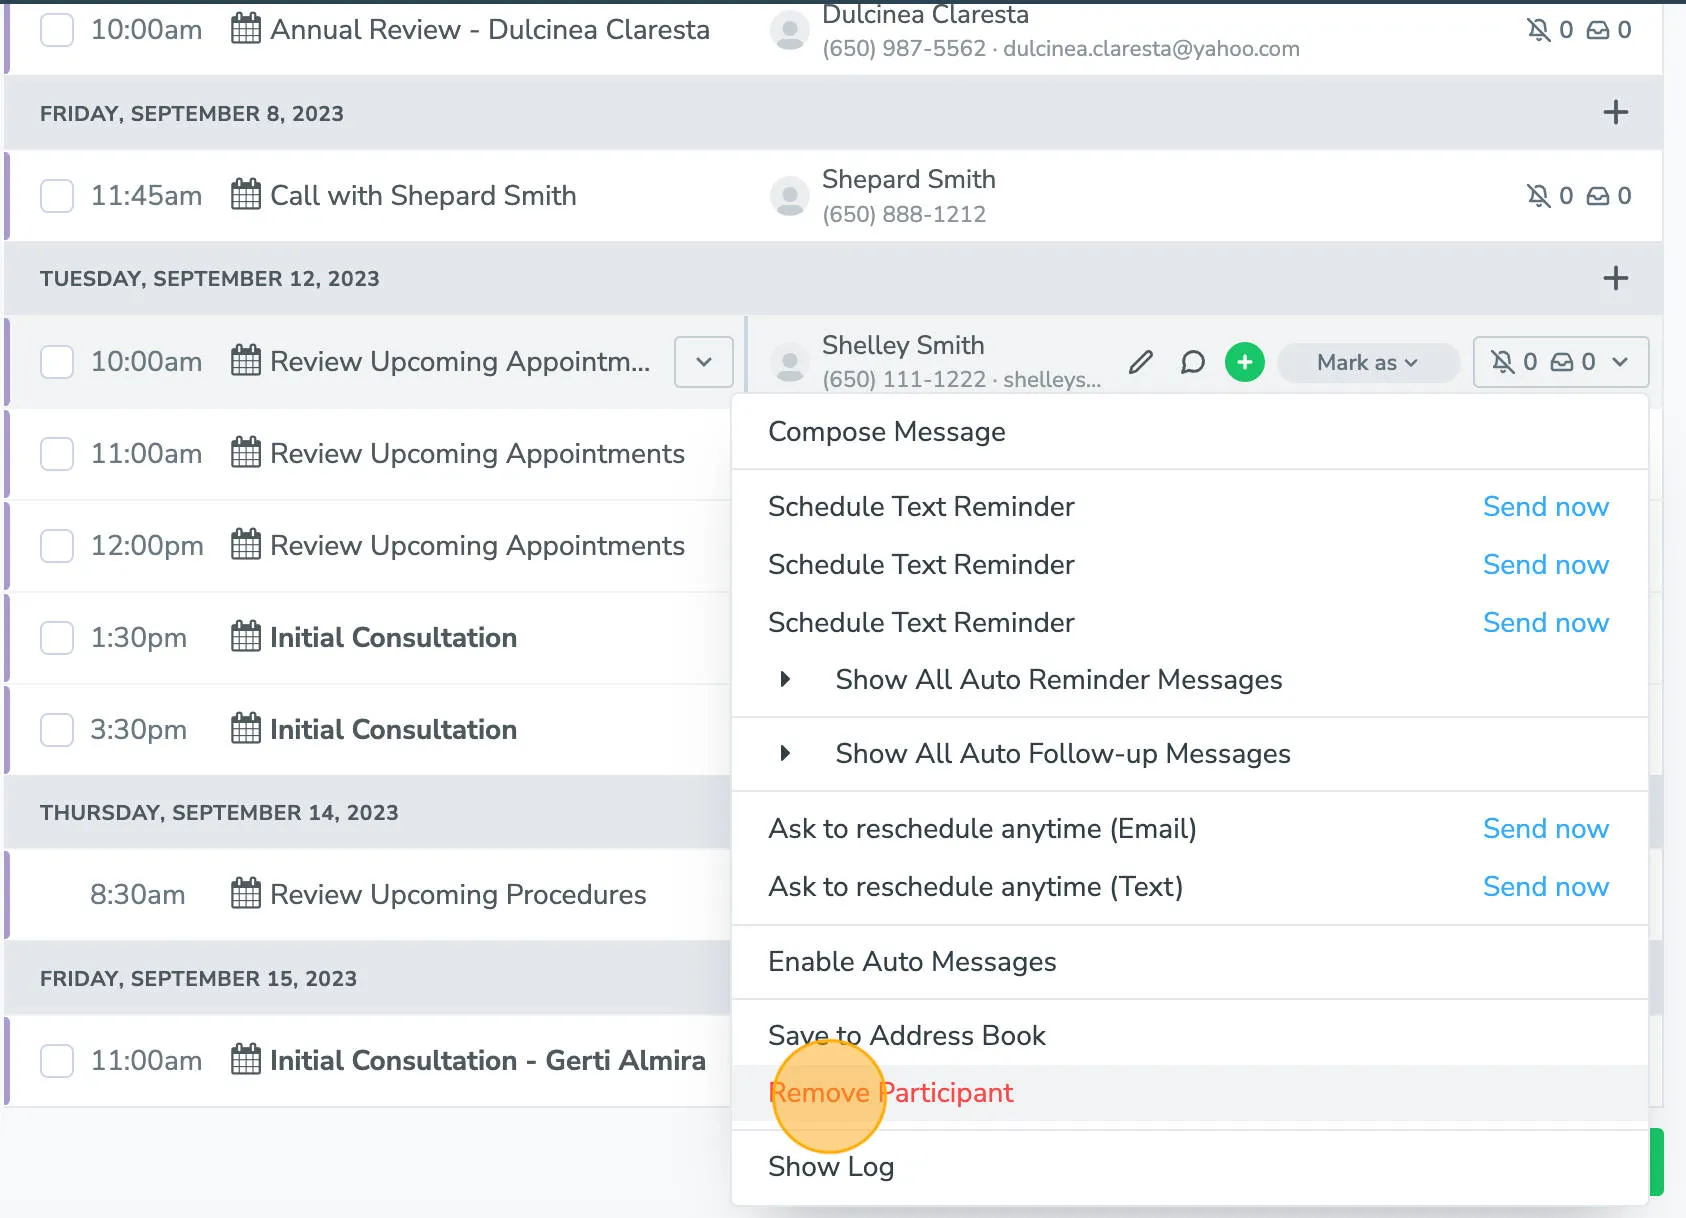
If you see the same participant for every appointment (or most appointments), you can easily tell Apptoto to remove them from all appointments by clicking on the options menu.
-
Choose Remove Participant.
-
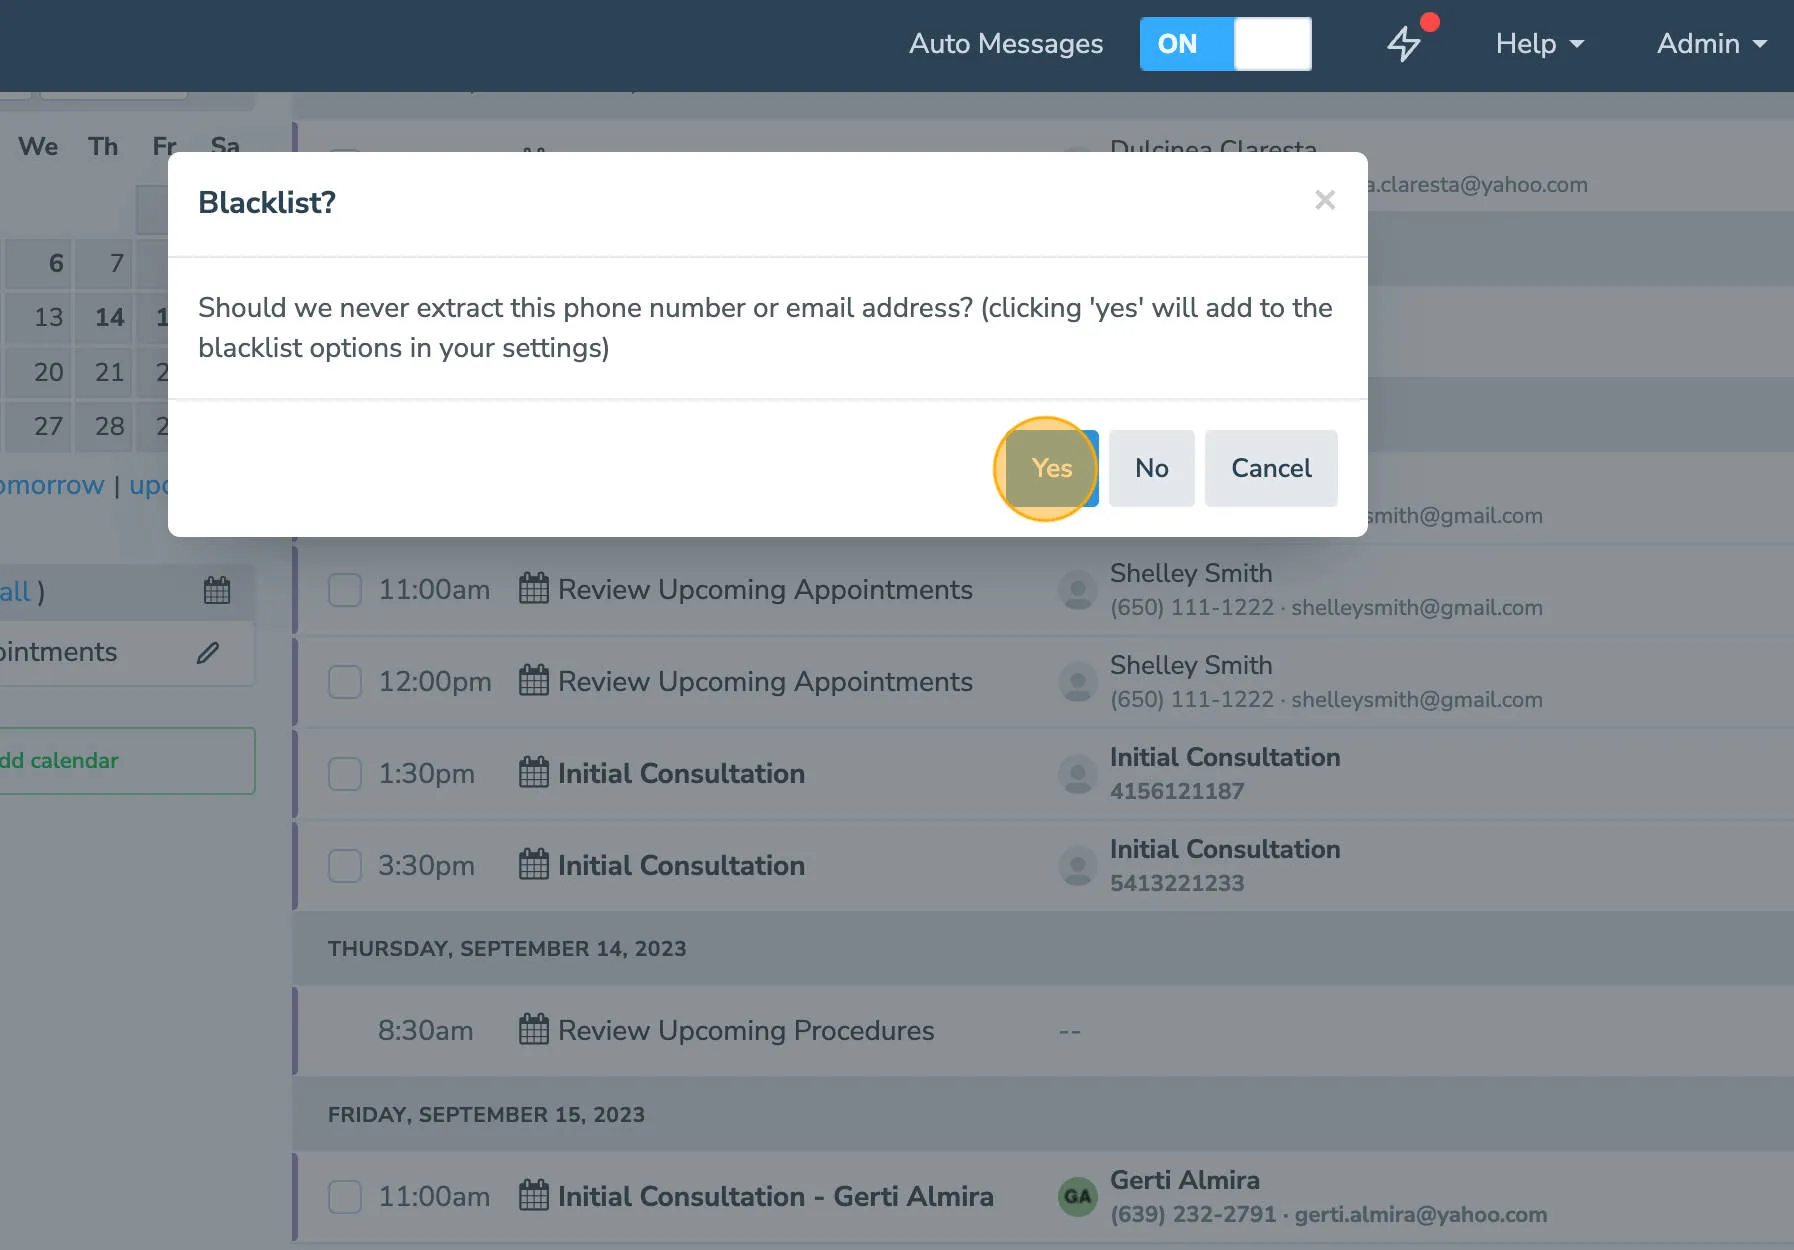
Select Yes when Apptoto asks if you want to add them to the blacklist.
-
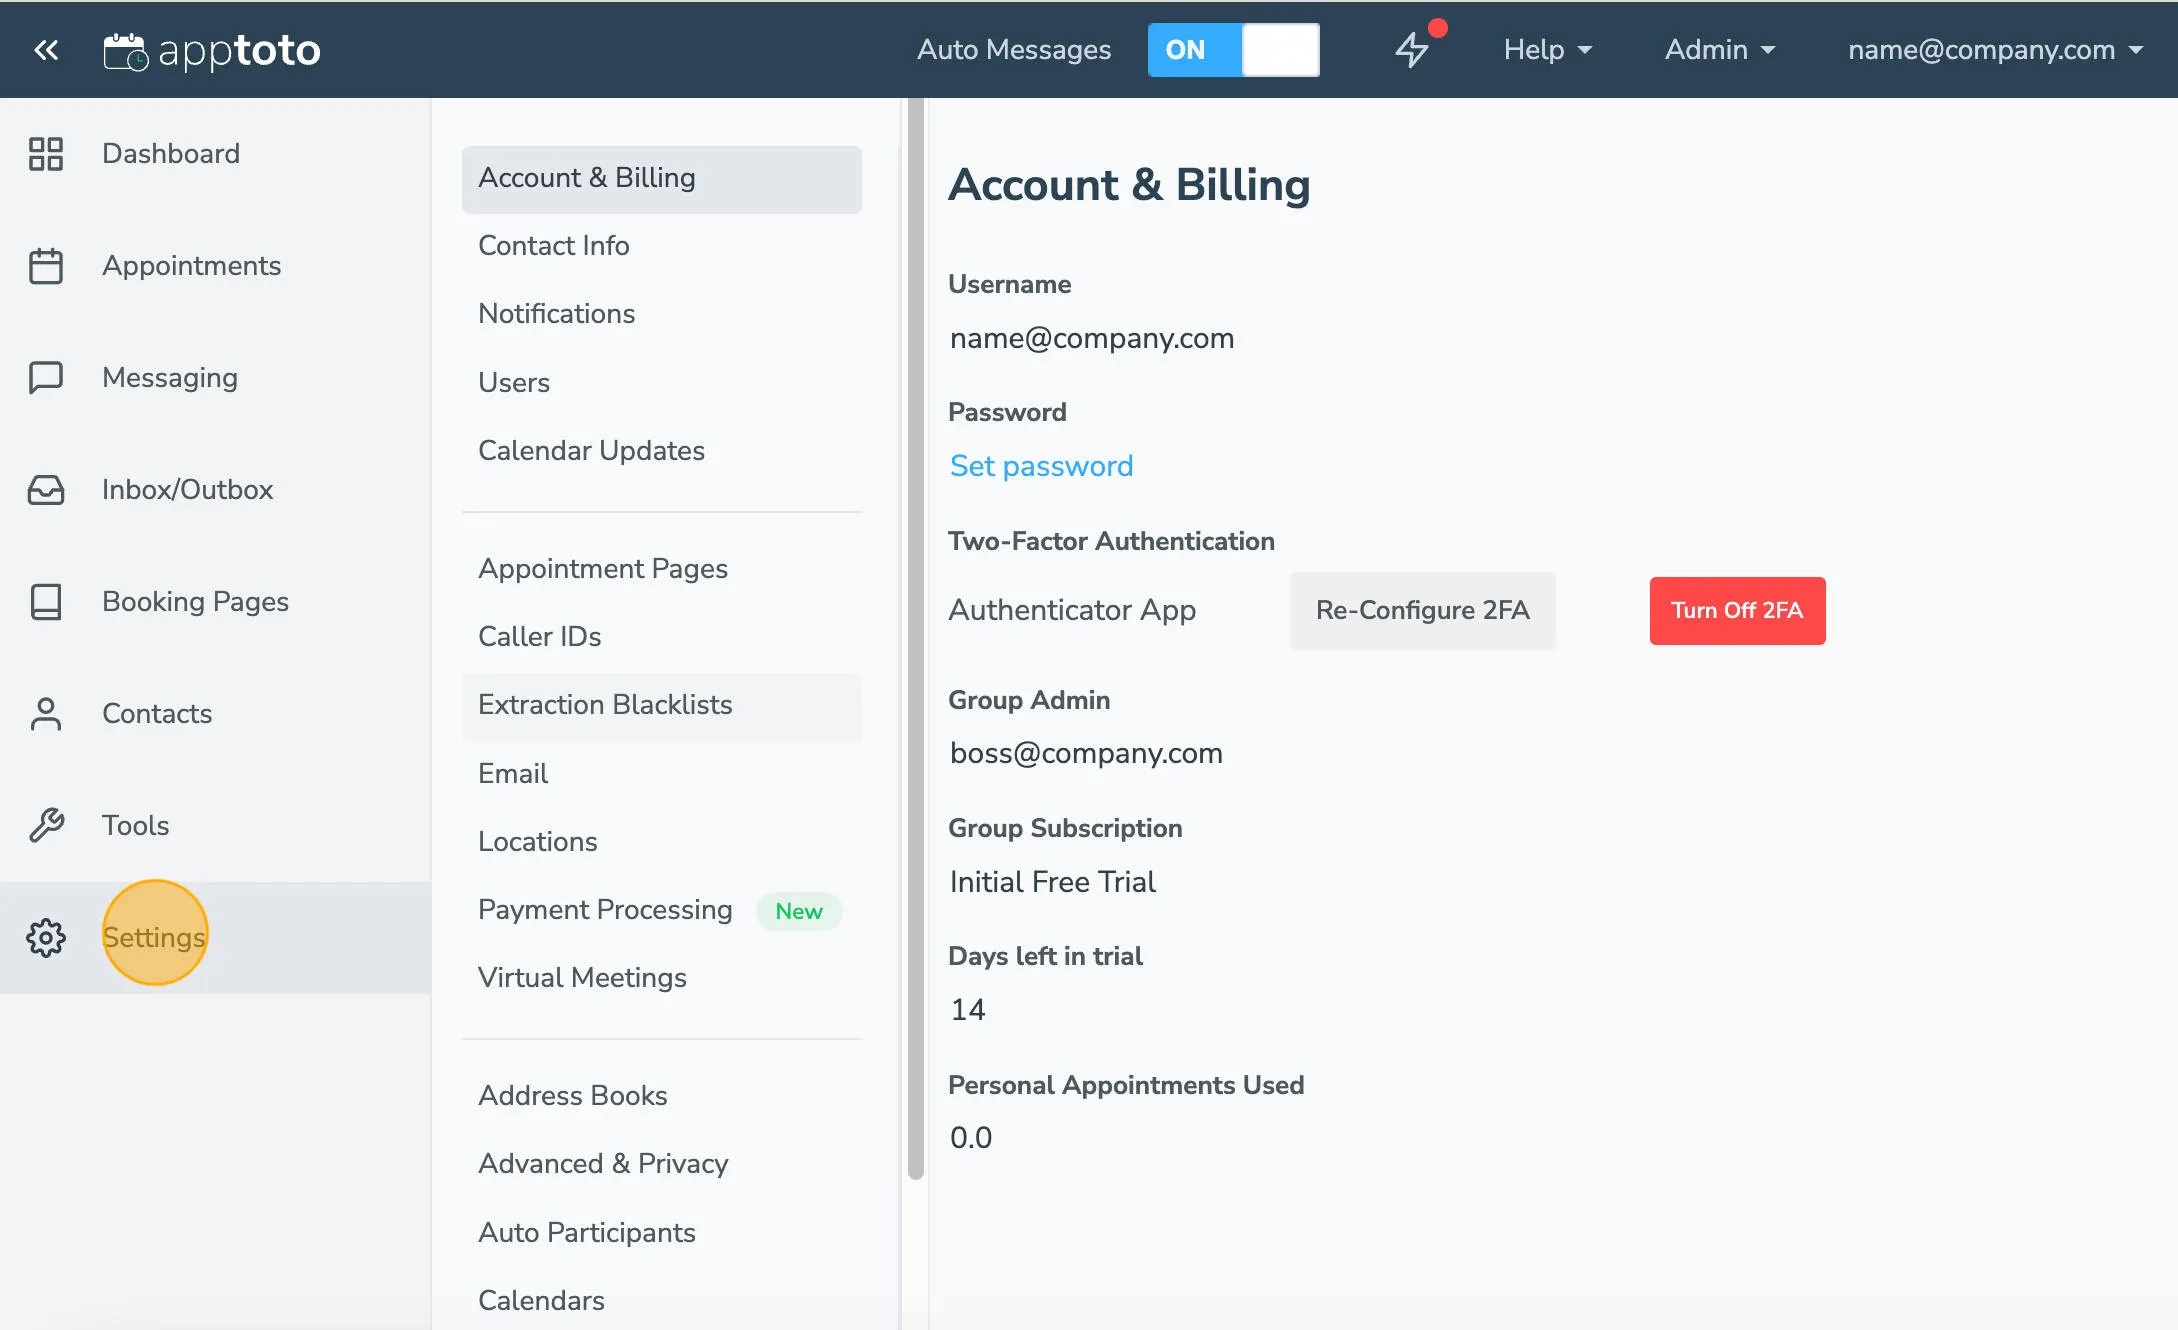
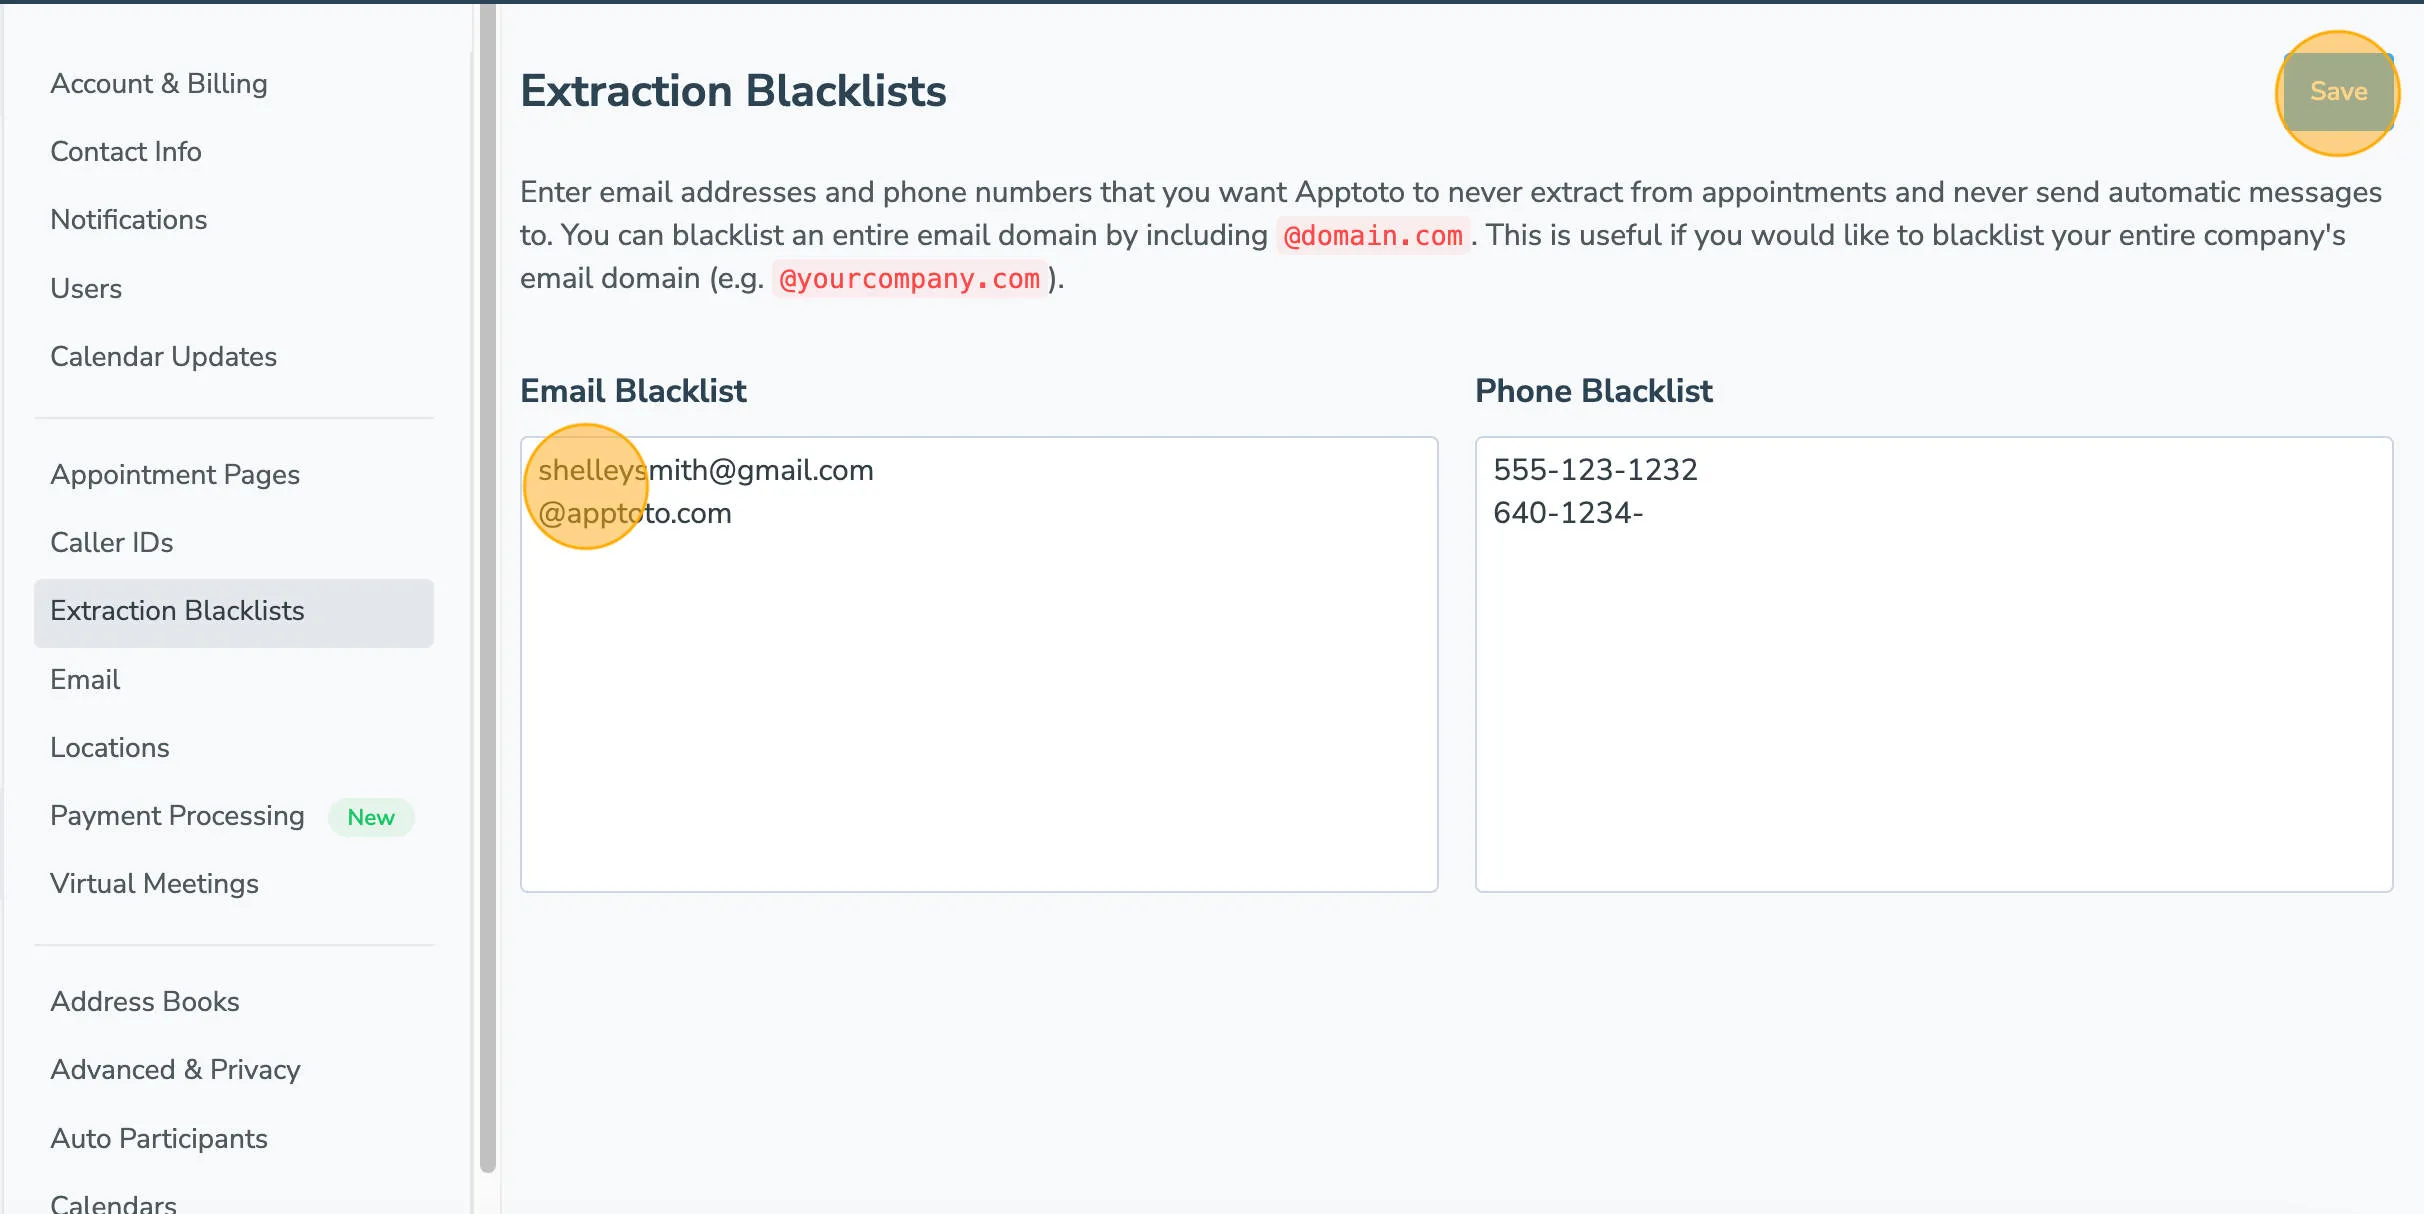
You can also access the Extraction Blacklist by clicking on the Settings menu.
-
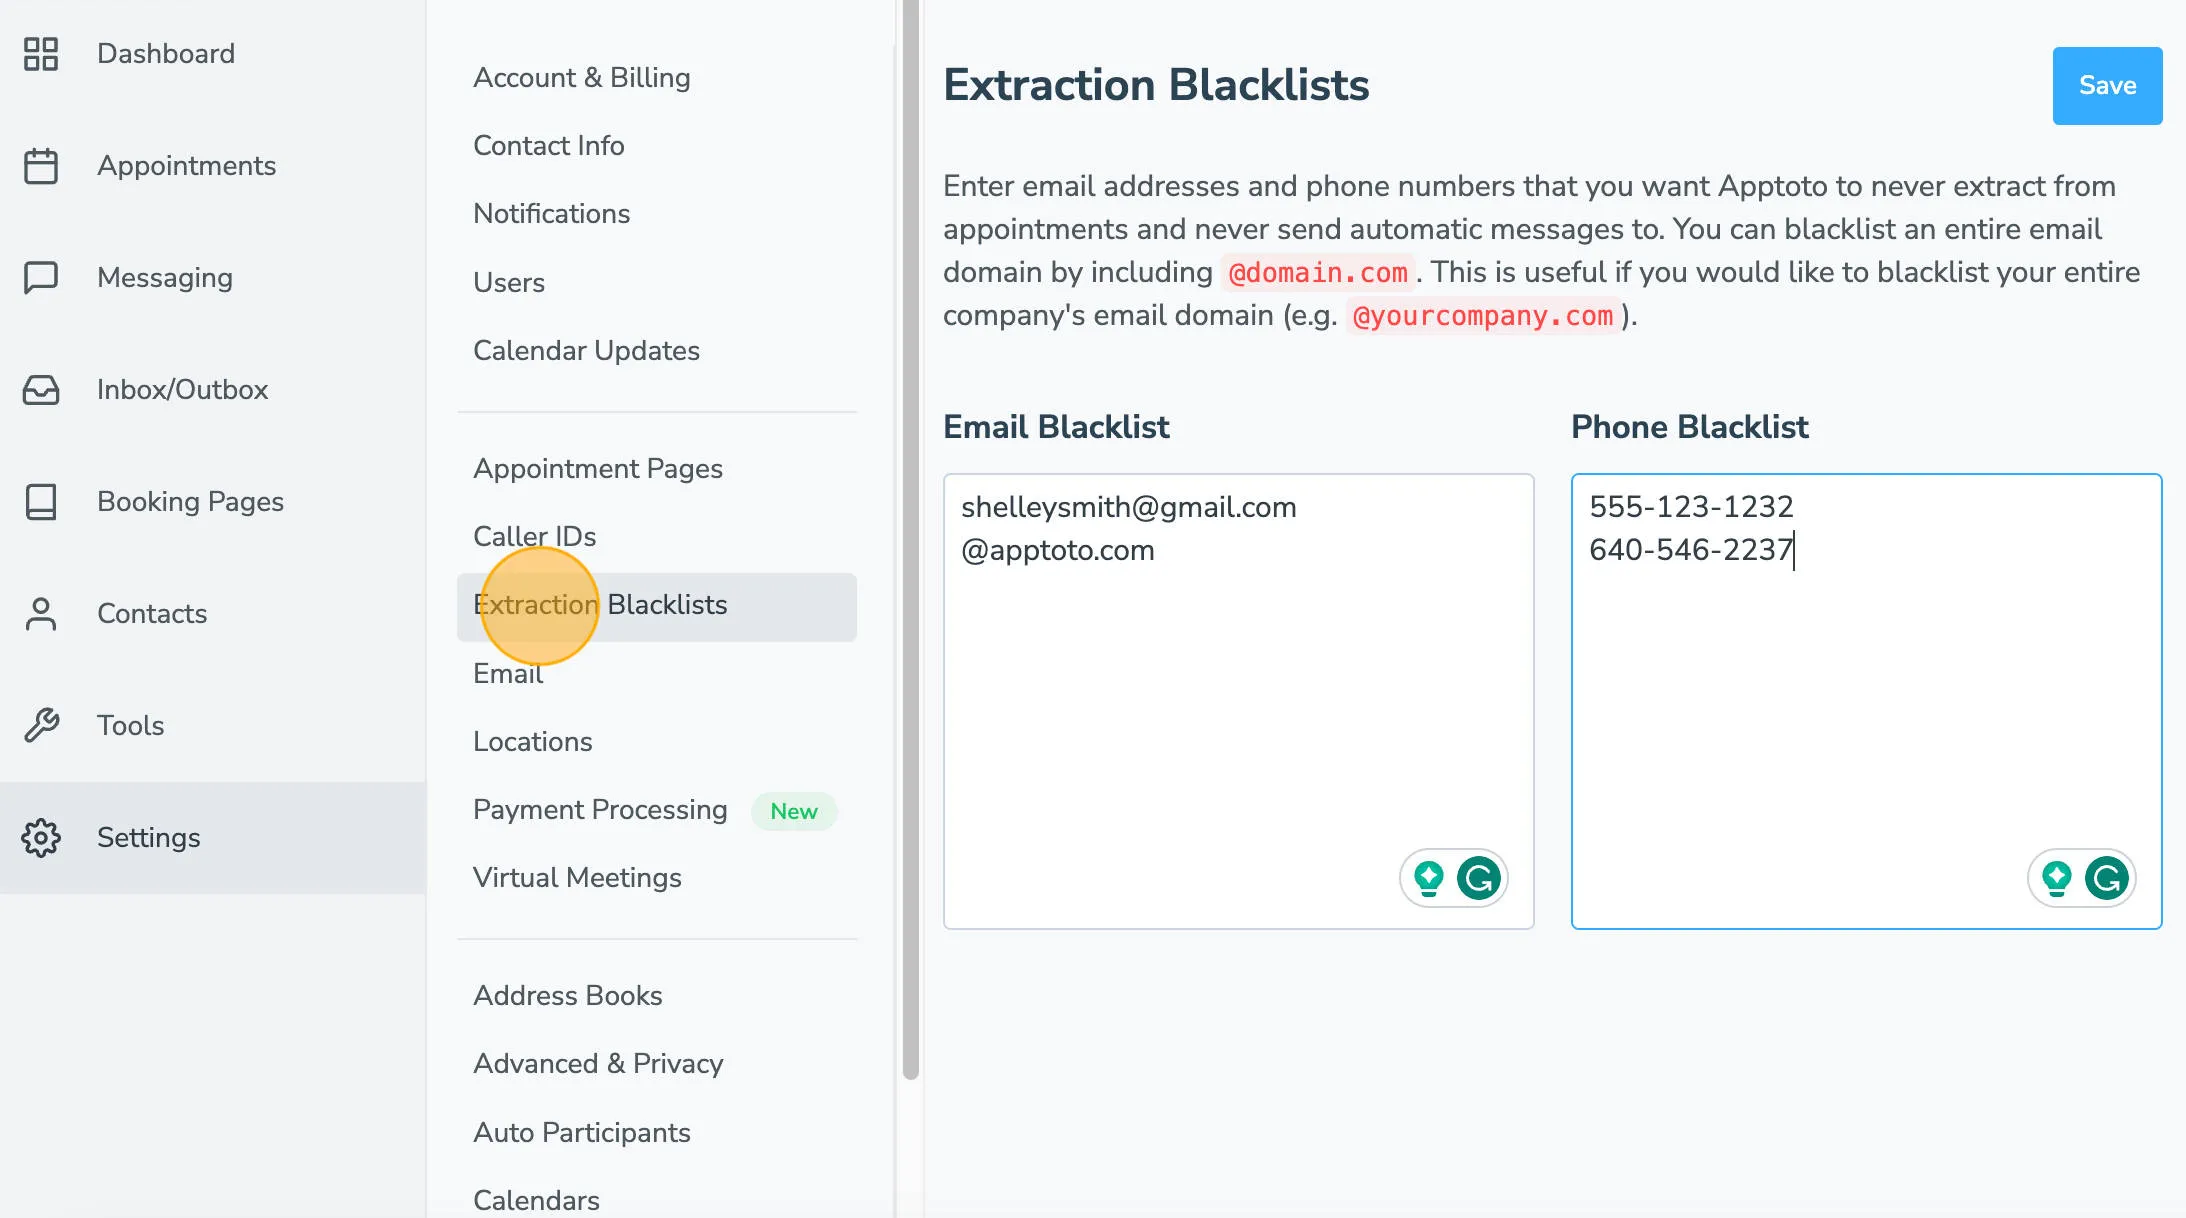
Then Extraction Blacklists.
-
Add any emails or phone numbers you want to be blacklisted (or review those you added previously).
What’s next
Section titled “What’s next”With your calendar and contacts connected, and your appointments synced successfully, you’re ready to send your first manual reminder.