Importing CSV Data Files
If your scheduling software, CRM, or other tool can export data as a CSV file, you can import that data directly into Apptoto. This means you can upload appointment data such as events with dates, times, and participant details.
How is a CSV file different from an Excel spreadsheet?
Section titled “How is a CSV file different from an Excel spreadsheet?”A CSV is a comma-separated values file that saves data in table-structured format. CSVs resemble spreadsheets but use a .csv extension, traditionally as text files with comma-separated information.
Adding data using Apptoto’s Importer tool
Section titled “Adding data using Apptoto’s Importer tool”-
Export data from your external source. Export data from your existing program using its export function, often found independently or within a Reports section. Contact your software provider if you cannot locate this feature.
-
Log into Apptoto. Once your file is saved, log into your Apptoto account. See Getting Started for account creation details.
-
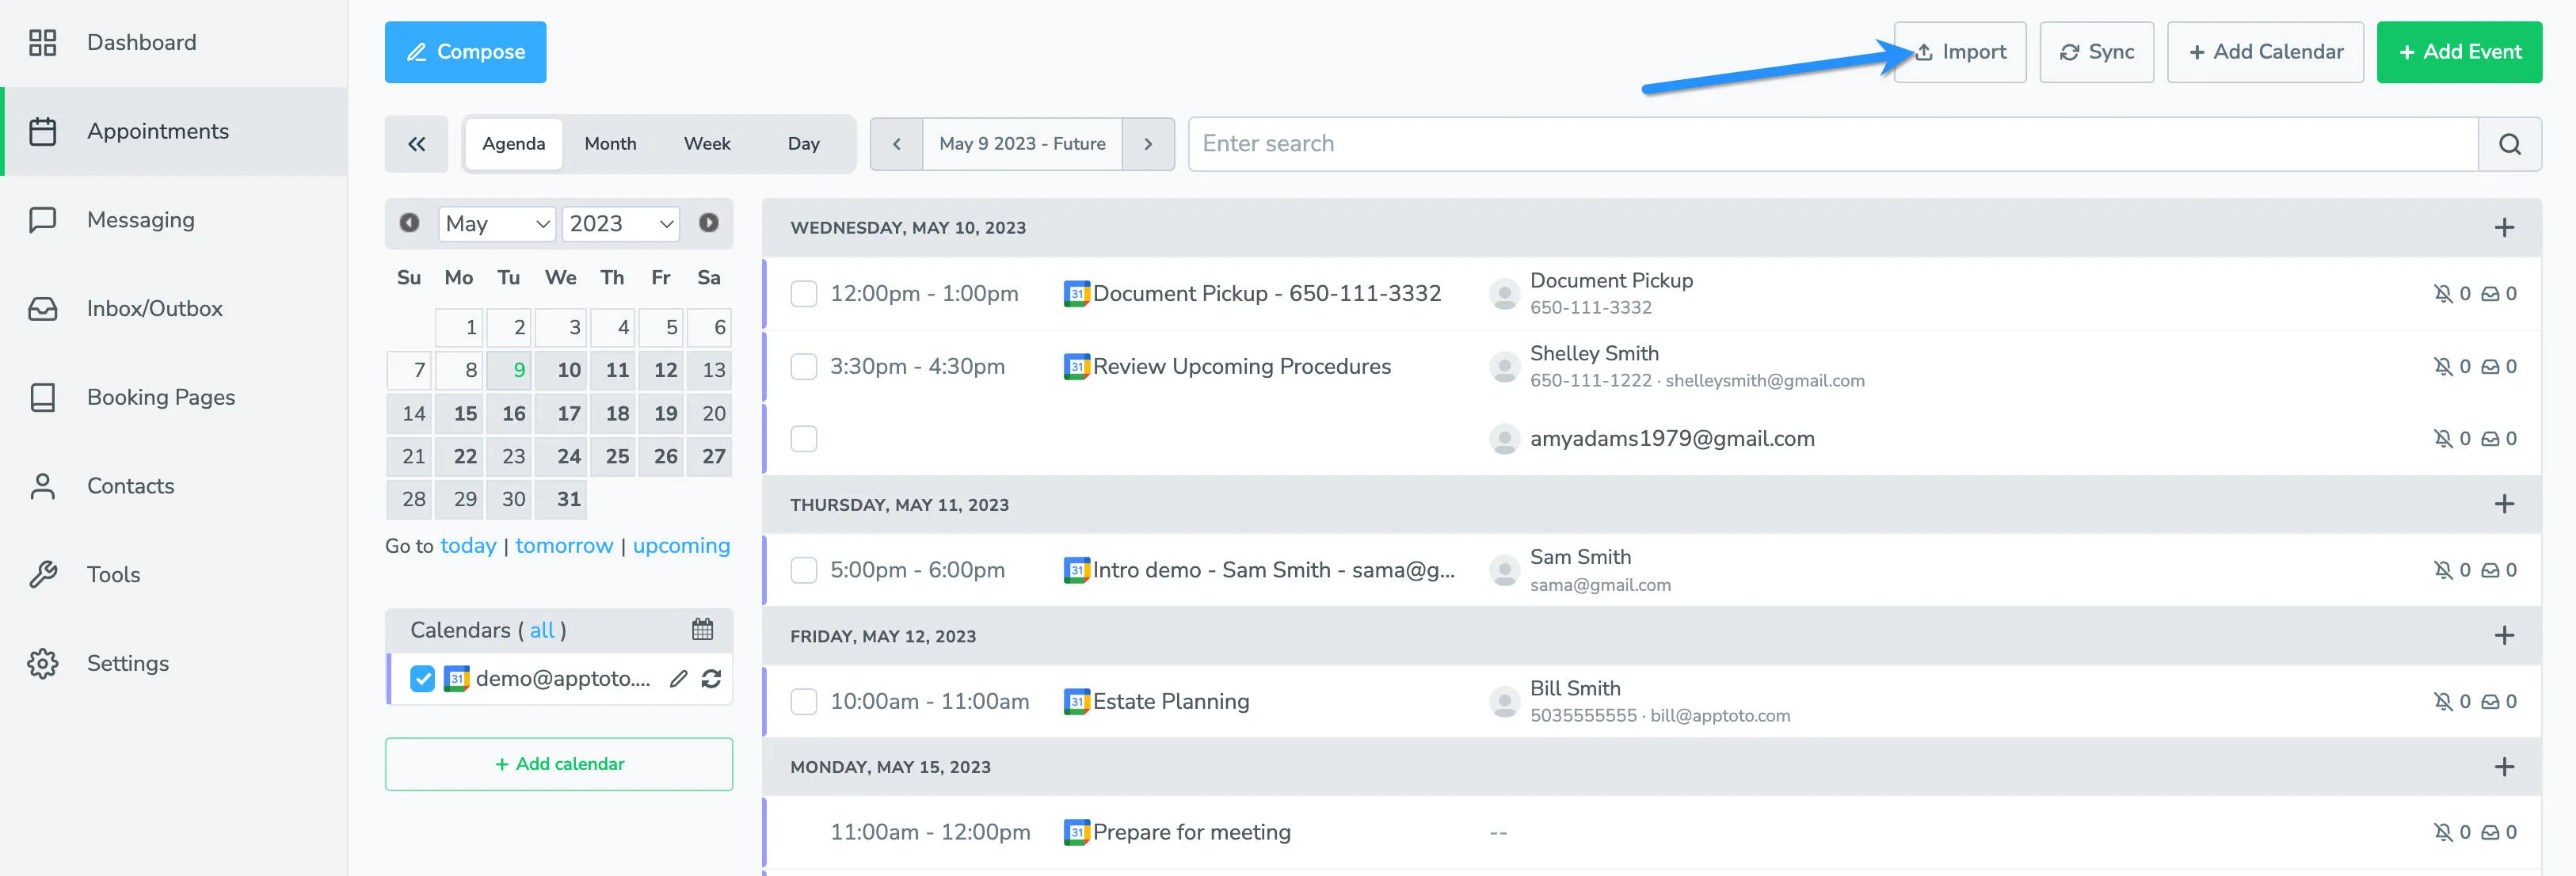
Select Import on the Appointments tab. After logging in, click Import in the upper right-hand corner of your dashboard.
-
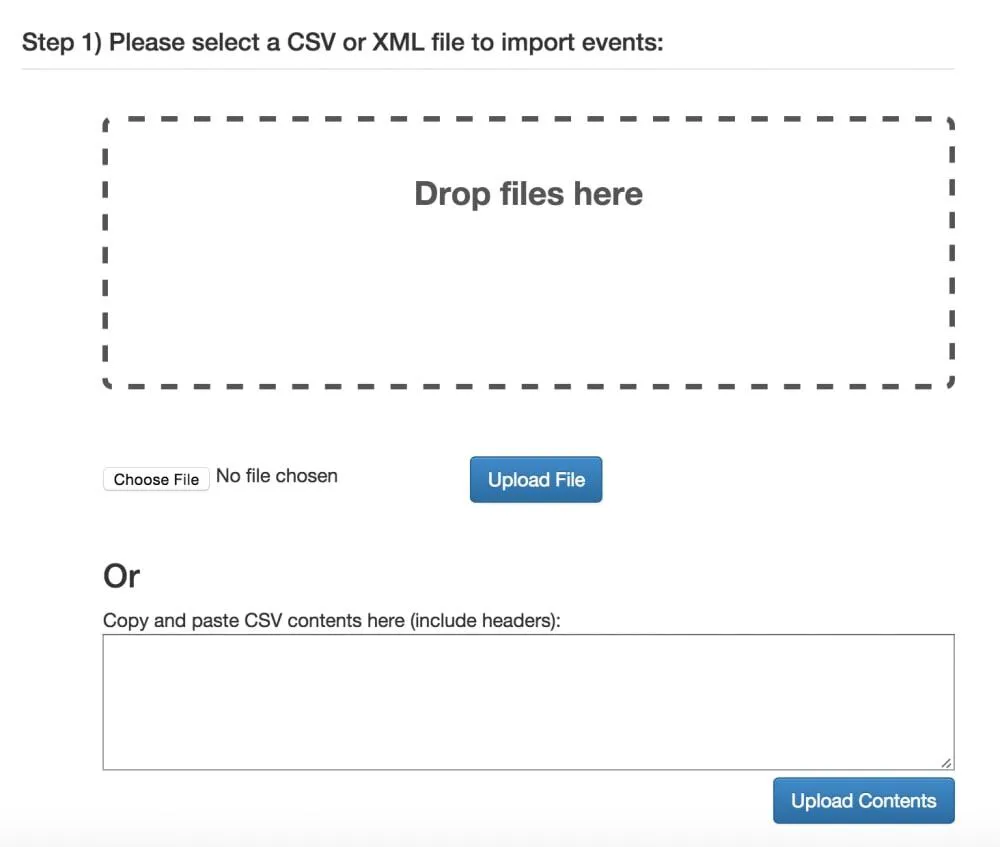
Upload your CSV or XML file. Select your saved file by dragging and dropping or choosing from documents. Click Upload File, or copy/paste contents and click Upload Contents. Apptoto will populate the data into a table with assumed column headers.
-
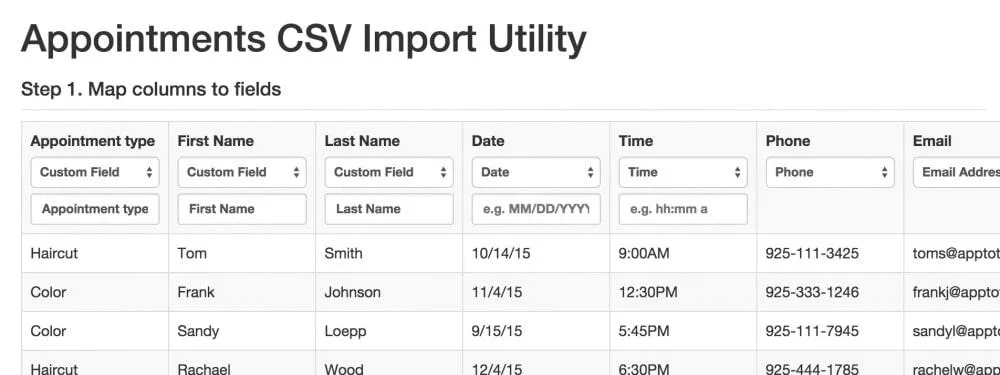
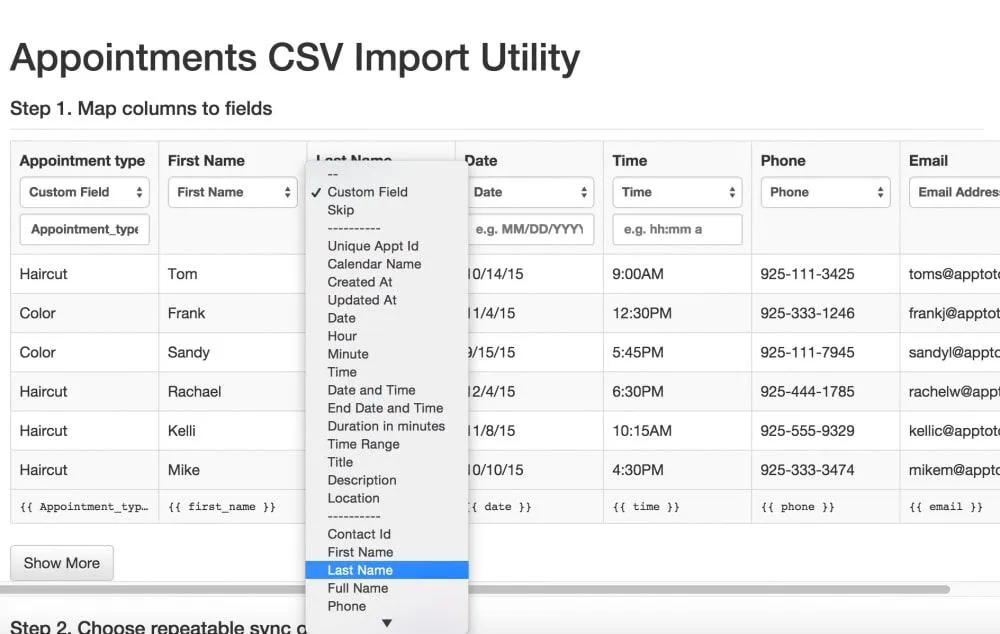
Map data columns to preset or custom fields. Use the dropdown menus to change custom field titles to preset fields for simplicity. Select First Name and Last Name from respective dropdowns for accurate data entry.
-
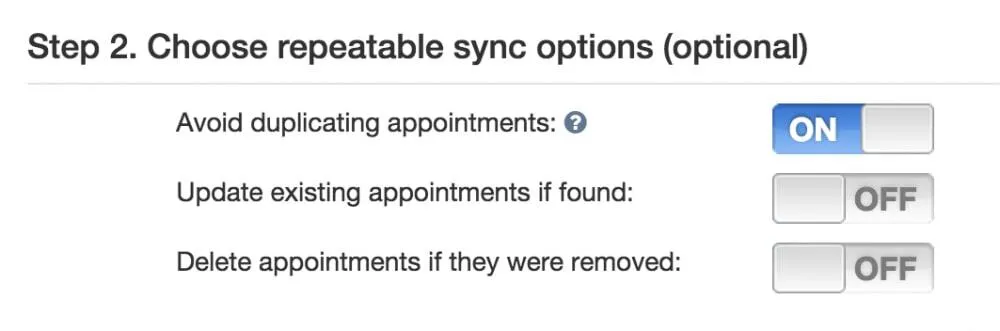
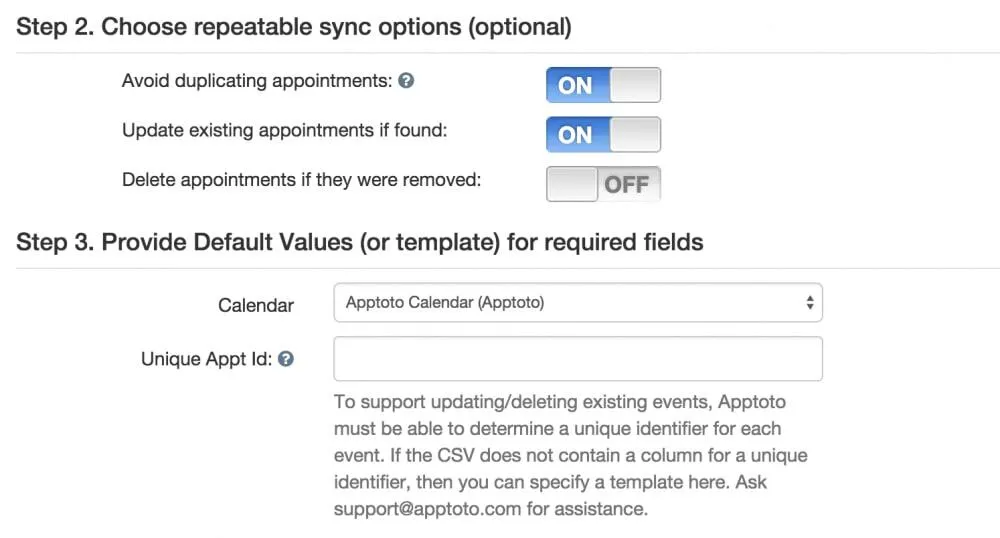
(Optional) Confirm repeatable sync options. Review repeatable sync options that control how Apptoto uses imported information:
- Avoid Duplicate Appointments — when enabled, Apptoto prevents duplicate appointments by checking appointment date, time, and title against existing calendar entries.
- Update existing appointments if found — when enabled, Apptoto requires a unique appointment ID. If your CSV file provides an appointment ID from your source system, use that. Otherwise, you might use the client’s first and last name for single appointments. Contact support@apptoto.com for CSV setup questions.
- Delete appointments if they were removed — requires the unique appointment ID and a date range so Apptoto knows how far forward to search for removed appointments.
-
Set how the appointment title should display. Control how appointment titles appear on the calendar. For appointment titles you want to include participant or appointment details, use the title template at the bottom of the import screen. For example, setting the title to
{{ Appointment_type }} – {{ First Name }} {{ Last Name }}would produce titles like “Haircut – Mike McCune”.
-
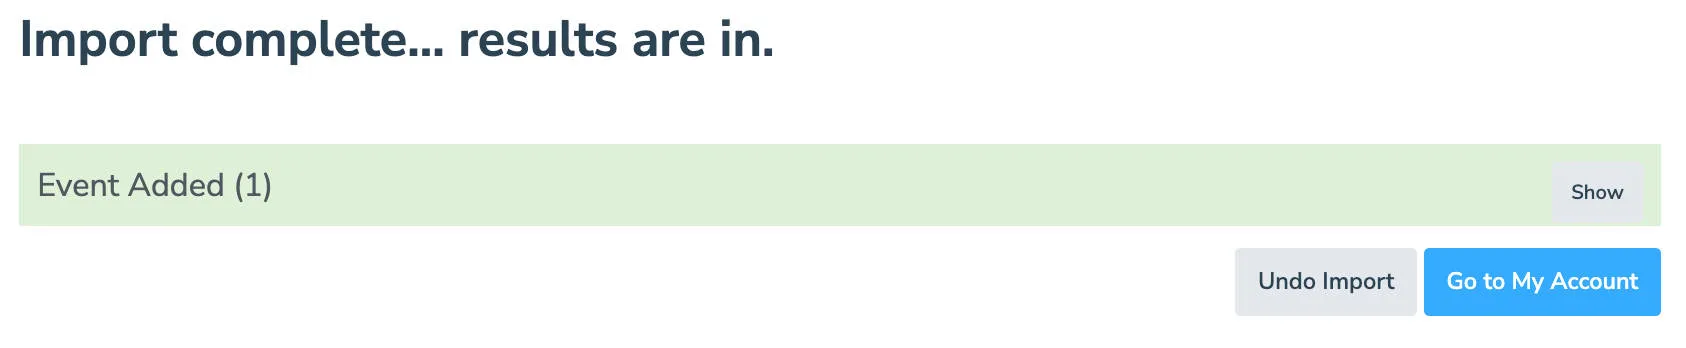
Import Click Import. Apptoto processes the file and shows a summary of the results. Your appointments will appear on your Appointments tab. The Apptoto dashboard displays the next 10 days by default, so not all imported appointments may be visible immediately. For additional questions, contact support@apptoto.com.
Handling import errors
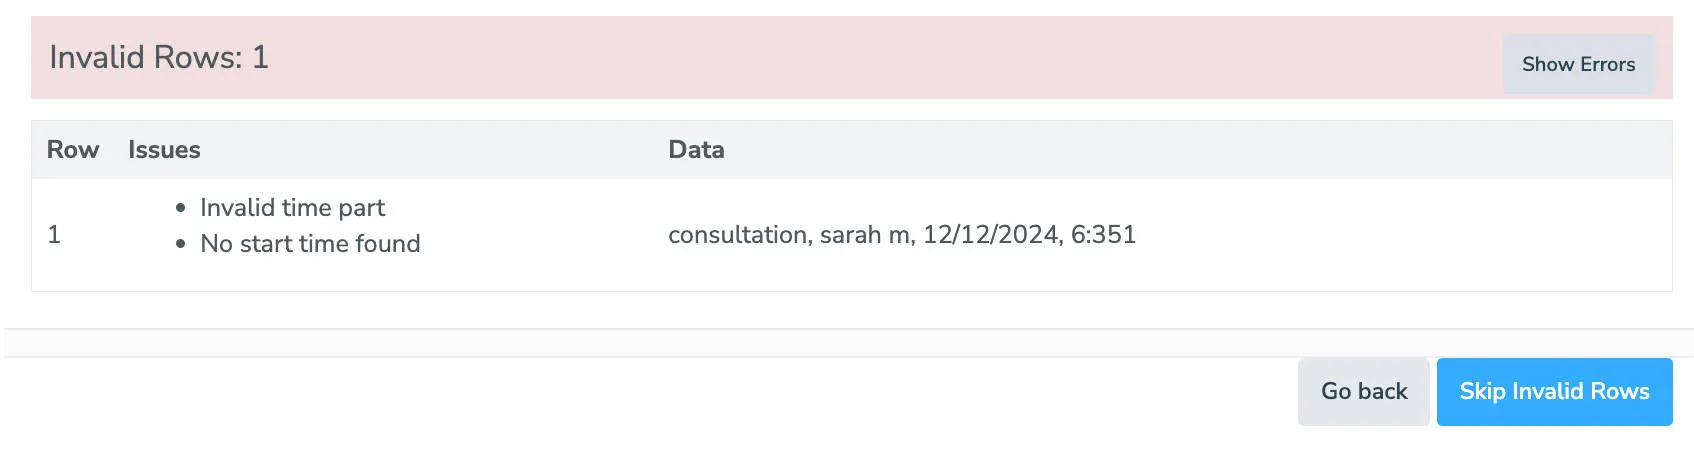
Section titled “Handling import errors”Upload issues may occur due to missing or incorrectly formatted data. Error notifications appear when problems are detected.
- Click Show Errors to determine why data did not upload correctly (e.g., if you see “no start time found,” check your time format. Change from
hh:mmmtohh:mmfor successful results). - Click Skip Invalid Rows to proceed with import while leaving invalid rows behind — useful if appointments are duplicated or lack required information.
| Error | Fix |
|---|---|
| ”No start time found” | Check the time format — use hh:mm, not hh:mmm. Switch to the Date and Time (with formatting) or Time (with formatting) field types if the format is non-standard. |
| Duplicate appointments | Enable Avoid duplicate appointments or check for identical rows in your source file. |
| Timezone mismatch | By default, Apptoto uses your account’s timezone. Contact support@apptoto.com to use the calendar’s timezone instead. |
After Connecting
Section titled “After Connecting”Your next step is to configure your reminder messages. See Message Setup for a full walkthrough.