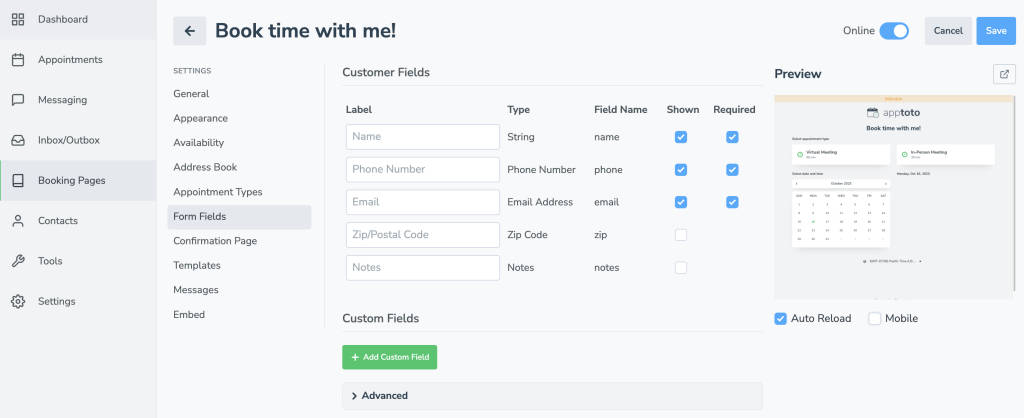
The Booking Pages > “Form Fields” tab allows you to specify what information your clients must provide when booking an appointment with you.

Customer Fields
These fields are specifically used to collect and associate information directly with the individual booking the appointment.
Label: The default label that will appear on your booking form is displayed in grey. You can customize your labels for each field by entering a new label in the open field.
Shown: Select which fields you’d like shown or hidden on your booking pages using the shown checkboxes.
Required: Select which fields clients/patients must enter on your booking page before they’re allowed to submit their booking reservation.
Upon completion of the booking, these fields will be used to generate a new contact in the address book associated with that booking page. Click the following link for more information on address book integrations.
Custom Fields
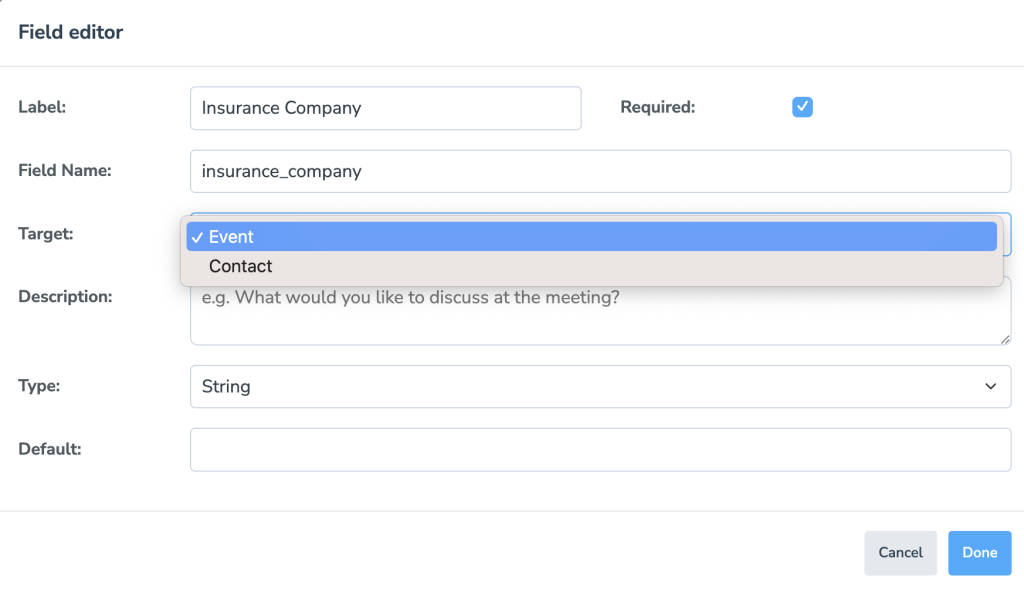
Beyond the standard information collected, you can specify further fields for your clients to fill out when booking appointments. The collected information can then be associated with the Contact or the Event via the “Target” dropdown in the Field Editor.
Label: The name or label that will display on your booking form above/next to your custom field
Required: Select if you want to require your client/patient to enter the custom field before they’re allowed to submit their booking reservation.
Field Name: Field name that will be stored for your custom field. This can be utilized to integrate your booking data with other systems.
Target: Fields can now be associated with the event or the customer, allowing you to assign the collected information to the intended target accurately. (e.g., nickname vs. location of meeting).

Description: Provide more information/details about your custom field.
Type: The type of information will be collected by the custom field.
- String – Collects short, typically one-word responses (e.g., nickname, username, alternate email address, etc.)
- Text Area – Allows for longer responses (e.g., What would you like to discuss? What are your goals? etc.)
- Number – Allows you to collect a single numerical response
- Checkbox – Allows your clients to select multiple options (e.g., Services Needed)
- Dropdown – Allows you to present a list of responses to the client for them to choose from.
- Hidden Field – This option allows you to pass a hidden value to the booking page and the resulting appointment via the booking page query string. (e.g., you could create a hidden field named “source” and then add ?source=website to the end of your booking page URL, allowing you to track if the client booked their appointment through the direct URL or by clicking a Facebook ad, newsletter, etc.) For more information on this, please contact our support team.
Default: Enter a default answer provided in your custom field that clients/patients can use (or edit before submitting).
Conditional Fields
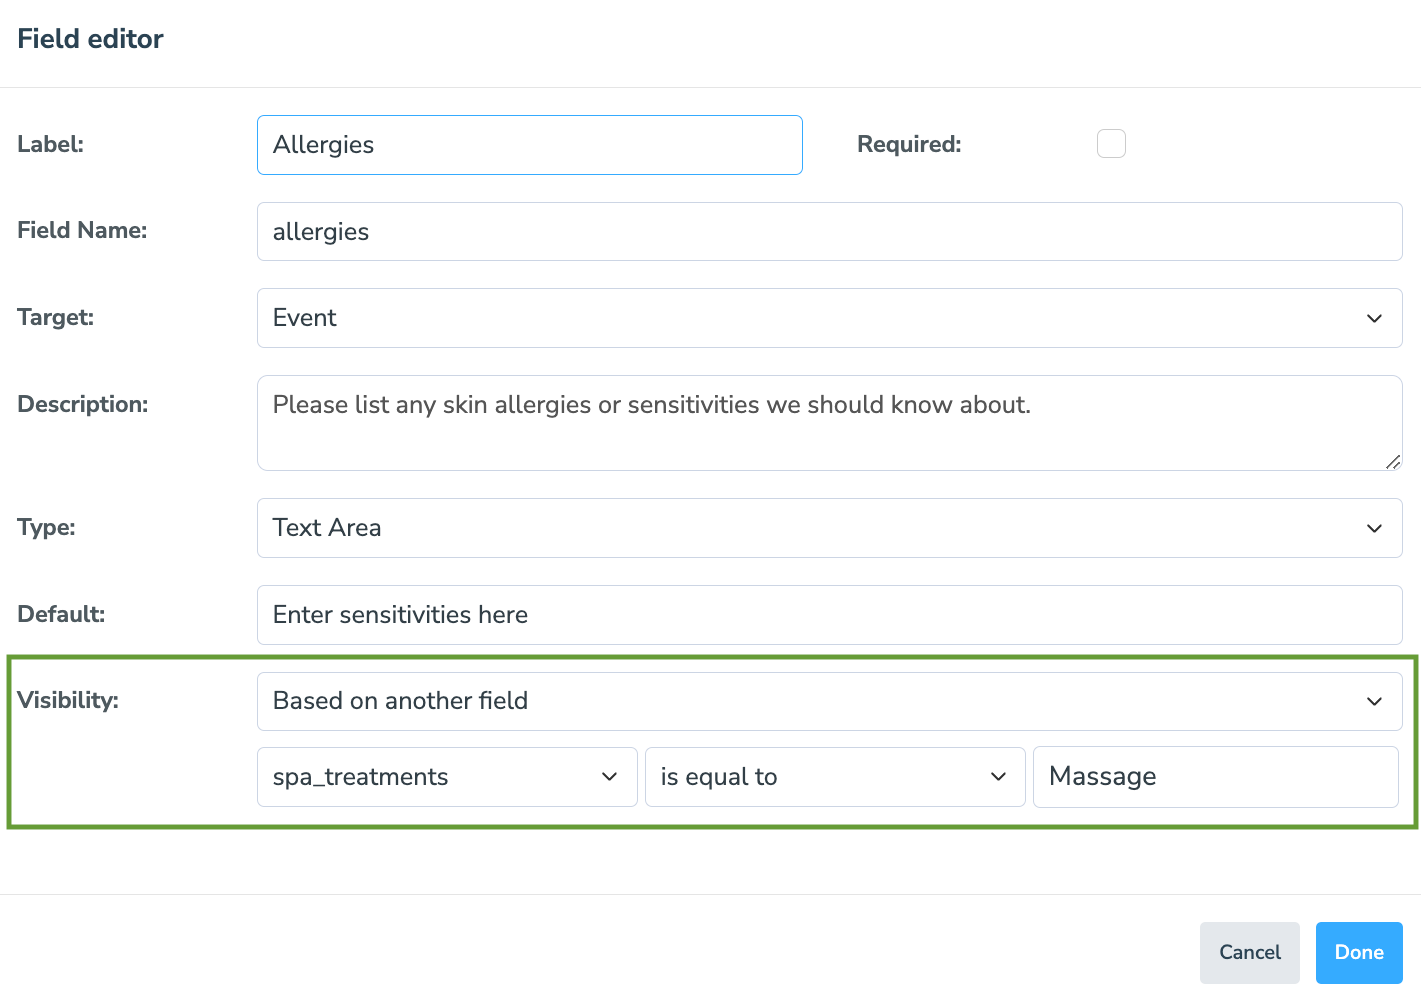
Conditional Fields are Form Fields that will only appear after a client enters a specific answer into one of your “Custom Fields.” An example of when you might use a Conditional Field is if you need to collect more information about customer preferences or needs.
To set up a Conditional Field, you’ll need to first have set up a Custom Field that the Conditional Field will trigger based on. See section above to set up a custom field. Then:
- Select “+Add Custom Field” on the Form Fields tab.
- In the Field Editor, enter your Field Name, Target, Type, Default Answer, and Description.
- Check if this is a “Required” field.
- In the “Visibility” section, select “Based on another field.”
- Select which Custom Field you want the new Conditional Field to trigger off.
- Choose whether the answer “is equal to” or “not equal to”
- Enter the answer in the final field
- Click “Done.”

Advanced
Several advanced settings can be accessed by expanding the “Advanced” tab at the bottom of the Fields tab.
- Client/patient must include their first and last names.
- Enabling this toggle automatically requests consent from a client/patient before you send them texts about their appointments.
- Enabling this toggle automatically a client/patient before you send them marketing text messages.
- Enabling this toggle will display a button at the bottom of your booking form. Your client/patient can invite up to 10 additional guests by entering their email before they click “Book Now.”