The “Address Book” tab under “Booking Pages” lets you specify how your Booking Page should interact with your Address Books.
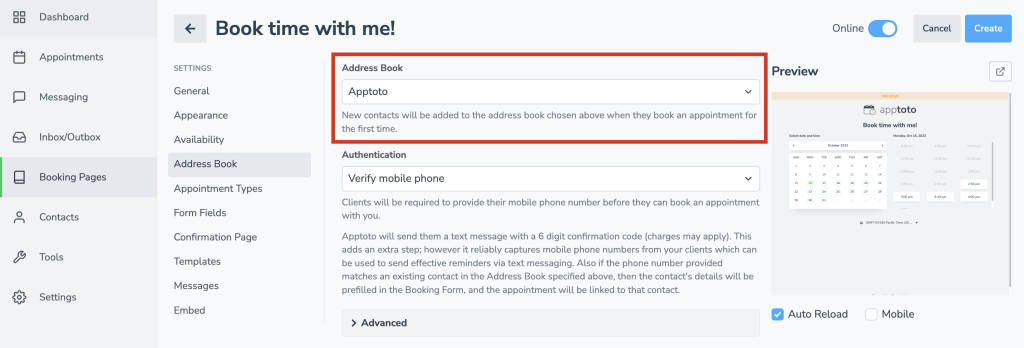
Address Book
This option lets you specify which Address Book should be used with your Booking Page. New contacts will be created in your default “Apptoto” address book by default. However, you can tell Apptoto to add new contacts to a different address book (e.g., your Google address book or Salesforce address book).
If you do not see the address book that you want Apptoto to add contacts to, then head over to the “Settings” > “Address Books” tab and connect the address book first, then come back to your Booking Page settings and configure the newly connected address book.
Authentication
This option allows you to choose how your clients prove they are who they say they are or, at least, that they are human.
Authenticating via Mobile Phone
If you set the Authentication method to “Verify Mobile Phone,” your clients will be asked to enter their mobile phone before booking an appointment.
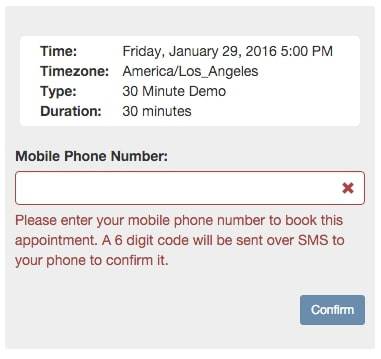
After entering their phone number, they will be sent a 6-digit code (via text message) to enter before they can complete the booking. The text message they receive will contain a 6-digit code and a link to complete the booking.

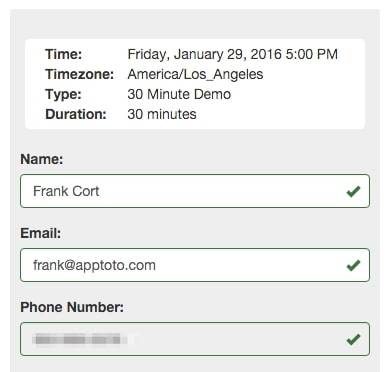
Once they’ve confirmed the mobile phone by entering the 6-digit code or clicking the booking link, the client can continue booking an appointment with you.
If the Address Book selected above contacts a contact that has the phone number they confirmed with, then the client will not have to fill out the contact details. Instead, those details will be filled out using the information in the Address Book.
Authenticating via Email
If you set the Authentication method to “Verify Email,” your clients will be asked to enter their email addresses before booking an appointment. They will be sent a 6-digit code (via email) to enter before they can complete the booking. Once they’ve entered the 6-digit code in the link provided, they can confirm their booking.
Require Campaign Booking Link
If you set the Authentication method to “Require Campaign Booking Link,” the client must have received a booking link via an Apptoto Campaign. Clicking on that link will take them to a unique campaign booking link they must use to book their appointment.
Authenticating via Captcha
By changing the Authentication method to “Captcha”, Apptoto will use Google’s Re-Captcha mechanism to verify that the client is human.
None
No authentication method is needed.
If you are going to post your Online Booking page online, then please consider using either “Verify Mobile Phone,” “Verify Email,” or “Captcha.” Using “None” as your authentication method is risky because someone could easily fill up your calendar with bogus bookings if they find the Online Booking page link.
Advanced Settings
Depending on which authentication method you choose, you may see some or all of these advanced settings in the expandable “Advanced” tab.
Contact must exist in address book in order to book: This requires anyone booking an appointment to be a contact in your address book already (helpful for reducing SPAM).
Match Contacts by: If you use a captcha authentication method or no authentication method, you have the option to match contacts to your address book using the options below:
- Phone and Email
- By Phone
- By Email
- None
Provided name must be close to an existing contact in order to match: Activate this toggle to allow Apptoto to match the name provided by the client/patient during booking to a close/similar name in your existing address book.
Limit contacts to # appointment: Prevent clients from booking more than a set number of appointments at a given time.
Allow staff to skip mobile/email authentication: Enable this to prevent having to authenticate an email or phone number when they book an appointment on behalf of a client/patient. You will be asked to generate “Secret Staff Code(s)” that your team can use to bypass the authentication requirement.