Once your messages have been edited and saved with changes, you can send your Auto Messages manually without turning on the Auto Messages feature.
To schedule the Auto Messages for a specific appointment, click on the bell/inbox button to the right of the appointment within the Appointments tab, and select “Enable Auto Messages.”
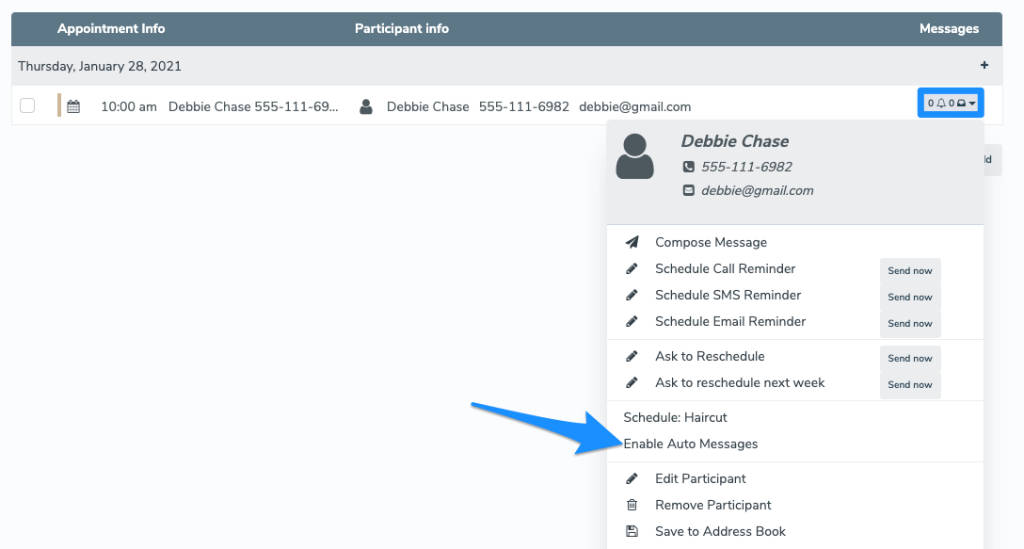
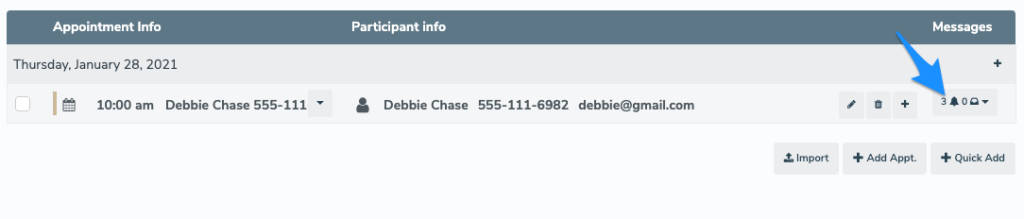
This will enable any messages that are set to ON and fit the conditions in the Auto Messages tab to be sent on their specified schedule. The appointment title text becomes bold when messages are scheduled to be sent, and the number next to the bell icon in the right-hand column shows how many messages are scheduled to send.
If you click on the bell/inbox button to the right of the appointment, Apptoto will display what messages will be sent and when. You can make any changes you want to a message by clicking on the title of an individual message.
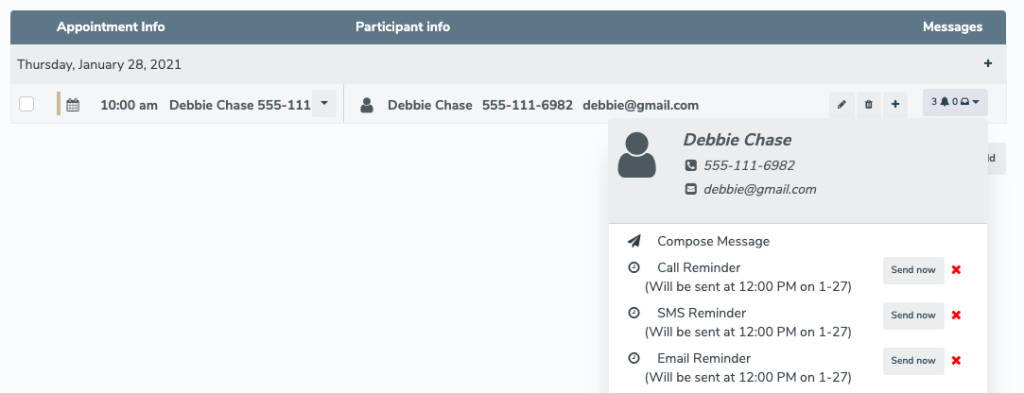
Clicking the “Send Now” button will manually force that specific message out. Clicking the red ‘x’ will stop Apptoto from sending that specific message out, even if it is scheduled to send.