Appointment Pages
Appointment Pages are links that can be included in your reminder or booking messages that will provide your customers with more info about their appointment in an easy-to-read format, as well as the option to confirm/cancel their appointment, and add the appointment to their own calendar.
Appointment Page: Desktop Preview
Section titled “Appointment Page: Desktop Preview”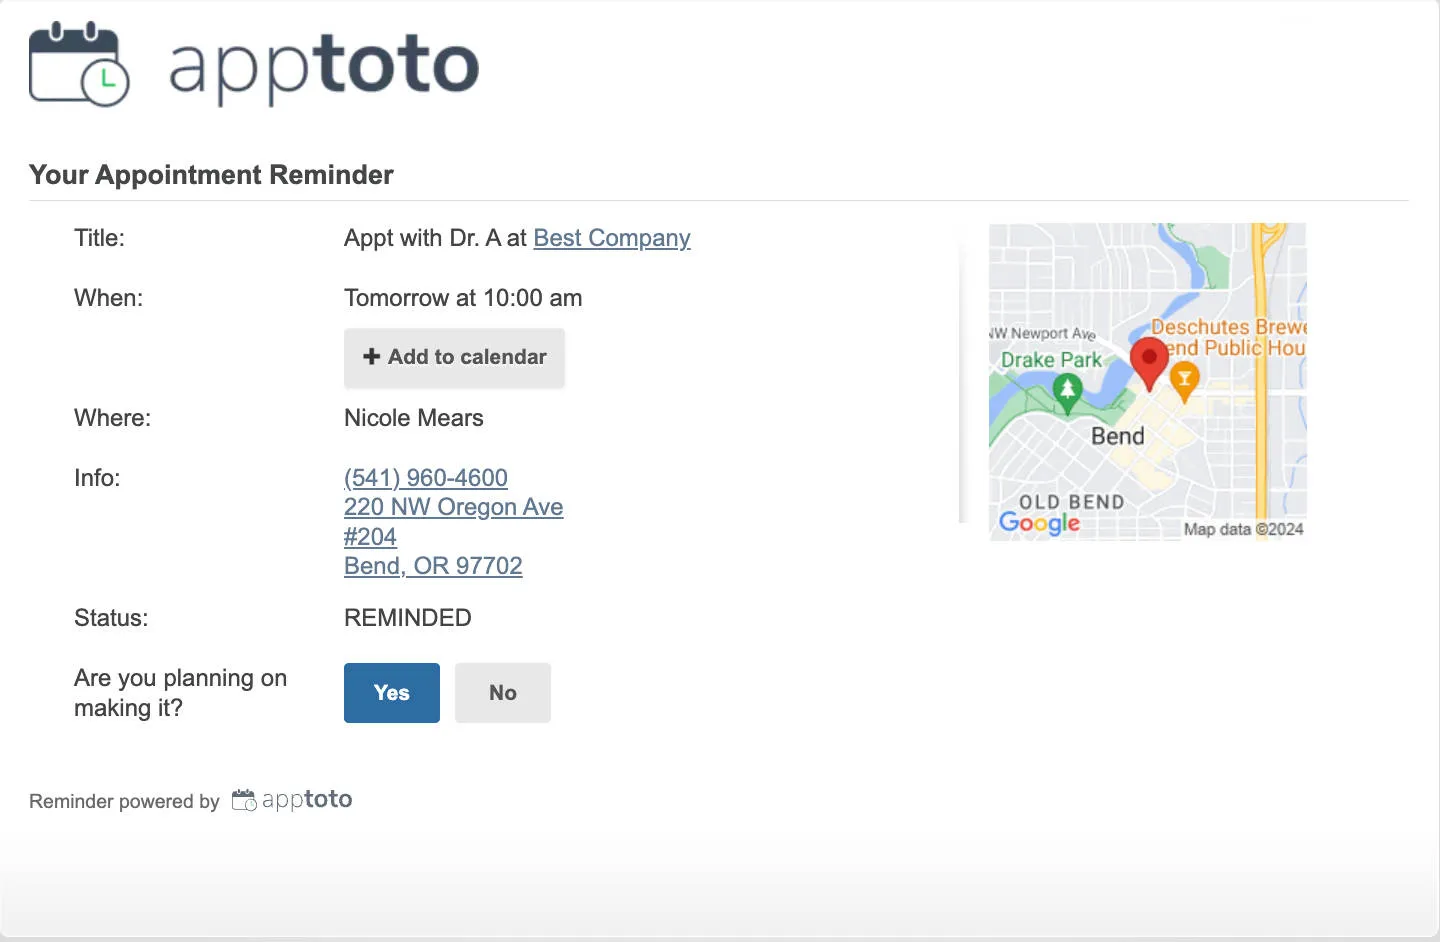
Configuring Your Appointment Pages
Section titled “Configuring Your Appointment Pages”To set up your Appointment Pages, navigate to your Settings > Appointment Pages tab.
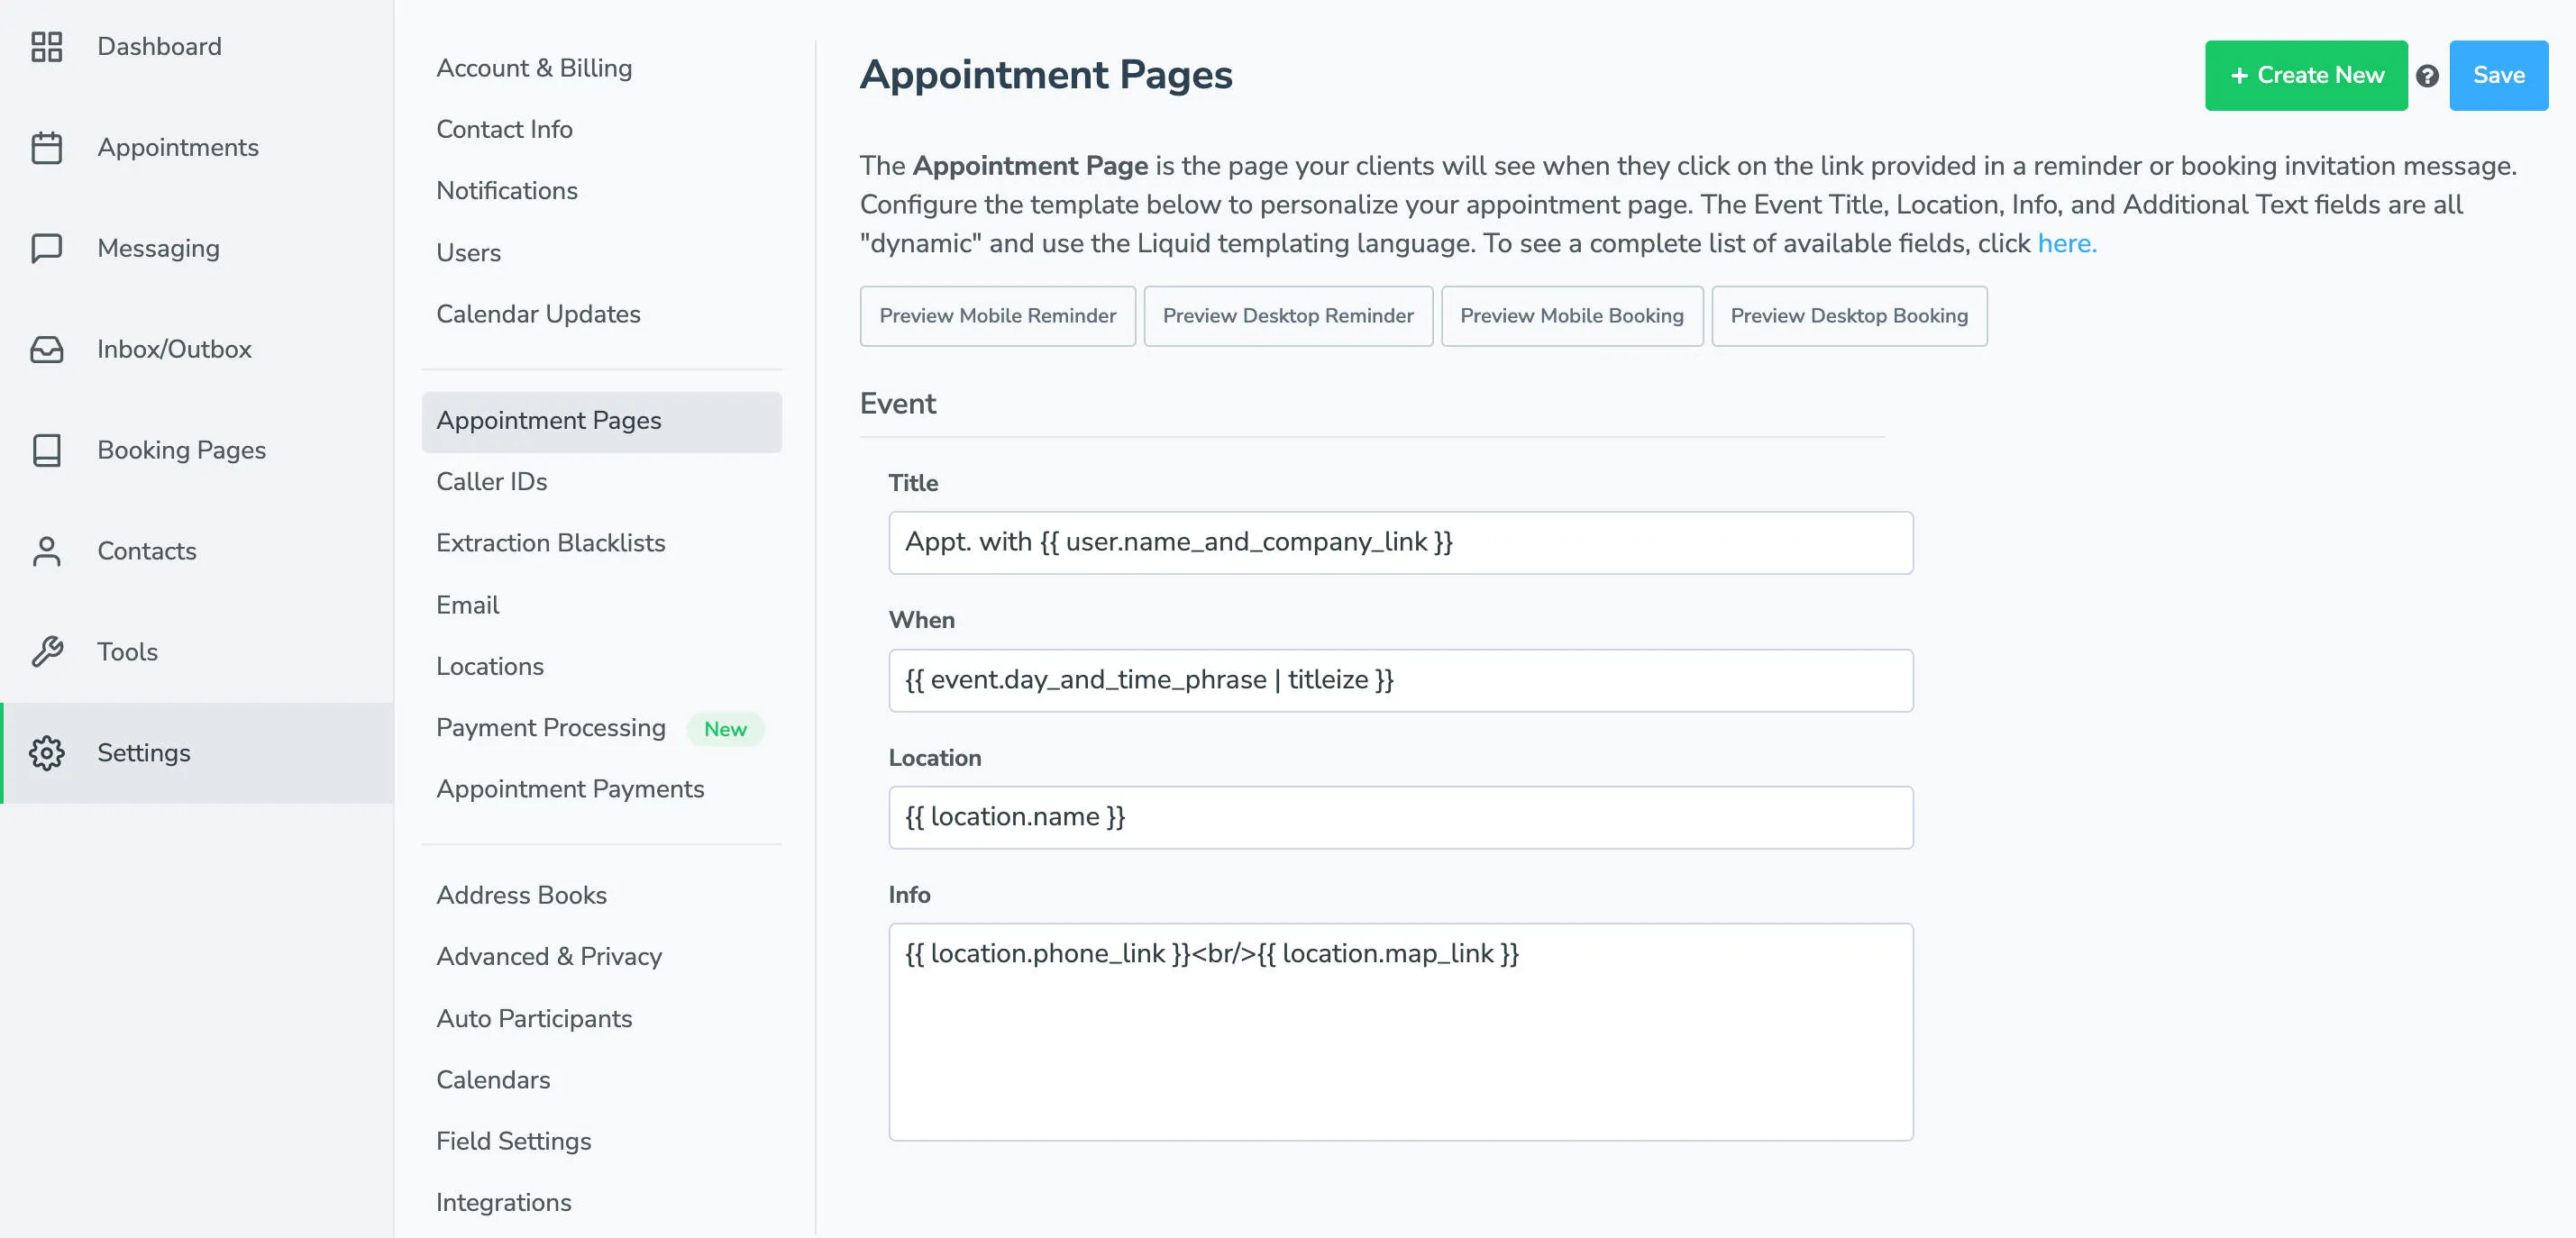
These default settings will pull information directly from each appointment to plug into the corresponding field, but each section can be customized to suit your needs using the same Fields as your Auto Messages.
Booking Prompt and Reminder Prompt – These two fields will be inserted in their respective message types (Booking messages or Reminder messages), and will insert the contents of that field into the Appointment Page (e.g. “Does this time work for you?” or “Do you plan on making it?”), further encouraging your clientele to respond to the message.
Additional Text – This is where you can include specific information (e.g. driving directions, special instructions) that will be conveyed to all recipients of this specific Appointment Page.
At any point during this editing step, you can preview exactly how those pages will appear to your customers by clicking on one of the Preview buttons on the right-hand side of the page.
Additional Pages
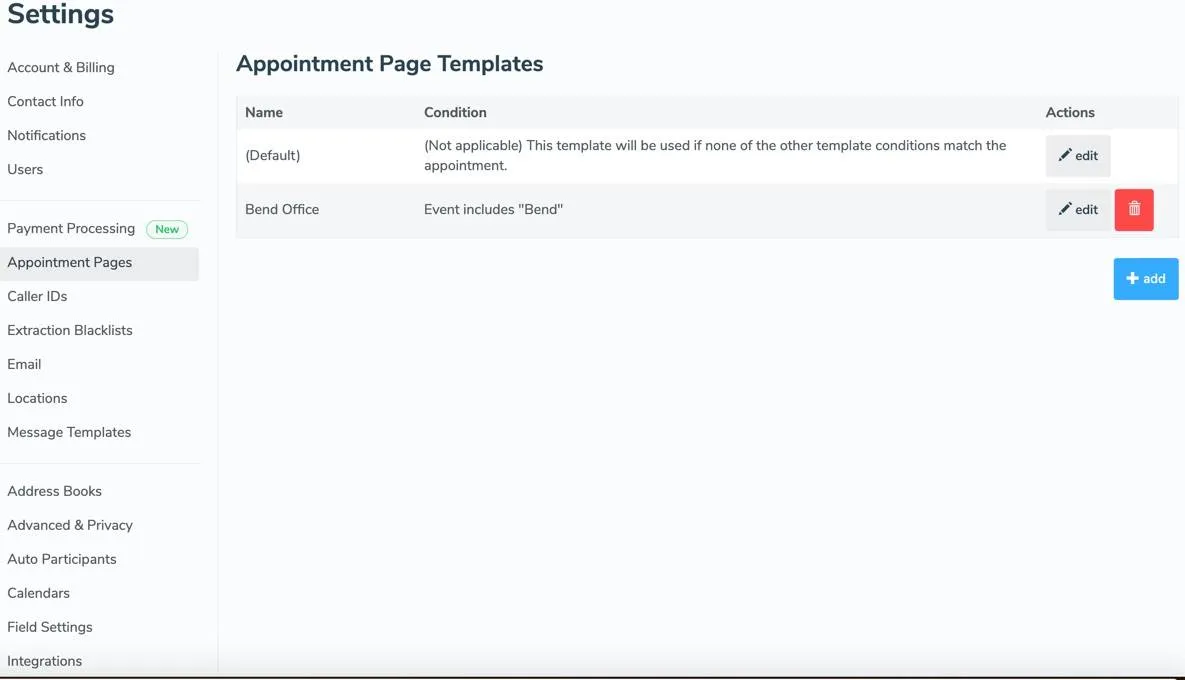
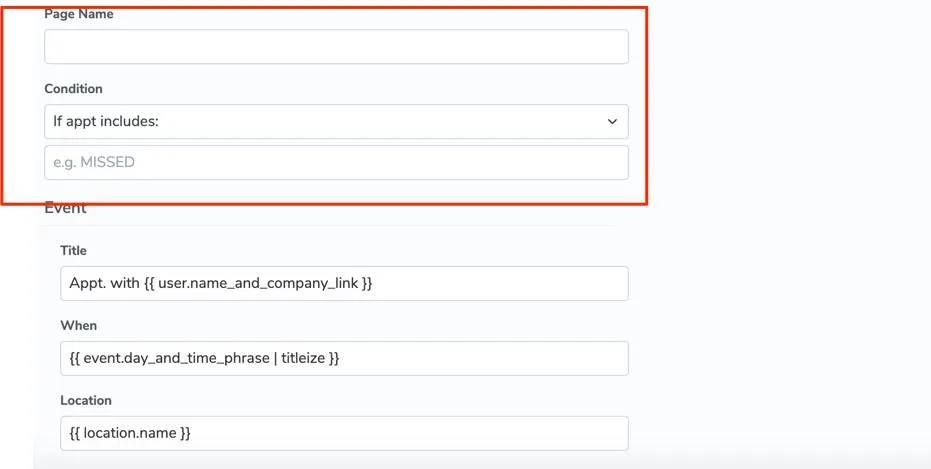
Section titled “Additional Pages”By default, your account will start with one default appointment page to use for all appointments, but you can easily set up multiple different pages to convey different information based on specific keywords. To set up additional appointment pages, simply click the “Create New Template” button at the bottom of the page. This will bring up a page similar to the default Appointment Page, with the addition of a page title and condition feature to trigger this specific page based on a key phrase of your choice that you’ll be including in the relevant appointments.
Once this new page is established, save your changes, and that will direct you to the list of your Appointment Pages which you can then edit by clicking on their corresponding edit buttons, or you can generate further additional Appointment Pages via the “+Add” button at the bottom of the page.