
Adding Users to Your Account
This article is about giving other people access to your Apptoto account. If you’re trying to log in to Apptoto, use this link.
The Settings > Users tab is where you invite teammates to your account, manage their permissions, and switch between accounts you have access to. Each person you invite keeps their own Apptoto identity and password — they don’t share yours — and they can be invited to multiple accounts and switch between them at any time.
The Users tab
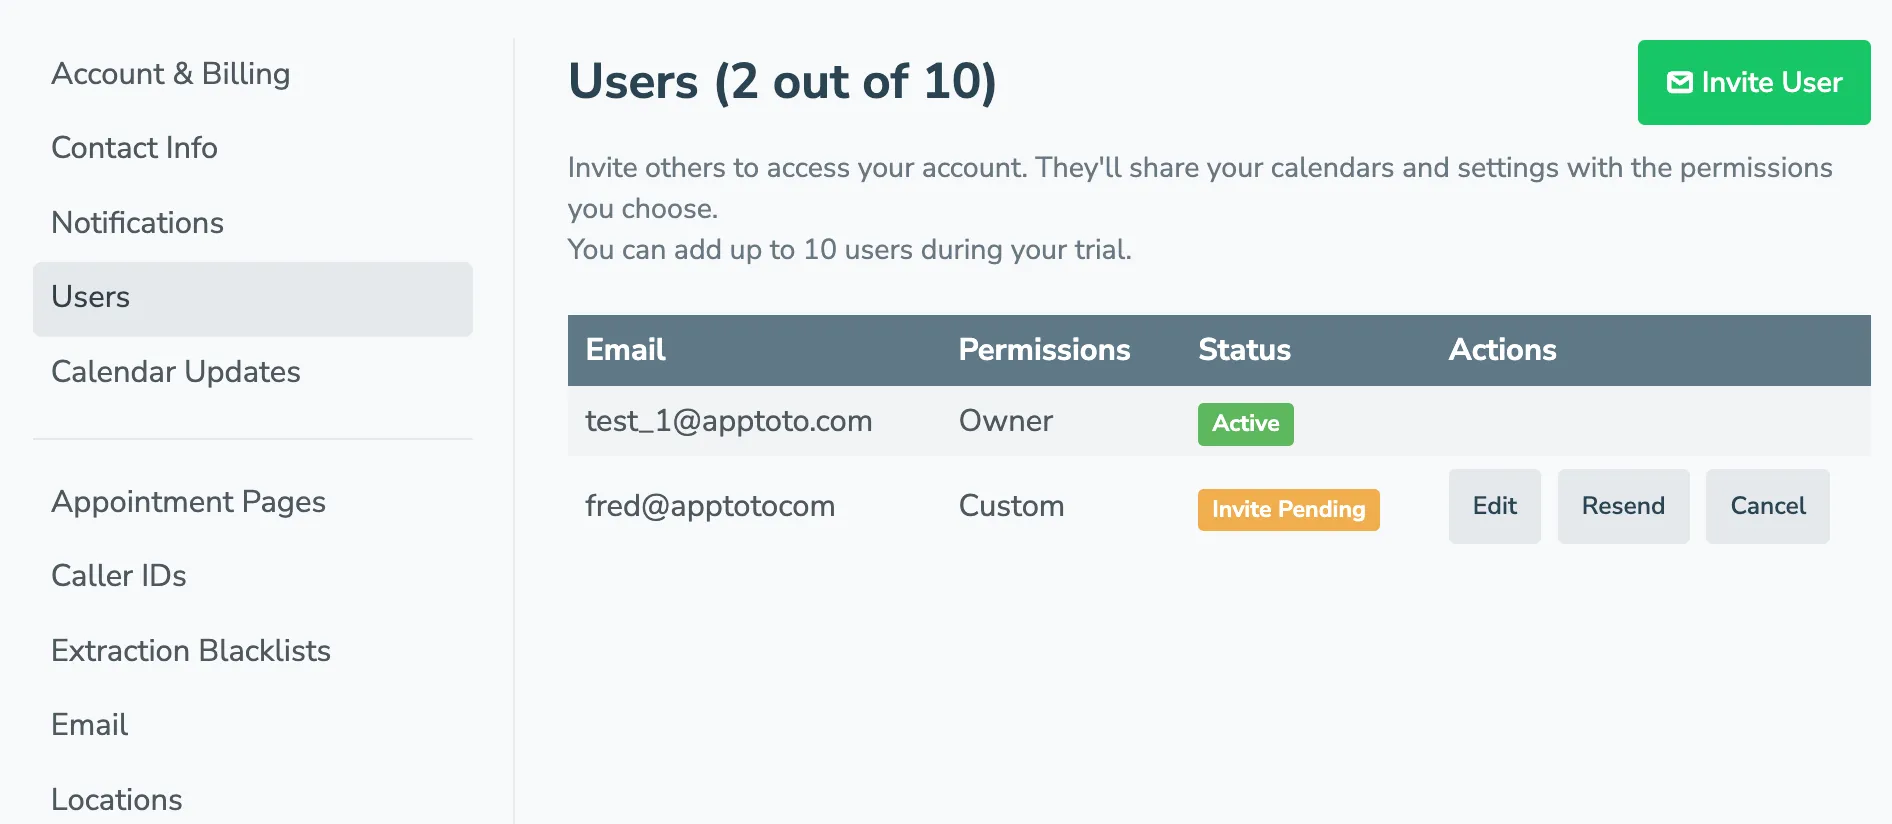
Section titled “The Users tab”Go to Settings > Users. Everyone with an Apptoto account sees this tab. From here, the account owner can:
- Invite new users by email.
- See all invited and linked users along with their status (Active or Invite Pending).
- Edit or remove the people who already have access.
- Resend or cancel any invite that hasn’t been accepted yet.
- See invites that other accounts have sent to you, and accept or decline them.
- See a list of other accounts you have access to, with a Switch to Account button next to each.
The header shows how many users you’ve added relative to your plan limit, e.g. Users (3 out of 10). This count includes invited users, pending invites, and any group users on your account.
Inviting a user
Section titled “Inviting a user”-
Go to Settings > Users and click Invite User in the top right.
-
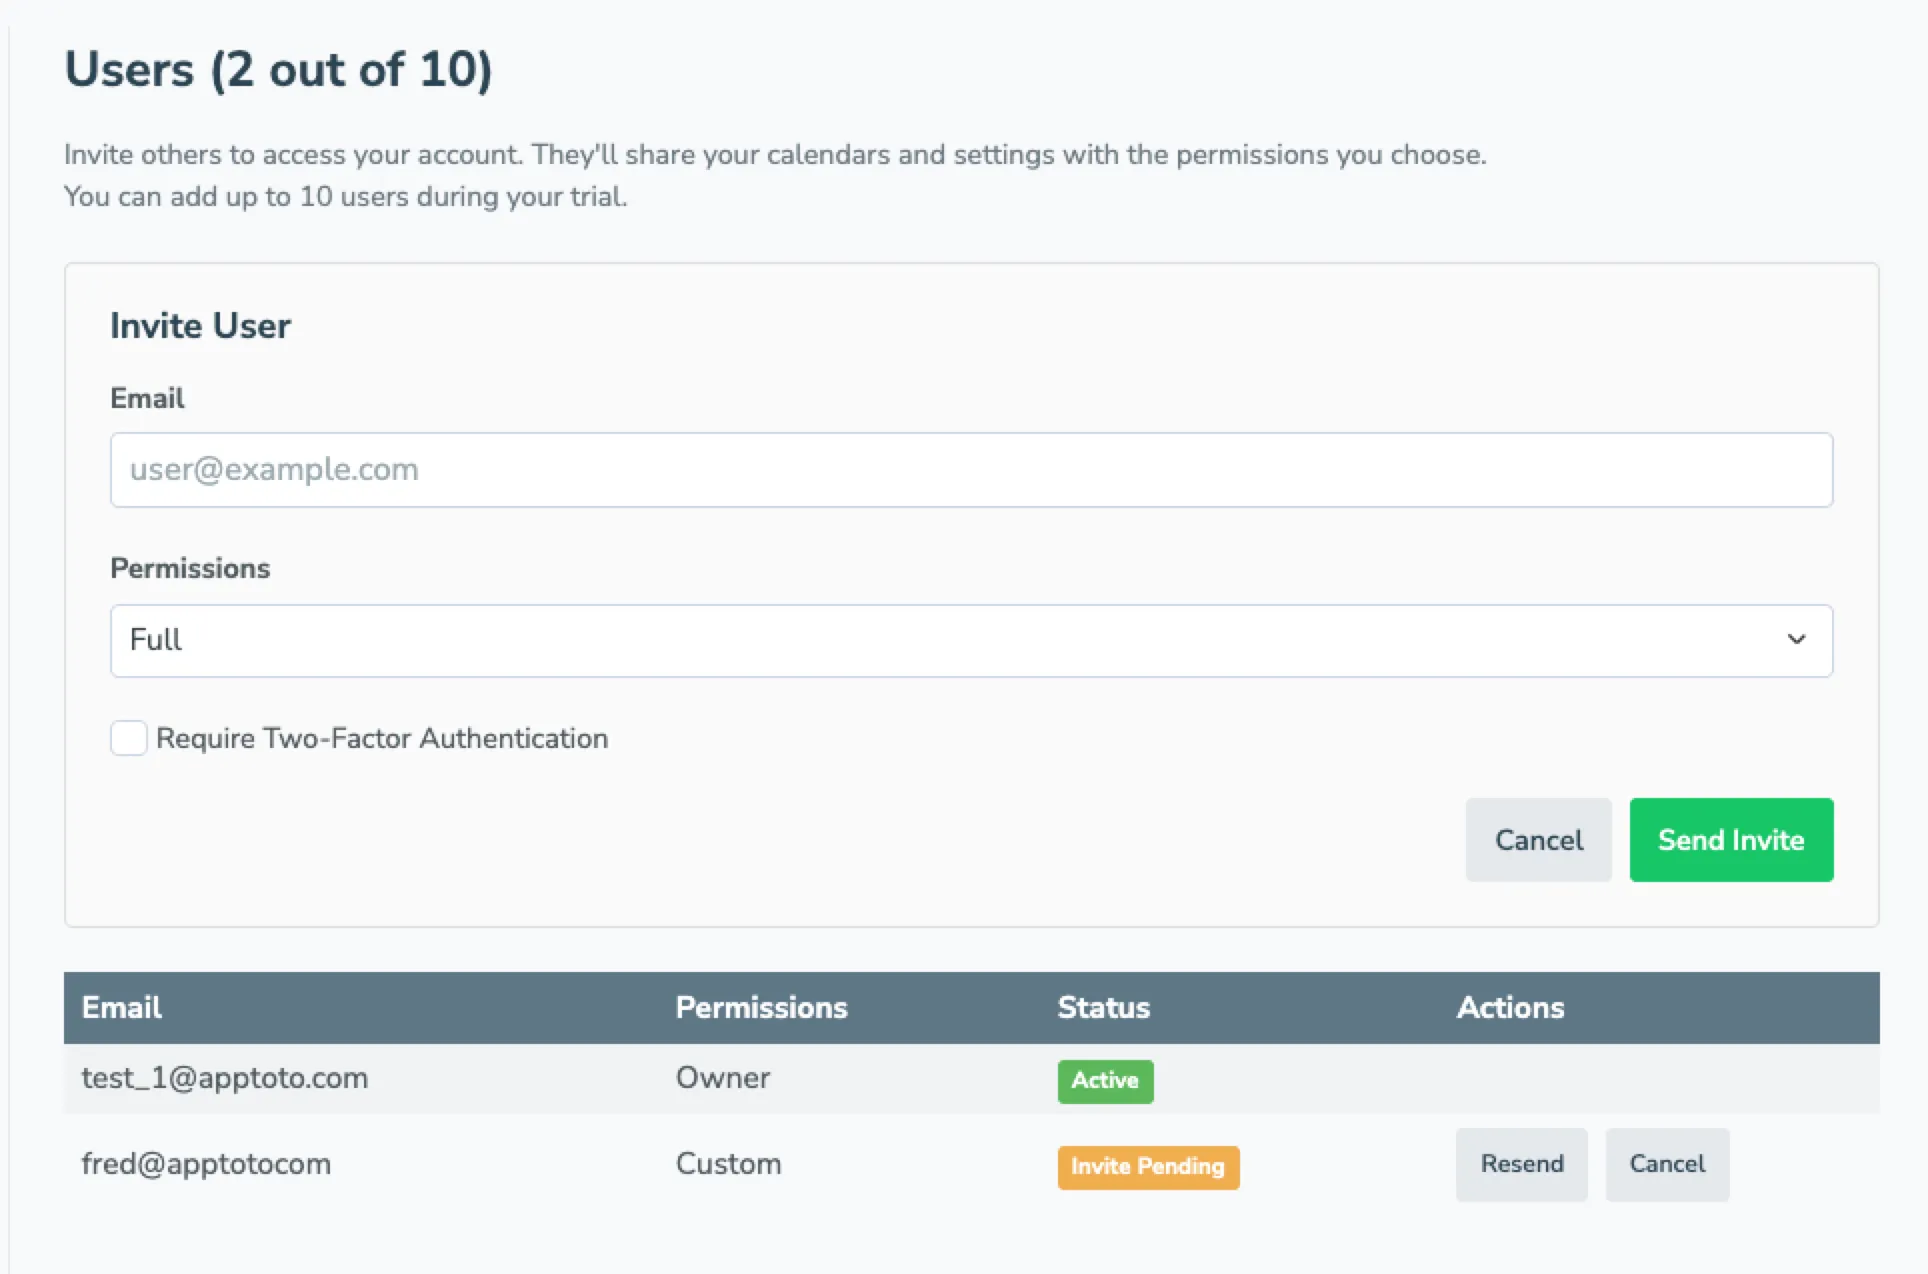
Fill in the invite form:
- Email — the address of the person you want to invite.
- Permissions — pick Full, Agent (No Settings), Custom, or Internal Booking Pages Only (see Permission Levels below).
- Calendar Access (Agent and Custom only) — choose All Calendars or Restricted, then check the calendars the user can see.
- Address Book Access (Agent, Custom, and Internal Booking Pages Only) — choose All Address Books or Restricted, then check the address books the user can see.
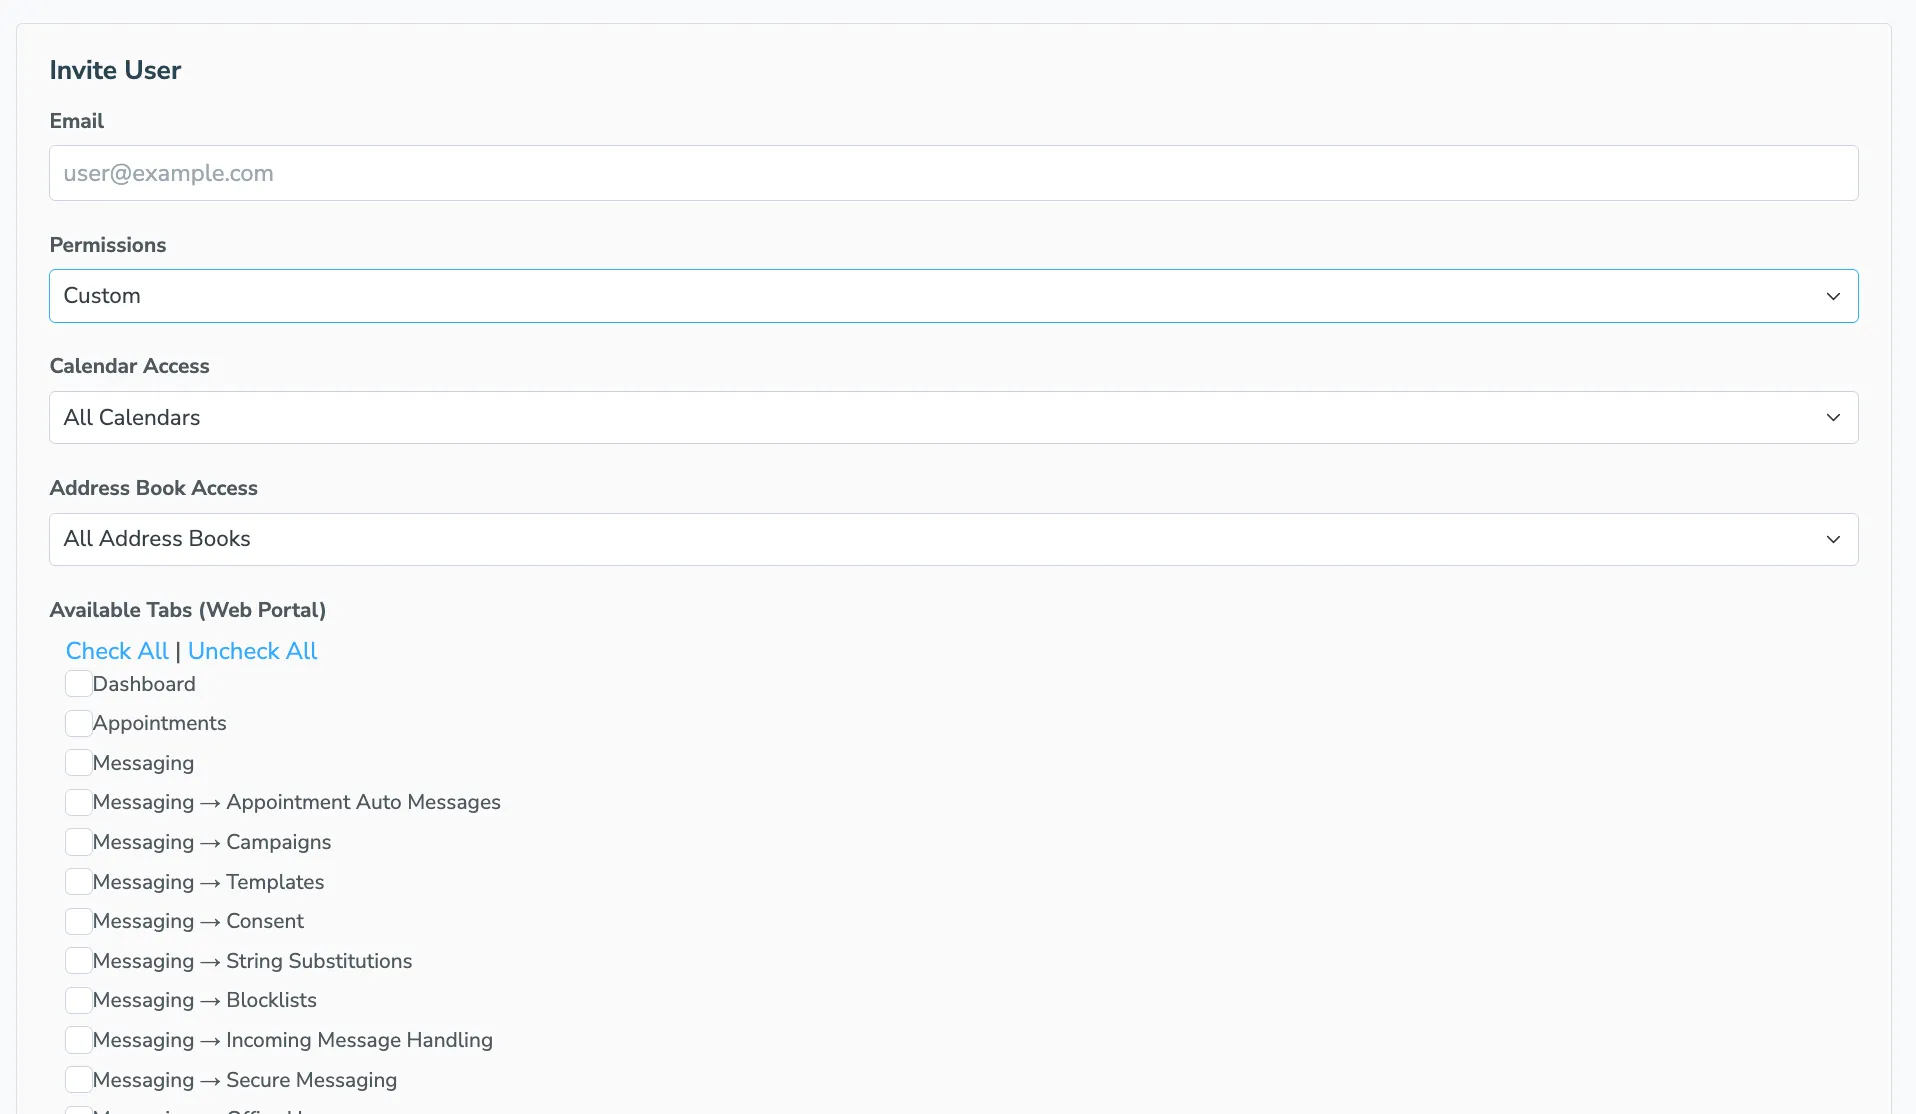
- Available Tabs (Web Portal) (Custom only) — check the portal tabs the user can open (Appointments, Messaging, Inbox/Outbox, Booking Pages, etc.).
- Optionally check Require Two-Factor Authentication to require this user to set up 2FA before signing in.
-
Click Send Invite. The user receives an email with a link to accept.
Invites expire after 30 days. Accounts are limited to 20 invites per day to prevent abuse.
Permission Levels
Section titled “Permission Levels”| Permission | What the user can access |
|---|---|
| Full | Everything you can see — all calendars, address books, and portal tabs. |
| Agent (No Settings) | Appointments, messaging, and inbox, with calendar and address book access optionally restricted to specific items. Cannot open Settings. |
| Custom | You pick exactly which calendars, address books, and portal tabs the user can see. |
| Internal Booking Pages Only | Only your internal booking pages. The user can book appointments through them but can’t open the rest of the portal. |
The Require Two-Factor Authentication toggle is available on every permission level. You can also require 2FA across all users on the account from the bottom of the Users tab — see Two-Factor Authentication.
Choosing Custom expands the form so you can pick exactly which calendars, address books, and portal tabs the user can see. Use Check All and Uncheck All to bulk-toggle the tab list.
Internal Booking Pages Only
Section titled “Internal Booking Pages Only”Use Internal Booking Pages Only for someone who books appointments for your clients — a front desk or call center, for example — but shouldn’t see your appointments, messages, contacts, or settings.
When a user with this permission logs in to your account:
- They land on a page listing your internal booking pages (only pages that are turned on are listed). Clicking one opens it so they can book.
- They can’t open the portal. Following a link to any other part of Apptoto brings them back to that list.
- The Find client and Find guests searches on your internal pages only show contacts from the address books you allow under Address Book Access.
- Their username dropdown in the top right still works as the Account Switcher, so they can switch to their own account or other accounts, change their password, set up 2FA, and log out.
- They can’t use your account from the Apptoto mobile app or the Google Add-On.
To set up the pages themselves, see Internal Booking Pages.
What the invitee sees
Section titled “What the invitee sees”The invitee gets an email saying “[Your Name] has invited you to access their Apptoto account with [Permission Level] permissions” and a button to accept.
If they already have an Apptoto account: they click Accept Invite, and they’re switched into your account immediately. They can use the Account Switcher to move between their own account and yours.
If they don’t have an Apptoto account yet: the email button reads Sign Up & Accept. They sign up for Apptoto with the invited email address, and after creating their account they’re shown a “You’ve Been Invited” page where they can click Accept Invite or Set Up My Own Account (which starts a 14-day free trial of their own).
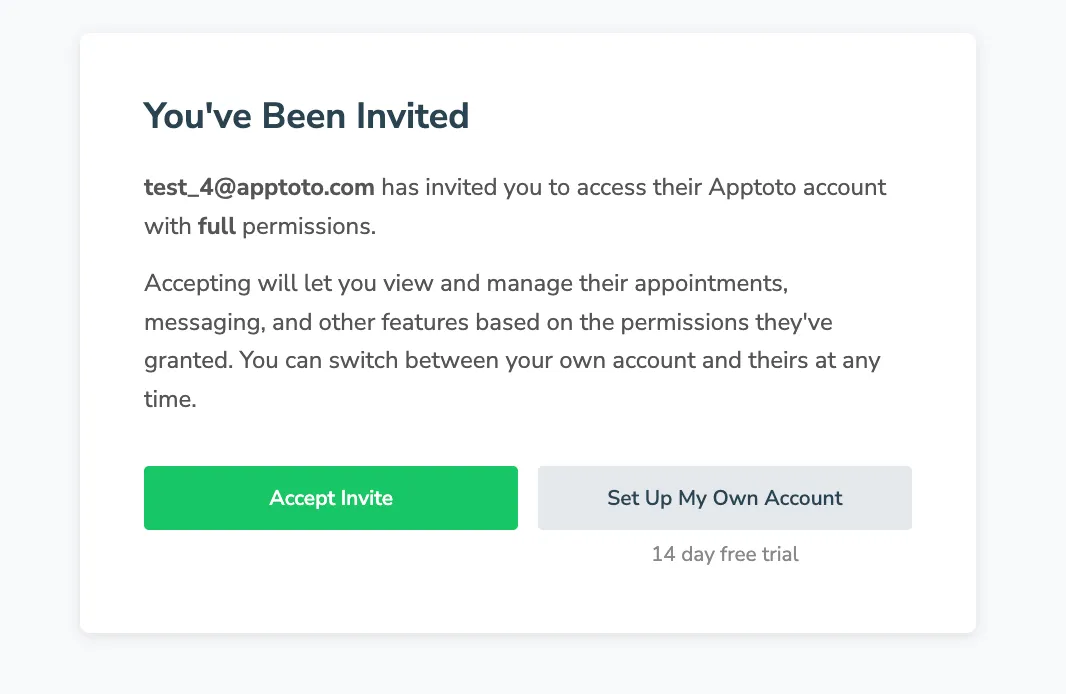
If the user already has their own Apptoto account, the second button on the acceptance page reads Maybe Later instead of Set Up My Own Account. Clicking it leaves the invite in a deferred state — they can still accept it later from the Account Switcher.
Managing pending invites
Section titled “Managing pending invites”Pending invites appear in the Users table with a yellow Invite Pending status. From the row’s Actions, you can:
- Edit the invite to change the permissions, calendar/address book access, portal tabs, or 2FA requirement before the user accepts.
- Resend the invite email.
- Cancel the invite.
Once the user accepts, their status changes to Active and the actions become Edit and Remove.
Editing or removing a user
Section titled “Editing or removing a user”Click Edit in a user’s row to change their permissions, the calendars or address books they can see, the portal tabs they can open, or the per-user 2FA requirement. Click Remove to revoke their access to your account; this does not delete their Apptoto account, only the link to yours.
The Account Switcher
Section titled “The Account Switcher”Once you’ve accepted an invite to another account — or have access to multiple accounts — your username dropdown in the top right of the portal becomes the Account Switcher. Click your username to open it. From there you can:
- Switch back to My Account (your own).
- Jump to any account you have access to. The current account is marked with a green checkmark.
- See Pending Invites sent to you, with Accept and Decline buttons inline.
A red badge on the dropdown shows the count of pending invites waiting on you. The same dropdown also keeps your usual user options — Settings, Change/Set Password, Configure 2FA, Update Payment, and Log Out — below the list of accounts.
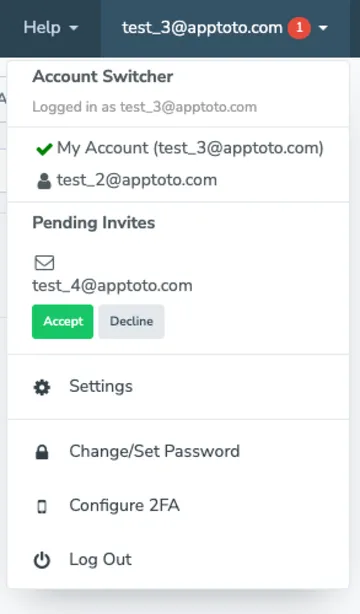
When you switch accounts, the entire portal reloads in the context of that account — you see only the calendars, contacts, and tabs the owner has granted you access to. The username shown on the dropdown updates to whichever account you’re currently viewing. Apptoto remembers the account you switched to last, so the next time you log in or visit the portal you’re placed back into that same account automatically.
Setting up your own account as a linked user
Section titled “Setting up your own account as a linked user”If you’ve been invited to (or linked into) someone else’s account but haven’t set up your own Apptoto account yet, choose My Account in the Account Switcher. You’ll see a Set Up Your Own Account screen with two options:
- Set Up My Account — starts a 14-day free trial and walks you through onboarding so you have your own calendars, appointments, and messaging.
- Go Back — returns you to the linked account you were just viewing.
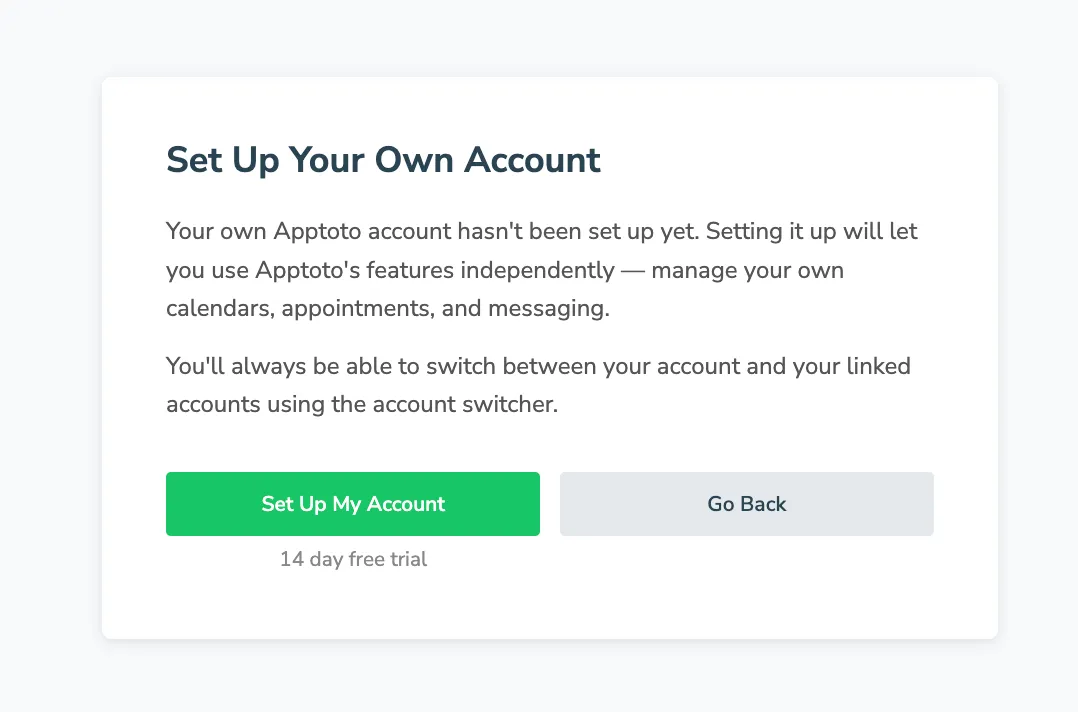
You can always switch between your own account and any linked accounts using the Account Switcher.
Mobile app and Google Add-On
Section titled “Mobile app and Google Add-On”When you log into the Apptoto mobile app or the Google Add-On, you’re placed into the account you switched to most recently in the web portal. If you want the mobile app or add-on to use a different account, switch to that account in the web portal first.
Additional Logins (legacy)
Section titled “Additional Logins (legacy)”Some older accounts have Additional Logins — extra users who sign in with their own email and password but share your account directly, without their own Apptoto identity. These continue to work exactly as they always have:
- Existing Additional Logins keep working with no changes required.
- They appear in a separate Additional Logins section at the bottom of the Users tab.
- If your account already has Additional Logins, you can still add more from that section.
The invite-based flow described above is the recommended way to give someone access to your account going forward, because invited users keep their own identity, can be invited to multiple accounts, and don’t share a password with anyone else.