Appointment Editor
Overview
Section titled “Overview”The Appointment Editor is an all-in-one location for modifying the details of an event, in regards to the appointment itself, it’s participants, and the Auto Messages associated with it. At any point in viewing the Appointment Editor, you can switch to either the Event details, or the Participant details by clicking on the corresponding section on the left side of the dialog box.
Event Editor
Section titled “Event Editor”The event editor allows you to view and edit the details of your appointment, including title, date/time, timezone, location, and body.
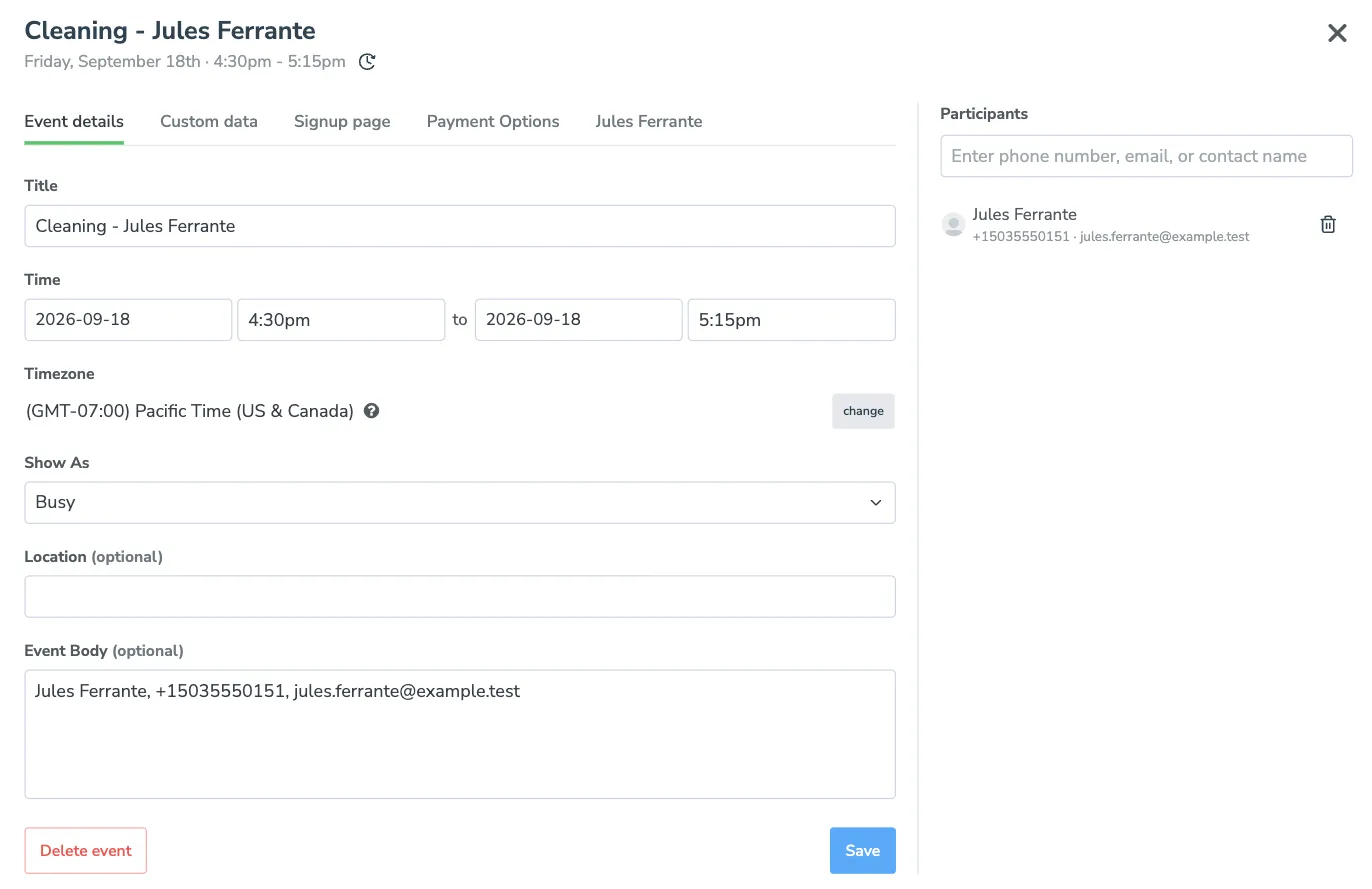
Show As
Section titled “Show As”Show As is how the appointment presents itself to anyone looking at your availability: whether the time reads as taken, and in what way. Changing it writes back to the calendar the appointment lives on, so your own calendar app shows the same thing.
Which choices you get depends on that calendar, because each one offers only what it can actually express:
| Calendar | Choices |
|---|---|
| Apptoto, Google | Free, Busy |
| Microsoft 365, Office 365, Outlook | Free, Tentative, Busy, Out of Office, Working Elsewhere |
| Salesforce | Free, Busy, Out of Office |
On a calendar with no notion of free or busy at all, the field is not shown. On Outlook and Exchange calendars it is shown but cannot be edited, like the rest of the event editor.
Participant Editor
Section titled “Participant Editor”The participant editor allows you to both view and edit the participants for an appointment, and includes some further functionality.
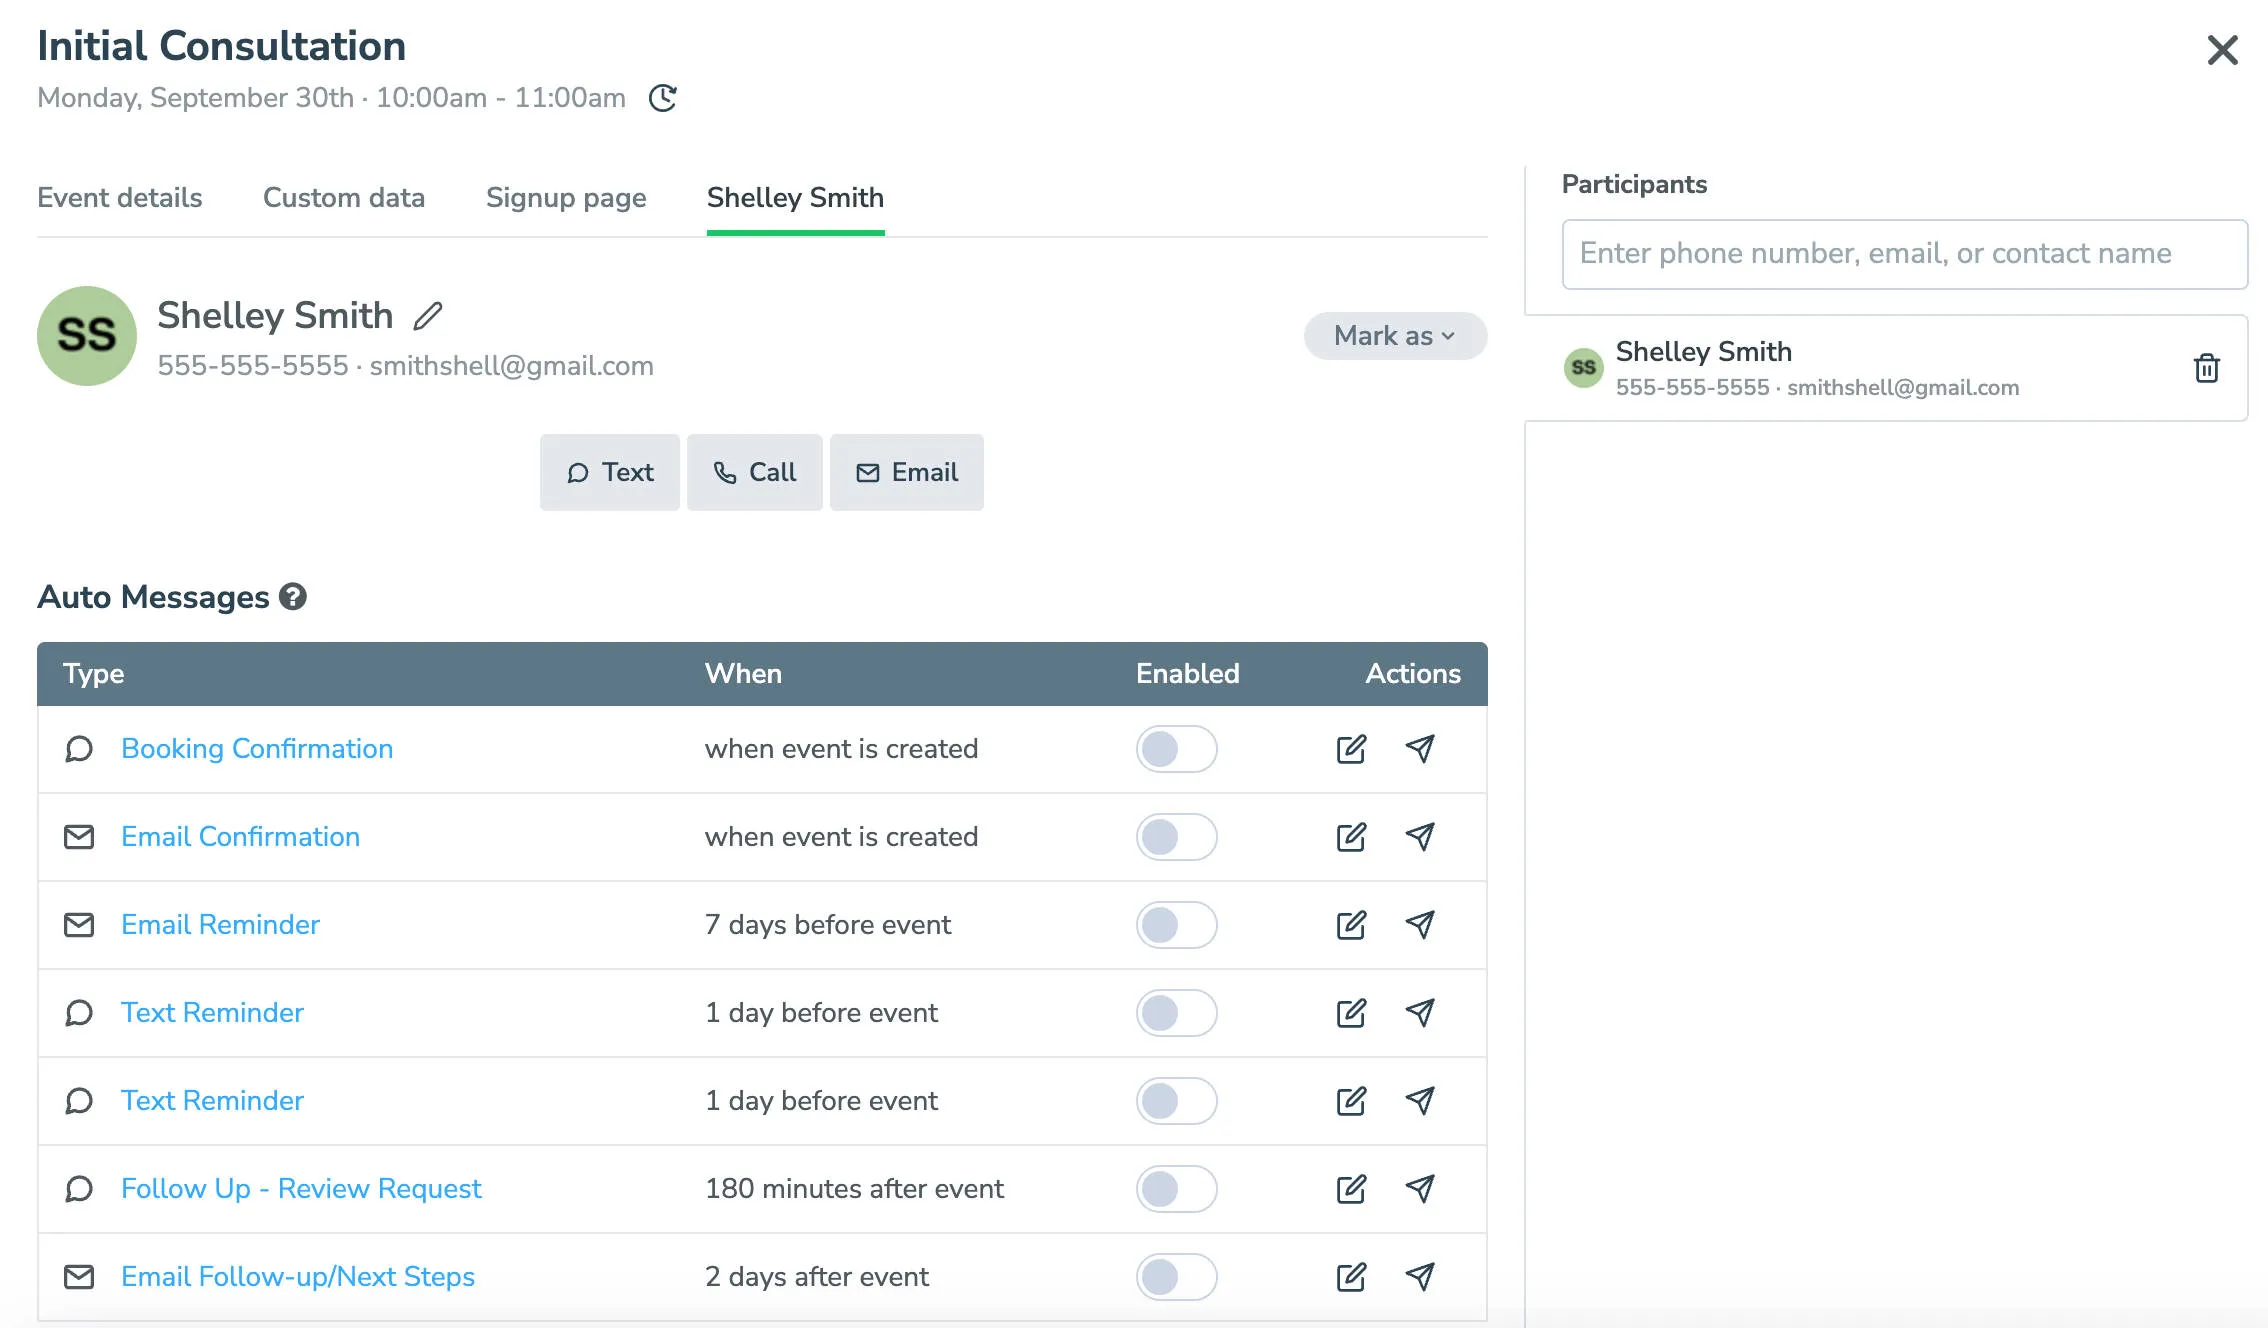
To edit a participant’s info, simply click the small pencil icon next to their name, either in the top of the window, or in the column to the left. To add another participant to the event, click the ‘+’ button in the left-hand column.
SMS, Call, and Email buttons – These buttons will bring you to a one-time message editor for this participant.
Auto Messages – This portion of the appointment editor displays the messages that have been sent to or are scheduled to send to the participant. Clicking on the title of any of these messages will bring you to a preview of the message that is scheduled to send (which you can edit similarly to the message editor), or to view the message that has already gone out.
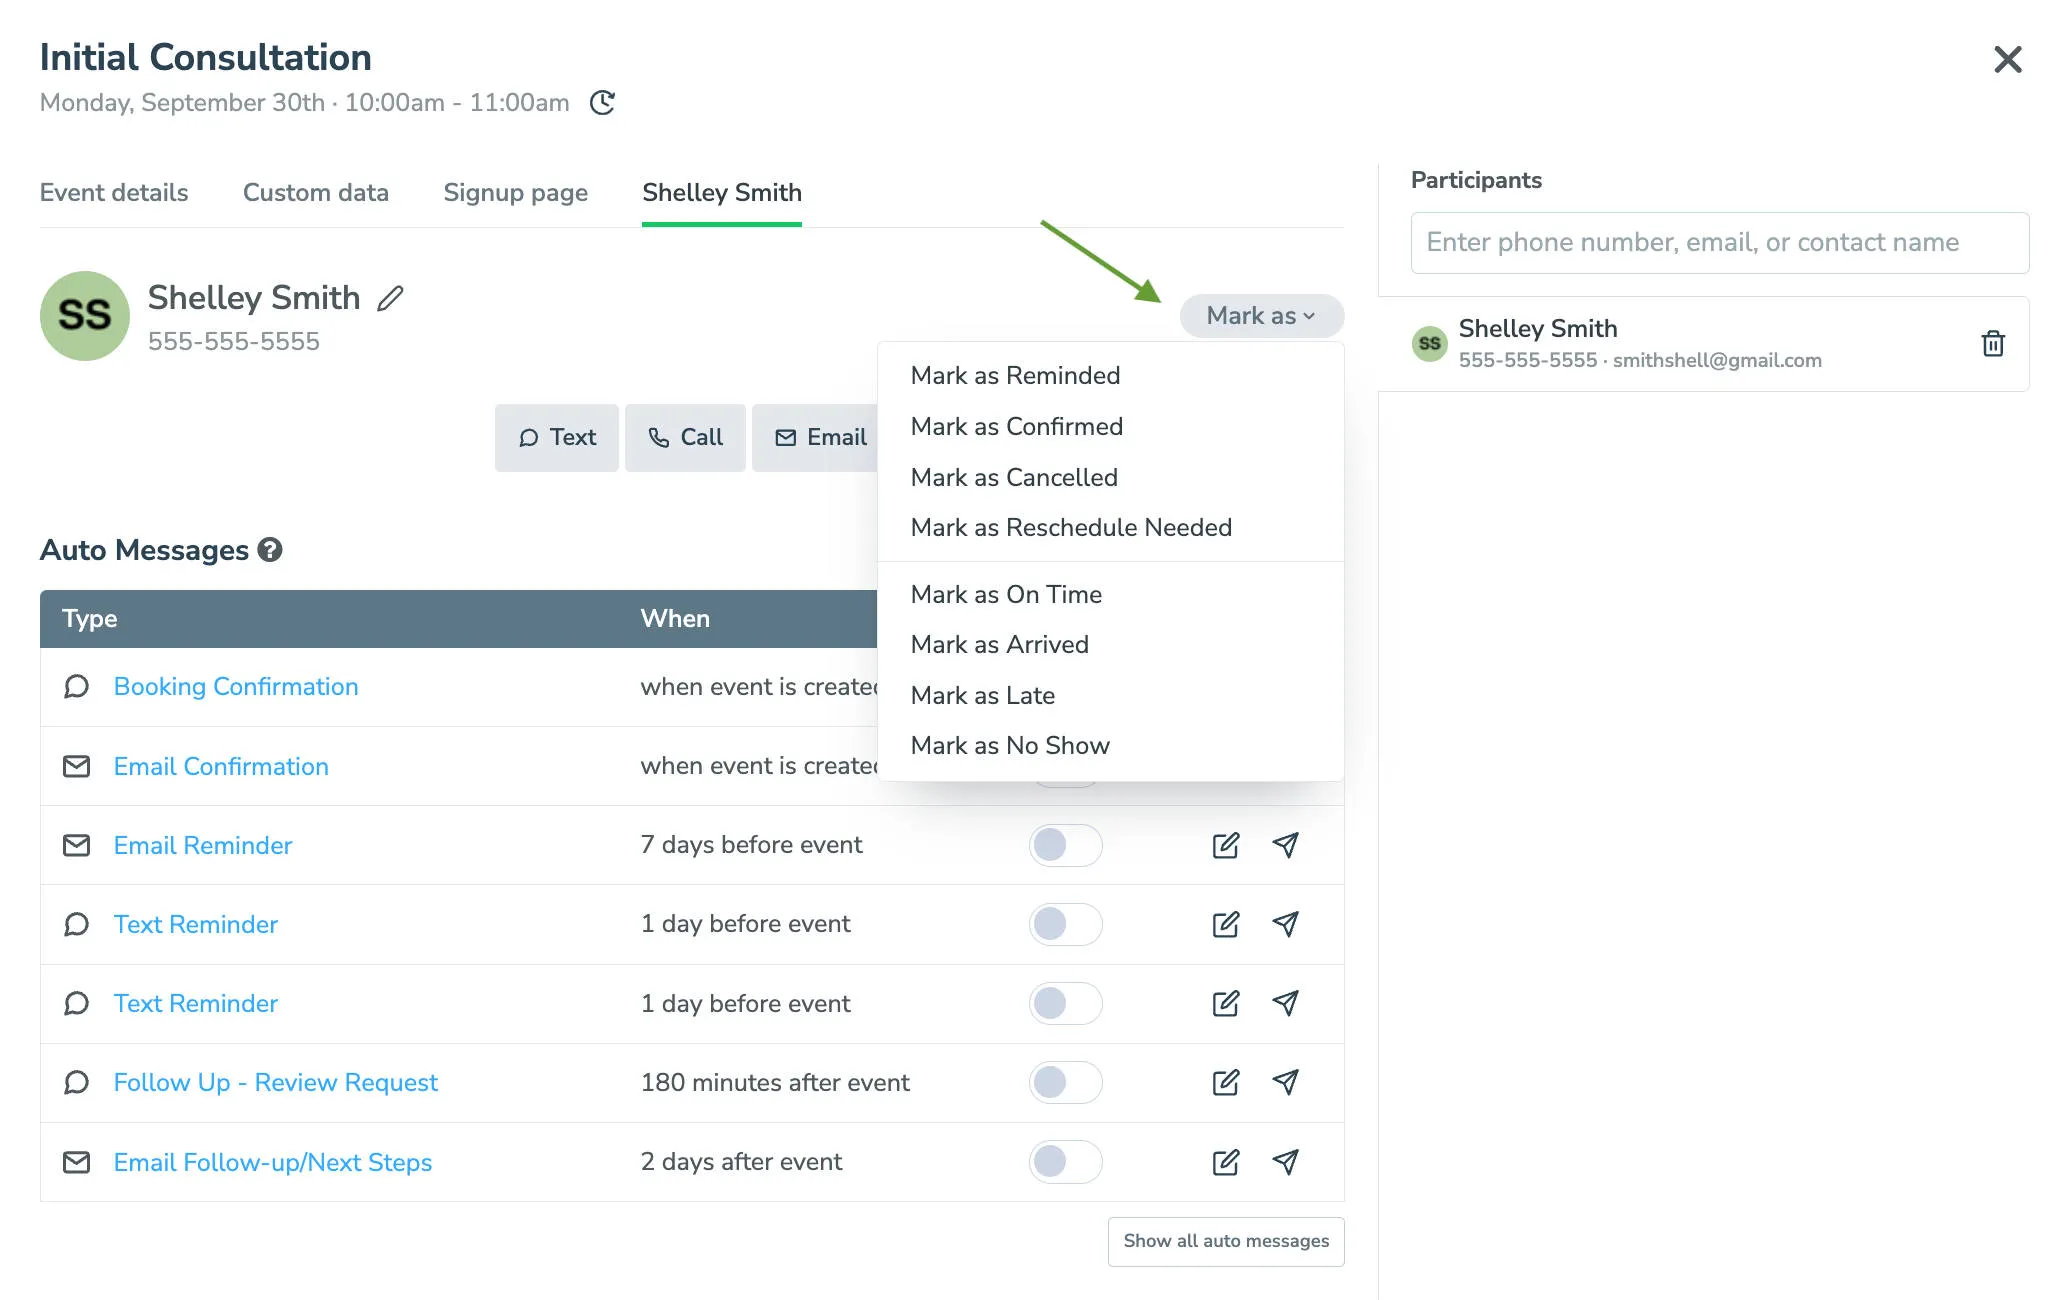
Actions – The actions button, located in the top-right corner of the window, will allow you to change the status of your appointment manually to one of four options:
- Reminded
- Confirmed
- Cancelled
- Reschedule Needed