Ensuring Email Deliverability
If you send Apptoto emails from a custom business email address (such as you@yourbusiness.com), you need to configure DNS records to prevent those messages from landing in spam. This applies when your Settings > Outgoing Email tab uses a custom address on your own domain, or sends from your calendars’ Email or Admin Email addresses.
Check your sending address
Section titled “Check your sending address”If you’re unsure if you’ve enabled Apptoto to send emails on your behalf from a custom domain, you can check your settings using the steps below:
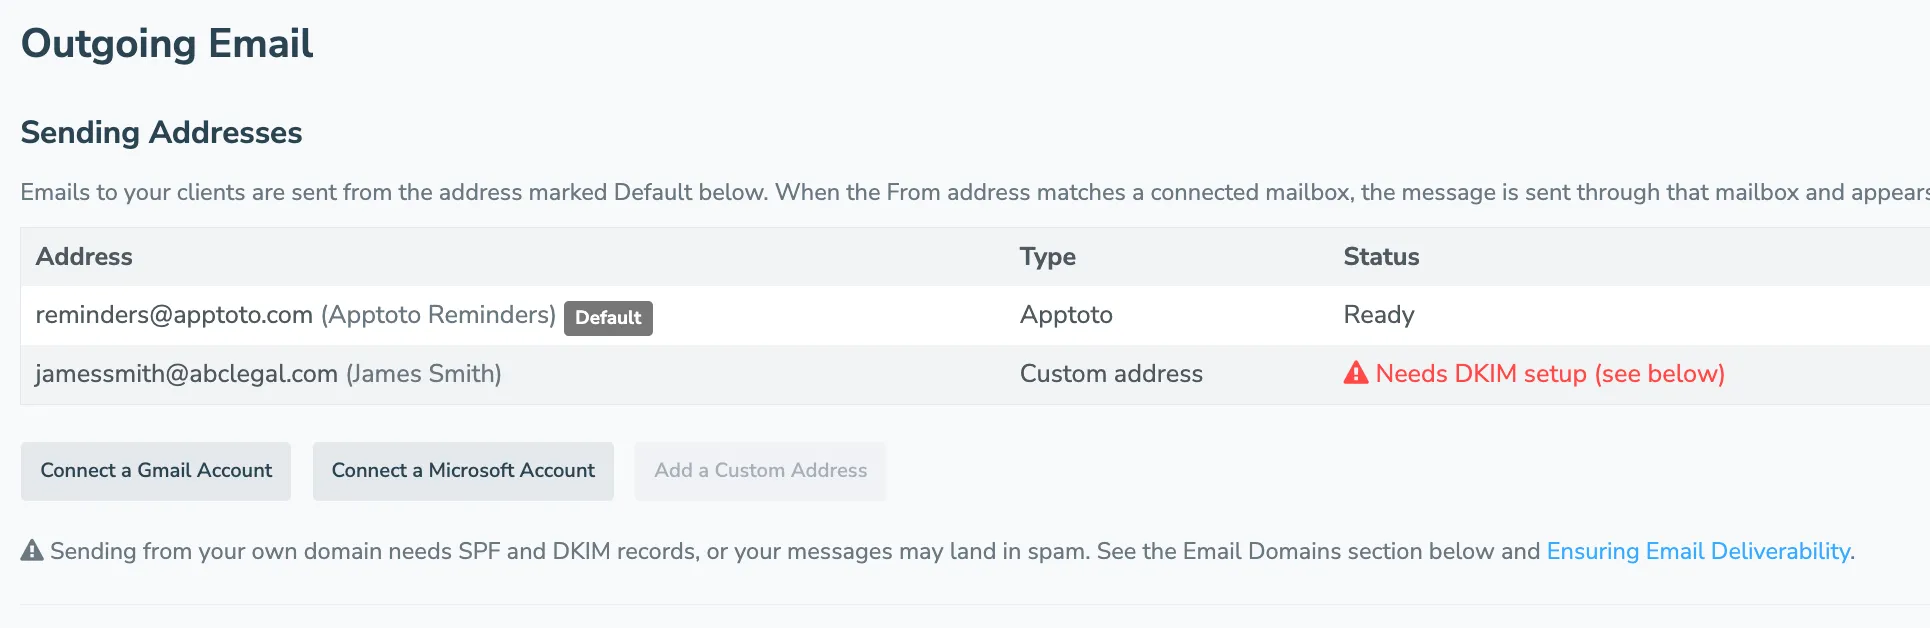
- Find your sending addresses: Go to Settings > Outgoing Email and look at the Sending Addresses table.
- Determine if DNS setup is needed: If your Default sending address is a custom address on your own domain, or Calendar-Specific Sending is set to use your calendars’ Email or Admin Email addresses, complete the SPF and DKIM steps below. Addresses sent through a connected Gmail or Microsoft mailbox need no DNS setup, and a custom address that still needs it shows Needs DKIM setup right in the table.
Send through a connected mailbox instead
Section titled “Send through a connected mailbox instead”If the address you want to send from is a Gmail or Microsoft account, you can connect that mailbox to Apptoto instead of setting up SPF and DKIM. Messages go out through the account itself, so they appear in its Sent folder and no DNS changes are needed for that address.
You can connect several mailboxes and have each calendar send from its own address. See Outgoing Email for the full setup.
If an address has no matching connected mailbox, Apptoto sends that message on your behalf instead, which is when the SPF and DKIM steps below apply.
Adding or Updating Your SPF Records
Section titled “Adding or Updating Your SPF Records”An SPF (Sender Policy Framework) record tells email servers which services are authorized to send on behalf of your domain. You need to add Apptoto to your domain’s SPF record.
Work with your IT team or DNS provider to make the following change:
If your domain does not yet have an SPF record, create a new TXT record with this value to allow Apptoto to send messages on your behalf:
v=spf1 a:mailers.apptoto.com ~allIf you already have an SPF record, add a:mailers.apptoto.com before the final all segment. For example, if your SPF record is currently v=spf1 a mx include:sendgrid.net -all then you should make it:
v=spf1 a mx include:sendgrid.net a:mailers.apptoto.com -allIf you have multiple include or a records in your SPF record already, you may need to avoid hitting the “10 lookup limit” by using IP addresses instead of a records. To do that use the following:
v=spf1 ip4:167.89.8.91 ~allNote: The IP address may change in the future, so using a:mailers.apptoto.com is the recommended approach when possible.
Set up DKIM on your domain in Apptoto
Section titled “Set up DKIM on your domain in Apptoto”DKIM (DomainKeys Identified Mail) adds a cryptographic signature to your emails so recipients know messages truly came from you.
DKIM is a different technique than SPF. DKIM “uses your domain name to sign your emails with a digital “signature” so your customers know it’s really you sending those emails and that they haven’t been altered in transit.[1]
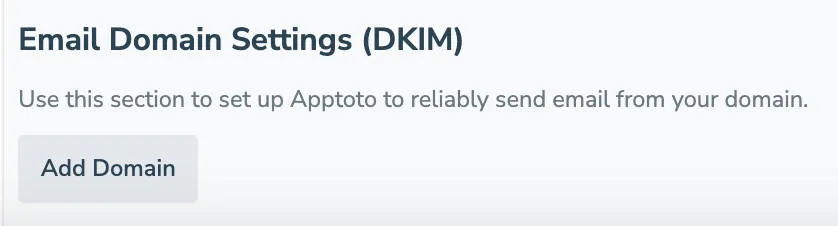
- Add your domain: Go to the Settings > Outgoing Email tab and find the Email Domain Settings (DKIM) section. Click Add Domain.
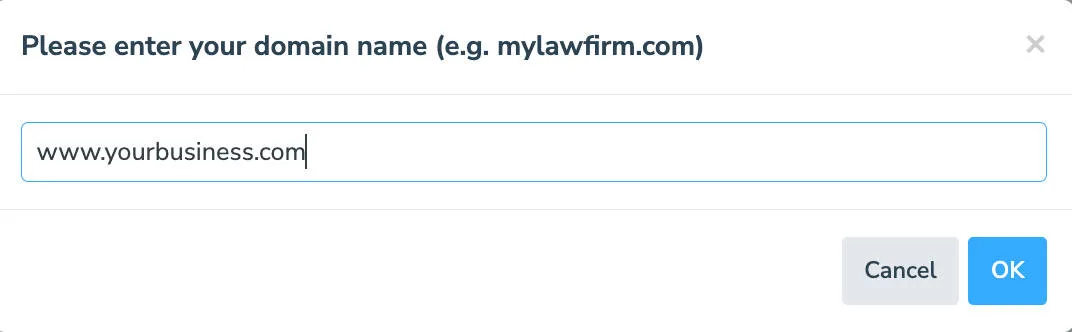
- Enter your domain: Type your business domain in the pop-up and click OK.
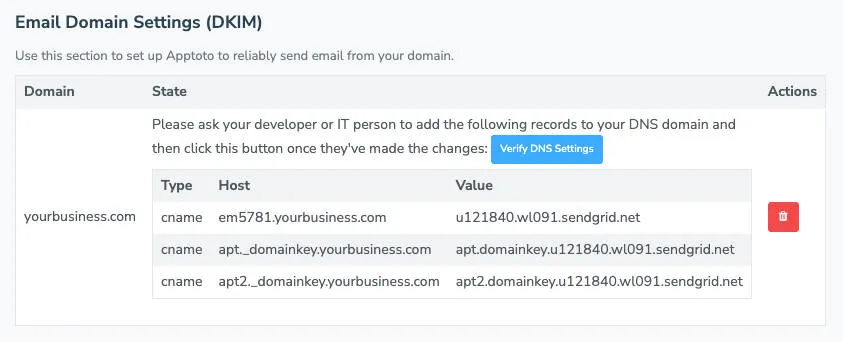
- Add the CNAME records to your DNS: Apptoto generates 3 CNAME records. Work with your IT team or DNS provider to add all three records exactly as shown.
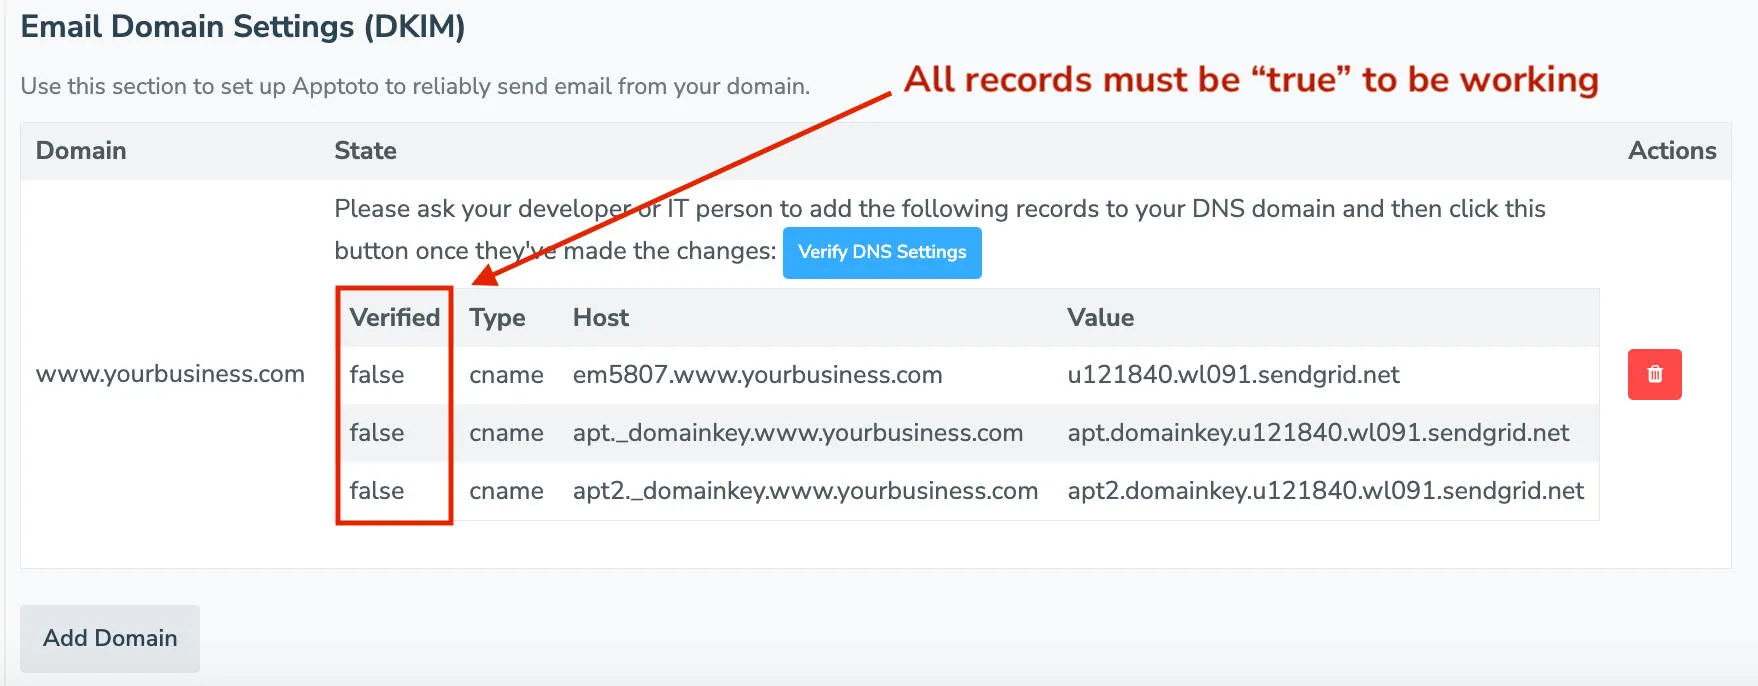
- Verify the DNS records: Return to Settings > Outgoing Email and click Verify DNS Settings. A Verified column appears. All three records must show true.
DNS Verification Needed for DKIM in Apptoto
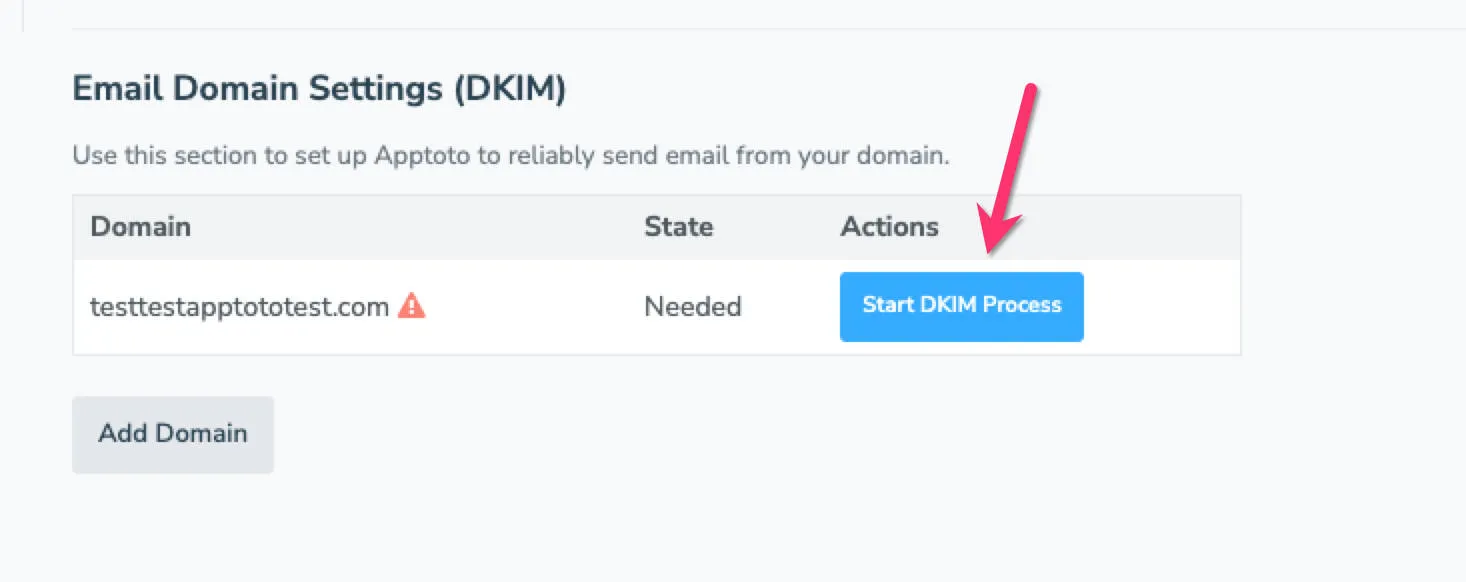
Section titled “DNS Verification Needed for DKIM in Apptoto”If you have already added your custom domain to Apptoto, but the DKIM process has yet to be completed, you will see the following in the Settings > Outgoing Email tab.
Please complete verification steps 3-4 in the “Setting Up DKIM on Your Domain in Apptoto” section above.