
AI Assistant
The AI Assistant is a chat window inside your account. You tell it what you want in your own words, it works out which settings and screens are involved, and it shows you exactly what it intends to change before anything happens. It knows your calendars, your clients, your messages, and your settings, so you rarely have to describe where something lives.
It is for you and your staff - not for your clients. If you want something answering incoming texts, emails, and calls from clients, that is the AI Receptionist.
Opening the Assistant
Section titled “Opening the Assistant”On a computer, click AI Assistant in the navigation menu on the left, below AI Receptionist. The chat fills the tab, with a greeting and a few suggestions you can click to get started.
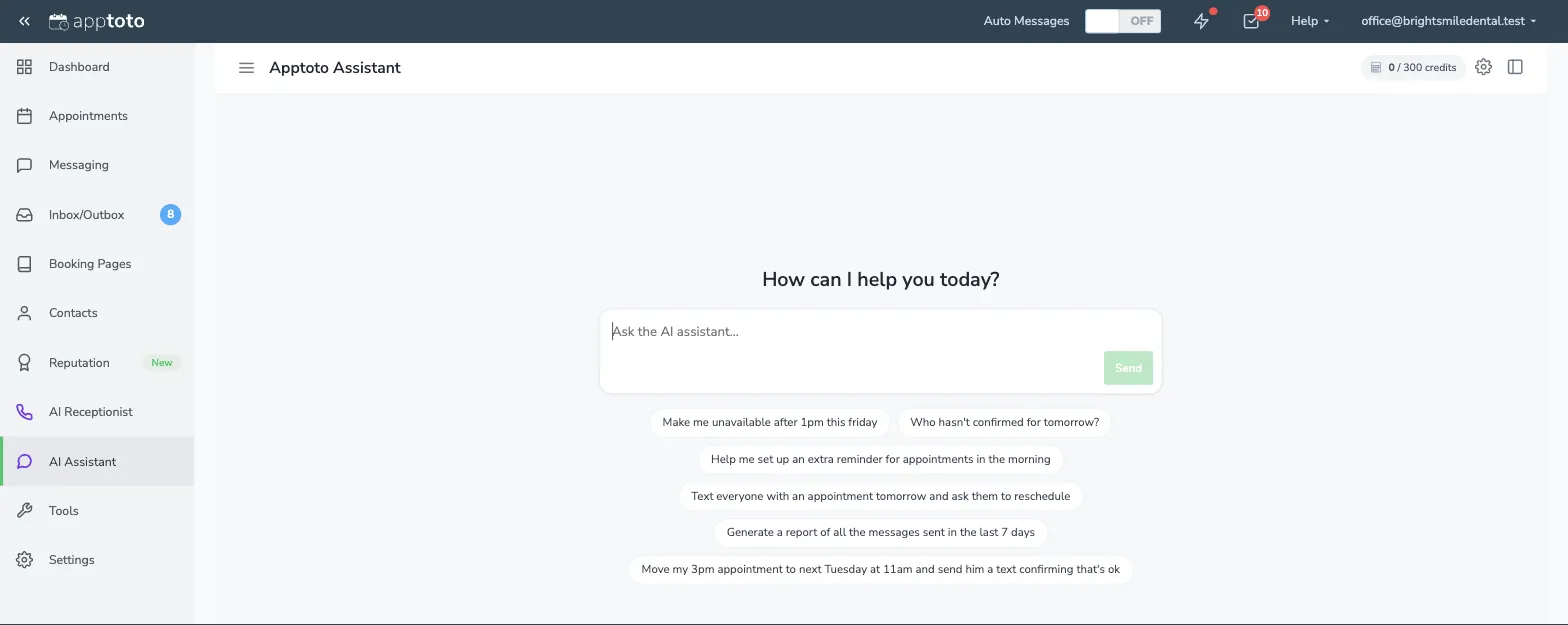
You can also keep it beside your work instead of in front of it. Click the dock icon in the top right of the chat to move it into a panel down the right-hand side of the screen. The rest of Apptoto stays usable while it is open, so you can watch it make a change on the screen you are already looking at. The panel stays put as you move between tabs and is still there after you reload the page, on whatever conversation you had open. To bring it back to full width, click the expand icon in the panel’s header, or open the AI Assistant tab and click Show it in this tab.
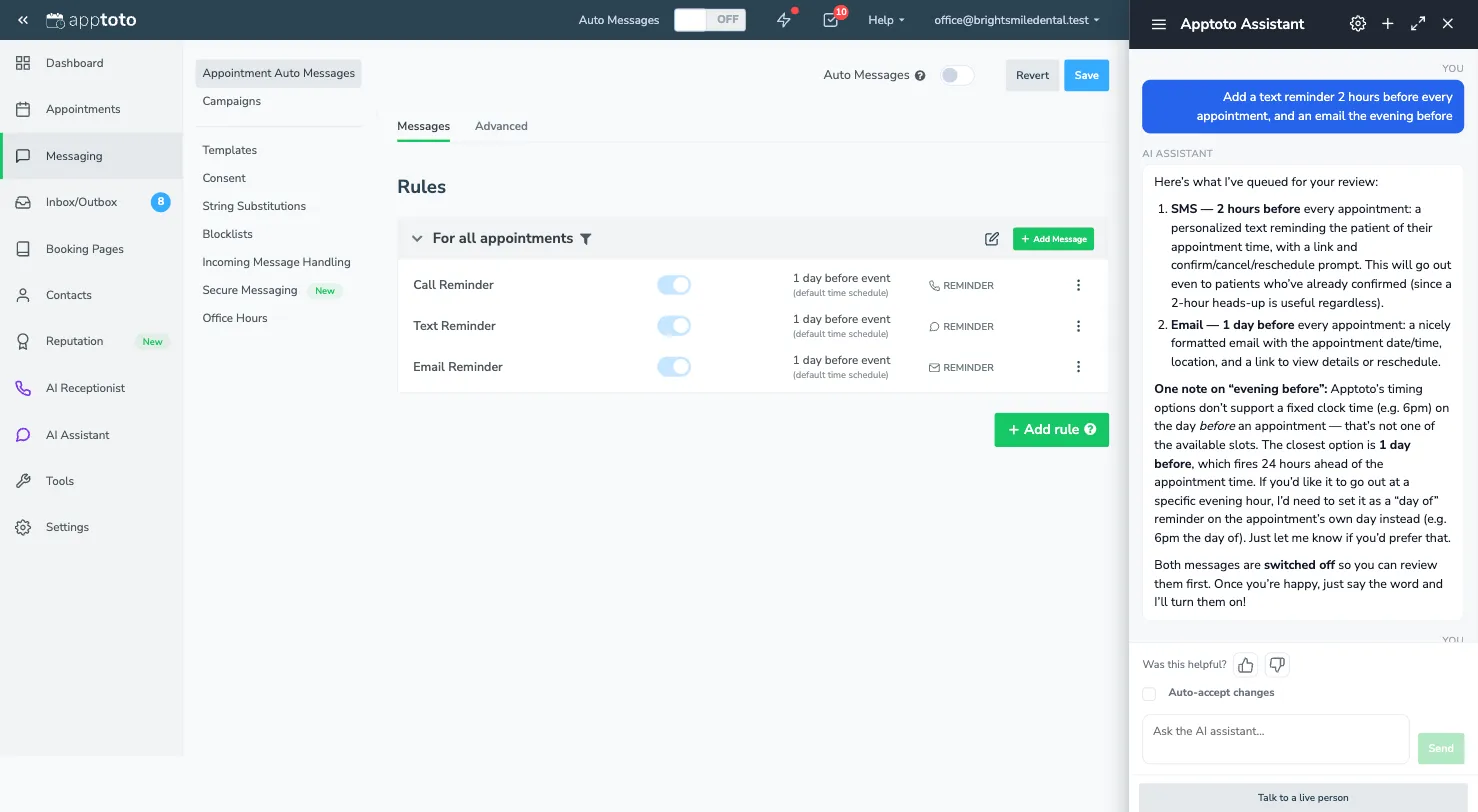
If your account uses the chat bubble in the bottom-right corner for support, that button opens the Assistant too, docked to the side.
On a phone or a small screen
Section titled “On a phone or a small screen”On a phone, tap AI Assistant in the bar along the bottom of the screen, beside Appointments, Inbox, Messaging, and Contacts. The chat takes the whole screen.
There is no docked panel on a narrow screen - there is no room beside it - so the dock icon is not shown. Everything else works the same way.
Previous conversations
Section titled “Previous conversations”Every chat is kept, so you can go back to what you asked last week and carry on from there.
- Open the list: Click the menu icon at the top left of the chat.
- Pick a conversation: Conversations are listed newest first, titled by what you first asked, with the date underneath. Click one to reopen it, messages and all.
- Start a fresh one: Click New chat at the top of the list, or the + icon in the chat’s header.
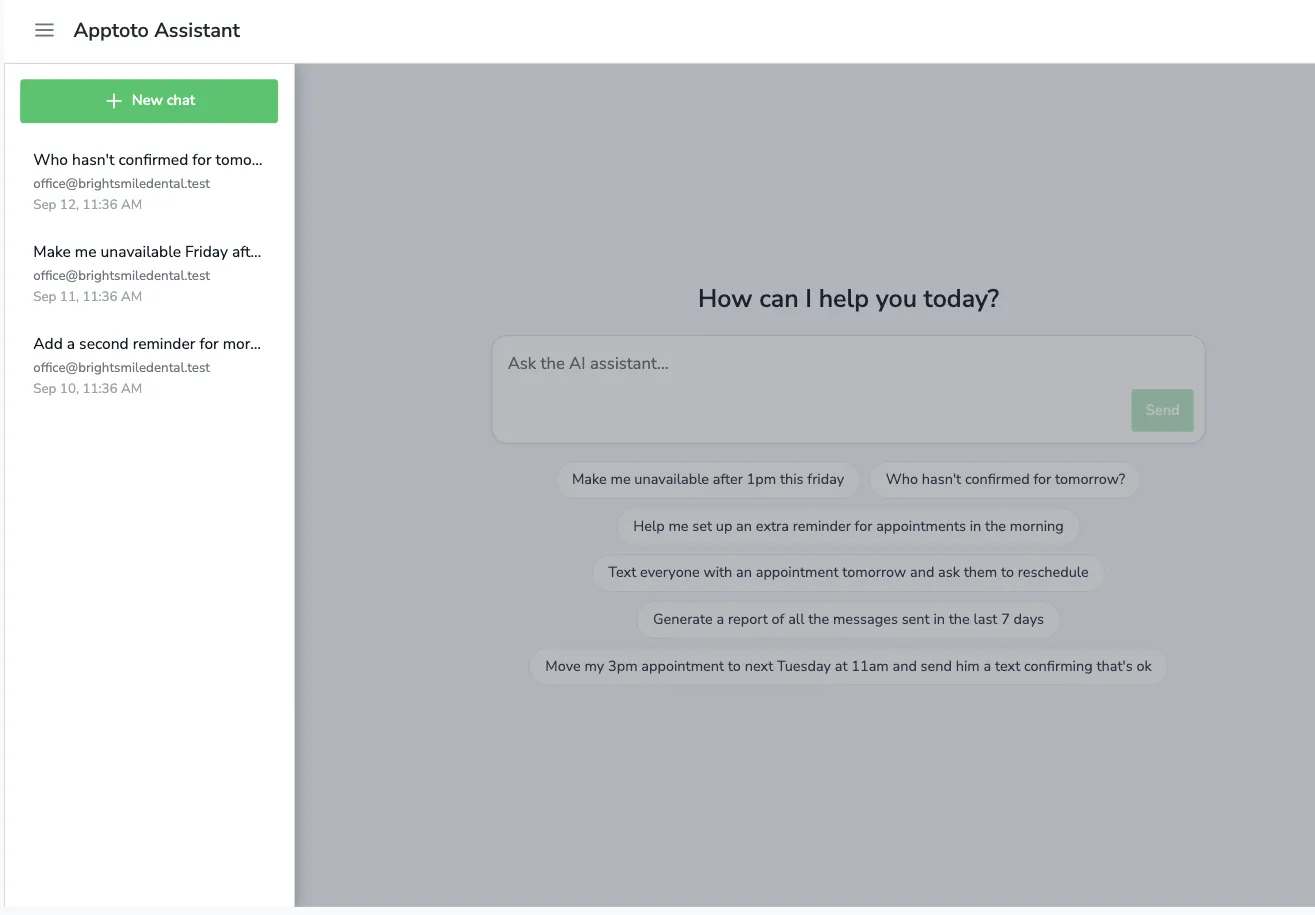
Starting a new chat is worth doing when you move on to an unrelated job. The Assistant uses what has already been said in a conversation as context, so a long chat that has wandered across three different topics gives it more to sift through than it needs.
If other people have access to your account, each conversation also shows who it was with, so you can tell your own chats from a colleague’s.
Approving changes
Section titled “Approving changes”The Assistant does not change anything without asking. When it has worked out what needs to happen, it collects the changes and lists them in a box at the bottom of the chat.
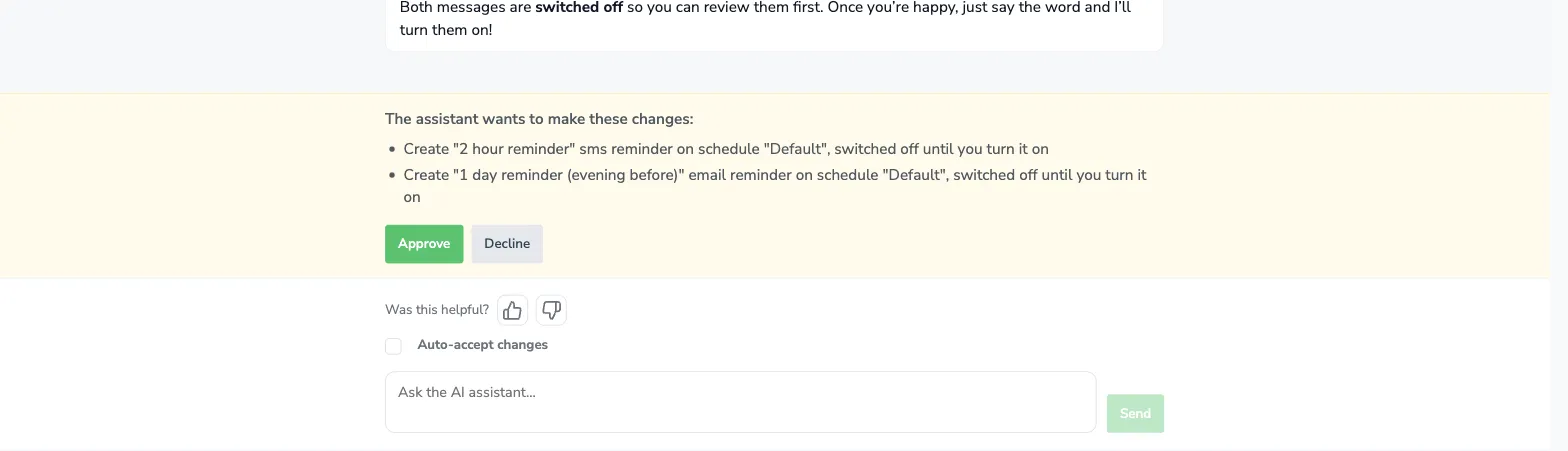
Each line is written in plain language, and says the part you most need to check - whether a new message is switched on and will start sending, whether a follow-up text rides along with it, which list a client is being added to. Click Approve to apply everything in the box, or Decline to throw it away. Either way the Assistant carries on the conversation and tells you where things stand.
A few things worth knowing:
- Related changes are grouped. If what you asked for takes three changes that only make sense together, all three appear in the same box and are approved together.
- Reading does not need approval. Looking up who has not confirmed, checking availability, or reading a message thread happens straight away. Only changes wait for you.
- Sending counts as a change. A text or email to a client is shown for approval like anything else, with the recipient named.
- Ignoring the box cancels it. If you type a new message instead of answering, the proposed changes are dropped rather than applied.
Auto-accept changes
Section titled “Auto-accept changes”Under the message box there is an Auto-accept changes checkbox. Switch it on and the Assistant applies changes as it goes, without stopping for approval. That is quicker for a run of small, obvious jobs, but you lose the chance to read each change first, so leave it off unless you are watching what it does.
Approval is the default, and the setting applies to the conversation you are in.
Stopping it
Section titled “Stopping it”While the Assistant is working, the Send button becomes a stop button. Click it if it has misunderstood you or is going somewhere you did not intend. It stops where it is, and anything not yet approved is not applied.
What you can ask it
Section titled “What you can ask it”The quickest way to get a feel for it is to try one of the suggestions on the opening screen. Some real examples:
- “Move my 3pm appointment to next Tuesday at 11am and send him a text confirming that’s ok”
- “Make me unavailable after 1pm this Friday”
- “Who hasn’t confirmed for tomorrow?”
- “Text everyone with an appointment tomorrow and ask them to bring their ID”
- “Help me set up an extra reminder for appointments in the morning”
- “Generate a report of all the messages sent in the last 7 days”
- “How do I stop messages going out for appointments I didn’t schedule?”
Broadly, it can help with:
| Area | What that covers |
|---|---|
| Appointments | Finding, creating, moving, and cancelling appointments, and marking who confirmed or cancelled |
| Clients | Looking up, adding, and updating contacts, and tagging them |
| Messages | Texting or emailing a client or a group, replying to a thread in your Inbox, and scheduling or cancelling a one-off message |
| Reminder setup | Adding, editing, and switching auto messages on or off, including the rules that decide which appointments they apply to |
| Availability | Blocking off time on a calendar or a booking page, and opening extra time up |
| Booking | Setting up booking pages and appointment types, and booking someone in |
| Forms | Building a form, changing the questions it asks, and editing what happens when someone submits it |
| Opt-outs | Checking whether a client can be messaged, and adding or removing them from your opt-out and opt-in lists |
| Notifications | Changing which alerts you get and where they go |
| Reports | Running a report and handing you the results |
| Answers | Explaining how a feature works and walking you through setting it up |
If you ask for something it cannot do, it says so rather than guessing.
Telling it about your business
Section titled “Telling it about your business”Click the settings icon in the chat’s header to open Business Knowledge. Anything you write there - hours, services, locations, staff, policies, pricing - is treated as fact when the Assistant answers questions and makes changes.
For example:
We are open M-F 8am-5pm. $50 no-show fee. 24-hour cancellation noticerequired. Locations: Downtown and Eastside.Click Save when you are done. This is the Assistant’s own knowledge and is separate from what you teach the AI Receptionist.
What it costs
Section titled “What it costs”Chatting with the Assistant yourself does not use AI credits. Ask it as many questions as you like - the conversation itself is free, and it shows in your usage breakdown as free credits rather than against your allowance.
What the Assistant sends costs the same as it always does. If you approve a text to a client, that is a message credit, exactly as if you had sent it from the Inbox. Approving a change to your settings costs nothing.
The credits pill at the top right of the chat shows your balance when the Assistant is in its own tab. Click it for the account-wide breakdown, then Done to go back to the conversation. See Billing for plan limits and overage.
Telling us how it went
Section titled “Telling us how it went”Once the Assistant has replied, Was this helpful? appears above the message box with a thumbs up and a thumbs down. Those go straight to us and are how the Assistant gets better at the things it is currently bad at, so please use them.
If a conversation is not getting you anywhere, Talk to a live person hands what you have already typed to our support team, so you do not have to explain it twice. Review the message and send it in the support chat that opens.