Estimated reading time: 12 minutes
Missed appointments aren’t just frustrating, they’re expensive. If you’re relying on manual texts or email reminders (or worse, nothing at all), you’re likely losing time, money, and clients. The good news? Setting up automated appointment reminders doesn’t have to be complicated.
In fact, with Apptoto, it can take just a few minutes to implement a system that:
- Keeps your calendar full
- Reduces no-shows
- Frees up your staff’s time
Let’s walk through how to schedule automated reminders in Apptoto and get your reminder game on autopilot.
TL;DR: What You’ll Learn
In this guide, you’ll learn how to:
- Automatically send reminders by text, email, or phone
- Choose when and how they’re sent
- Personalize messages based on appointment type
- Reduce no-shows and late arrivals
- Test and adjust reminder workflows easily
Step-by-Step: How to Schedule Appointment Reminders Using Apptoto
Connect Your Calendar
Apptoto works directly with your existing calendar, so there’s no need to change how you book appointments. Connect your Google Calendar, Microsoft Outlook, or other supported platform (find our complete list of integrations here).
How to do it:
- Log in to Apptoto and navigate to the “Settings” tab. Then click “Calendars.”
- Click “+Add” to add a new calendar.
- Select your existing calendar from the list, or click “Create Calendar” to add an “Apptoto Calendar.”

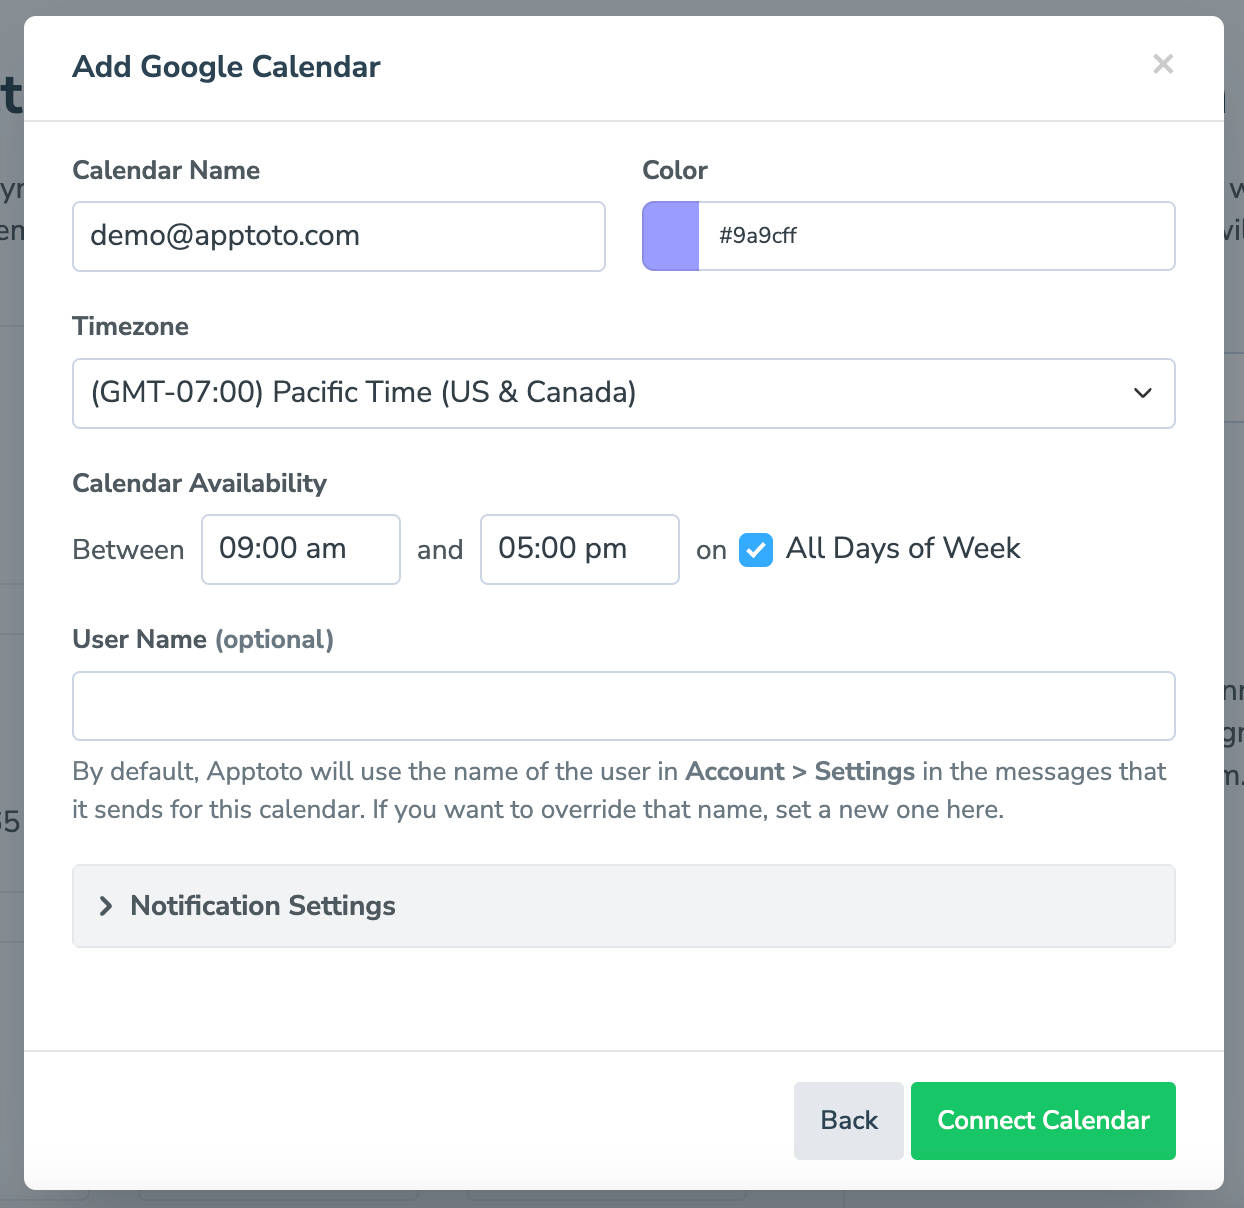
- Follow the steps to link your account, select which calendars to add, and adjust settings (such as the calendar name, availability, and notifications settings).
- Click “Connect Calendar” and your appointments will automatically sync to Apptoto!
Configure your Automated Appointment Reminders: Rules, Messages & Timing
How to do it:
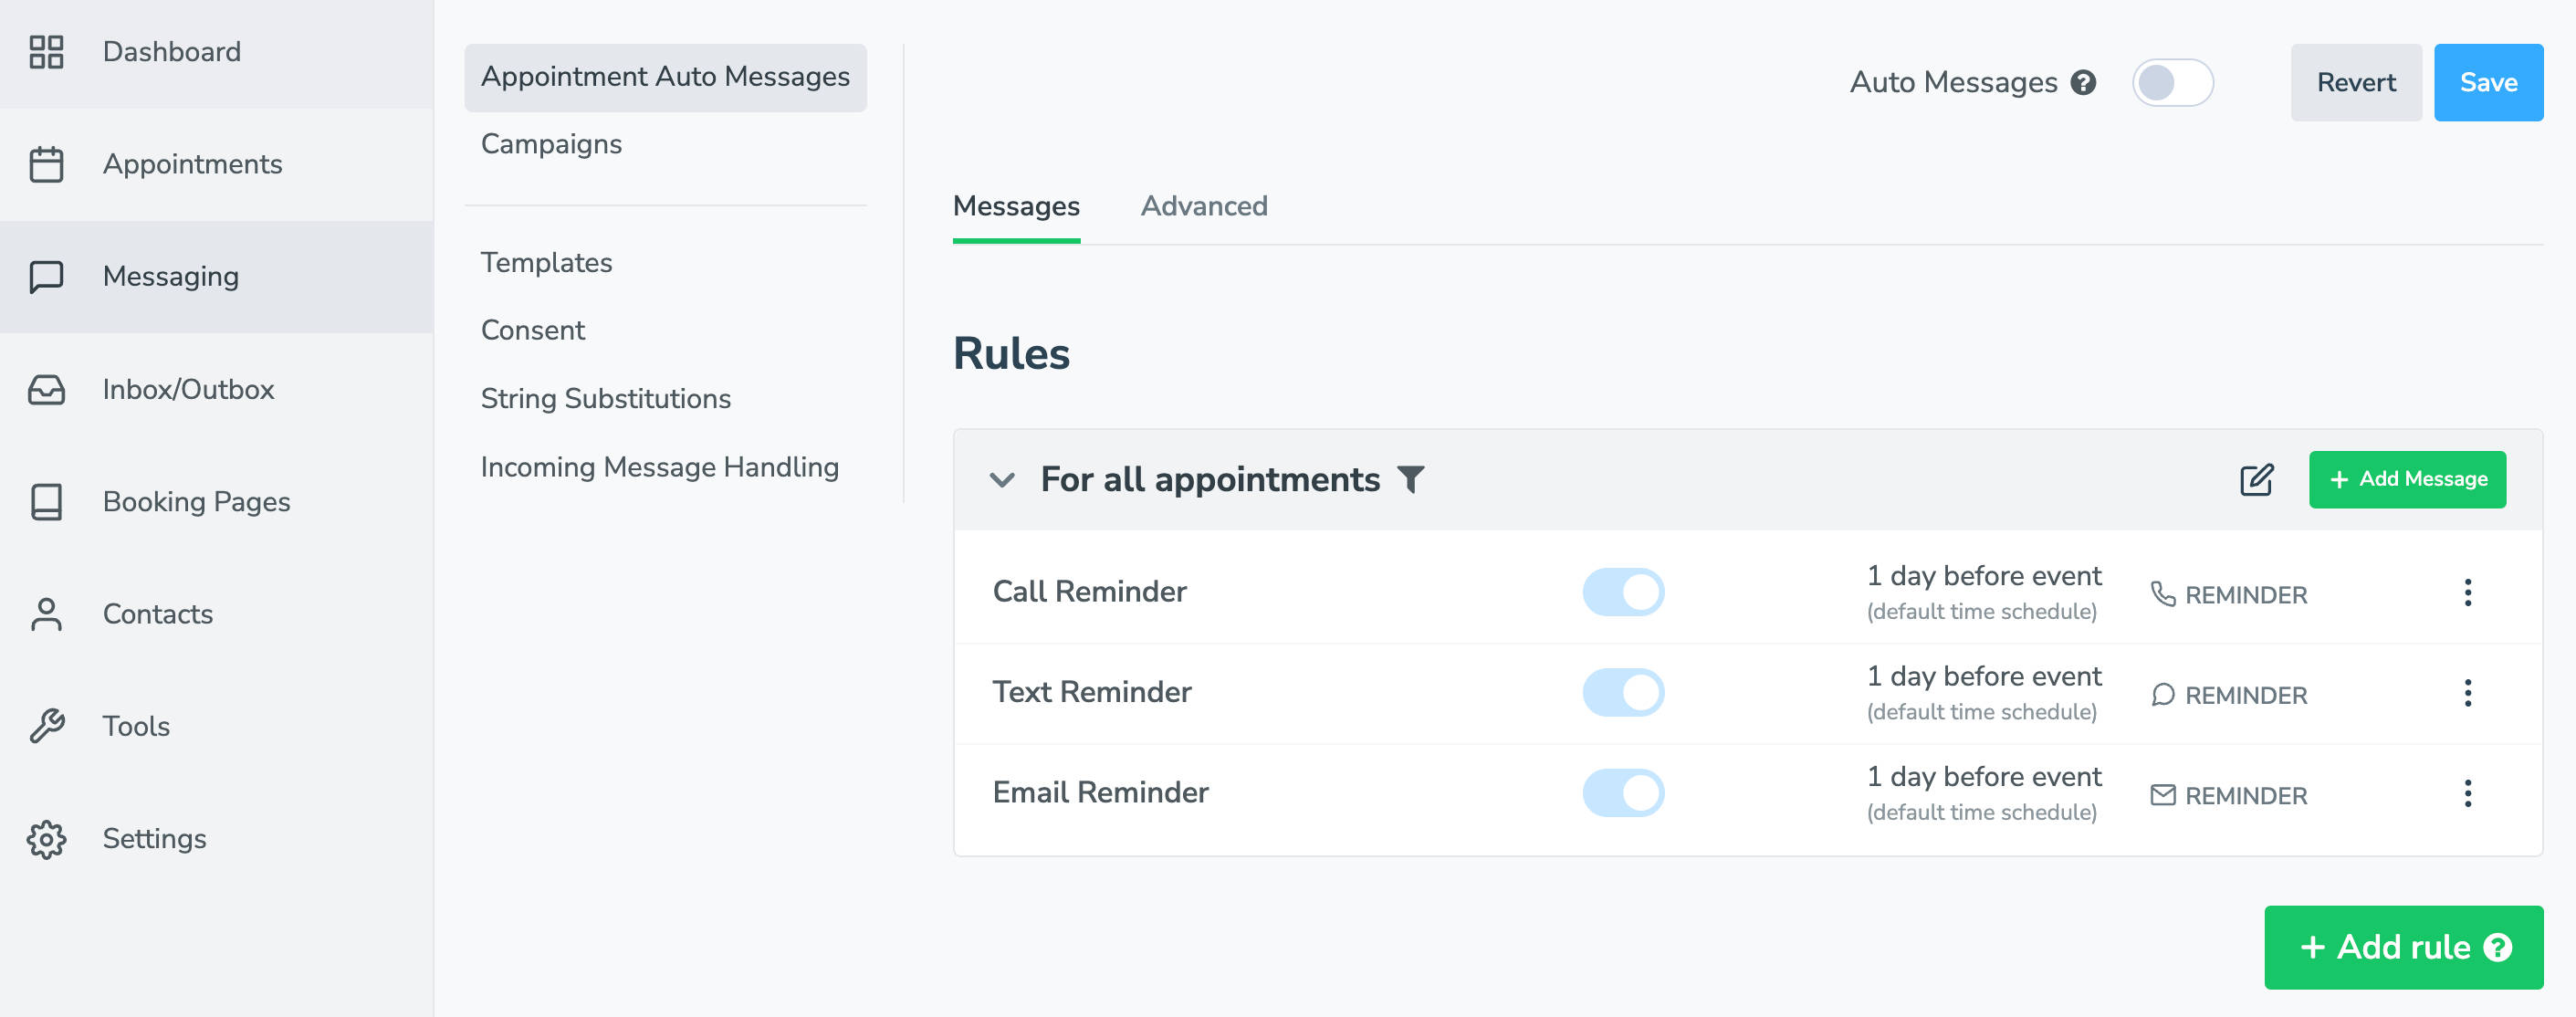
- Navigate to the “Messaging” tab, then click “Appointment Auto Messages.”
- By default, Apptoto has set up three appointment reminders to send to every appointment (a call, text, and email reminder) one day before every appointment.
- Click the name of a reminder to see the message that will be sent, and/or to update the timing, language, or message.
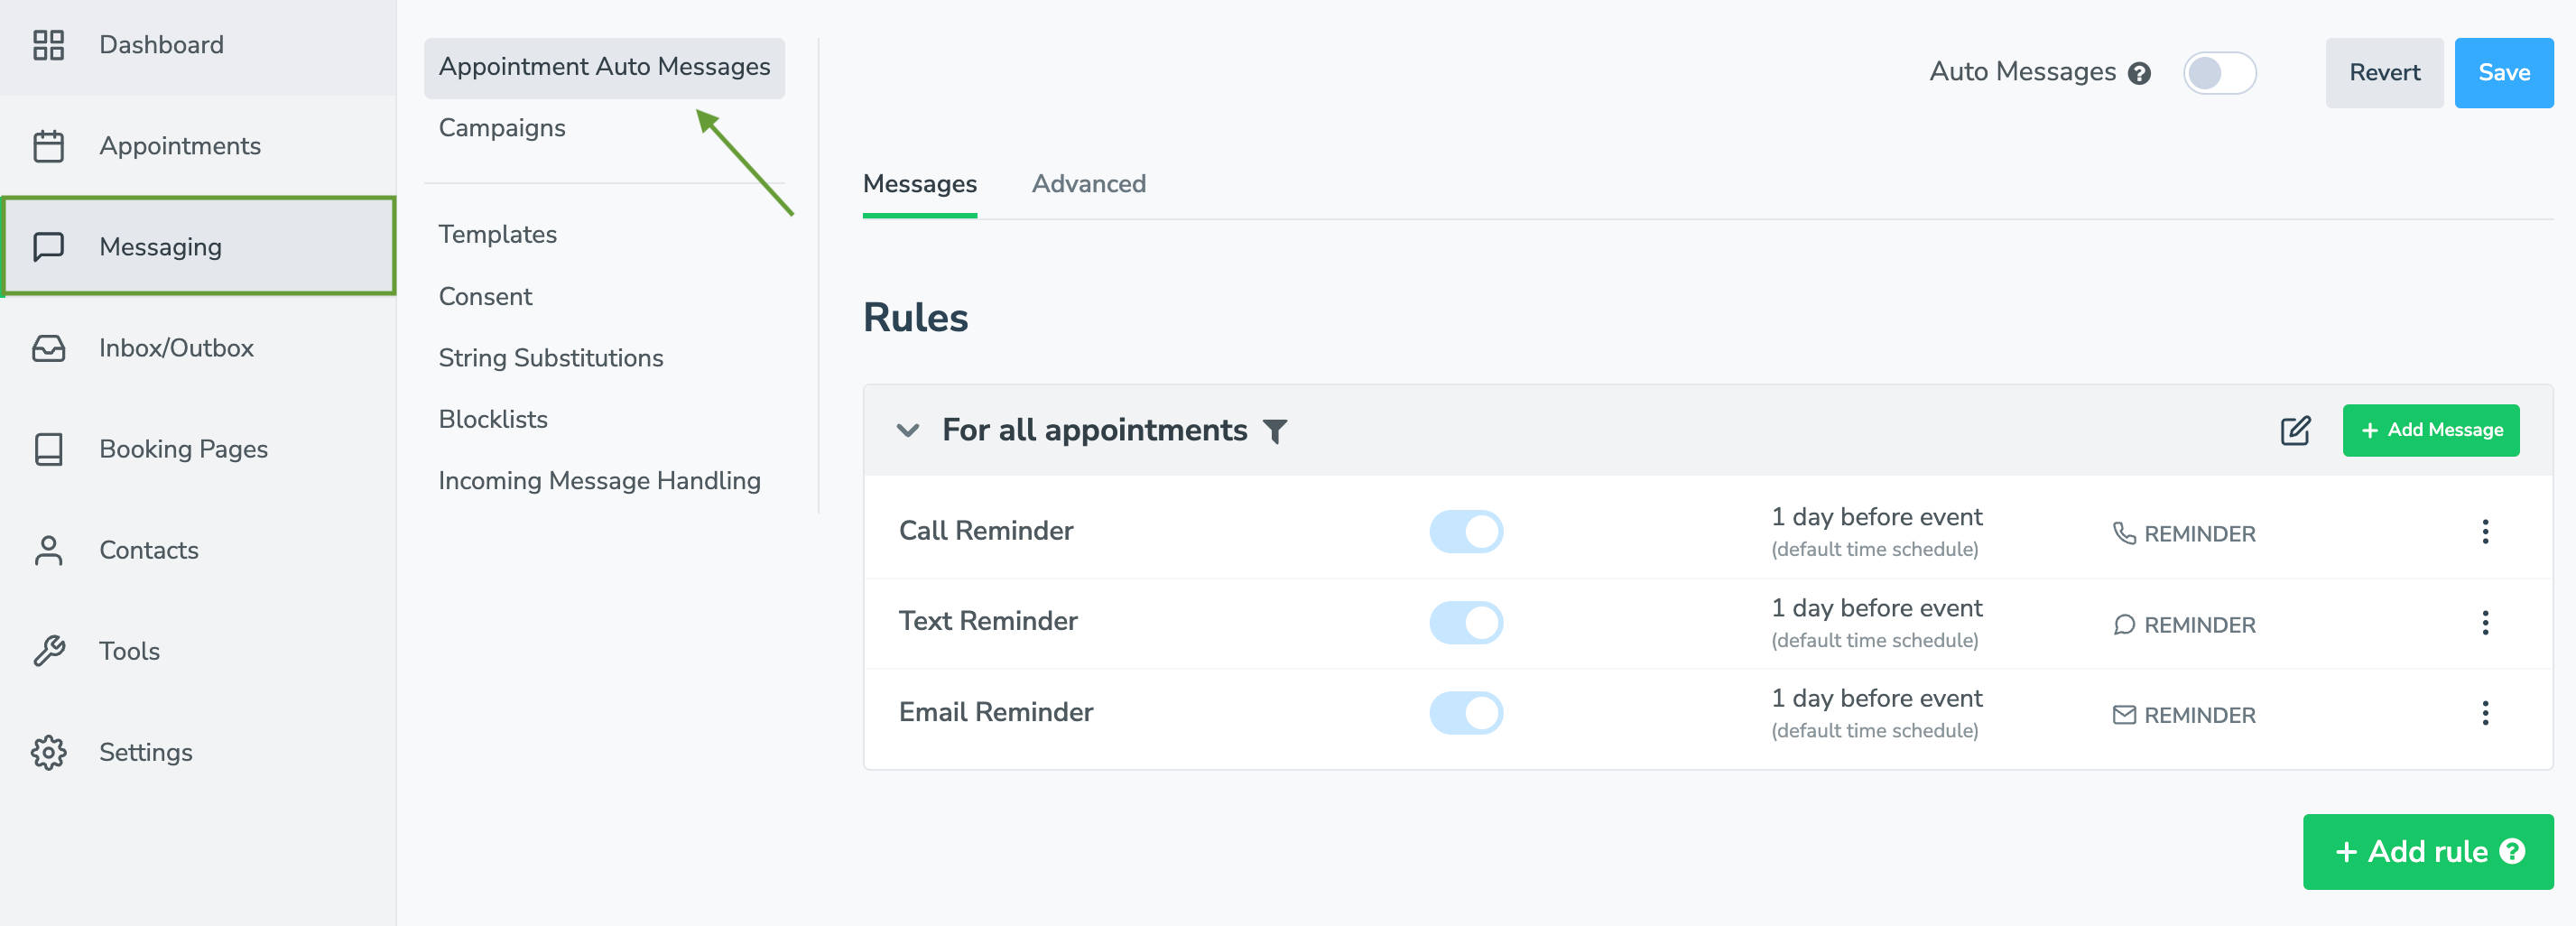
- Click the name of a reminder to see the message that will be sent, and/or to update the timing, language, or message.
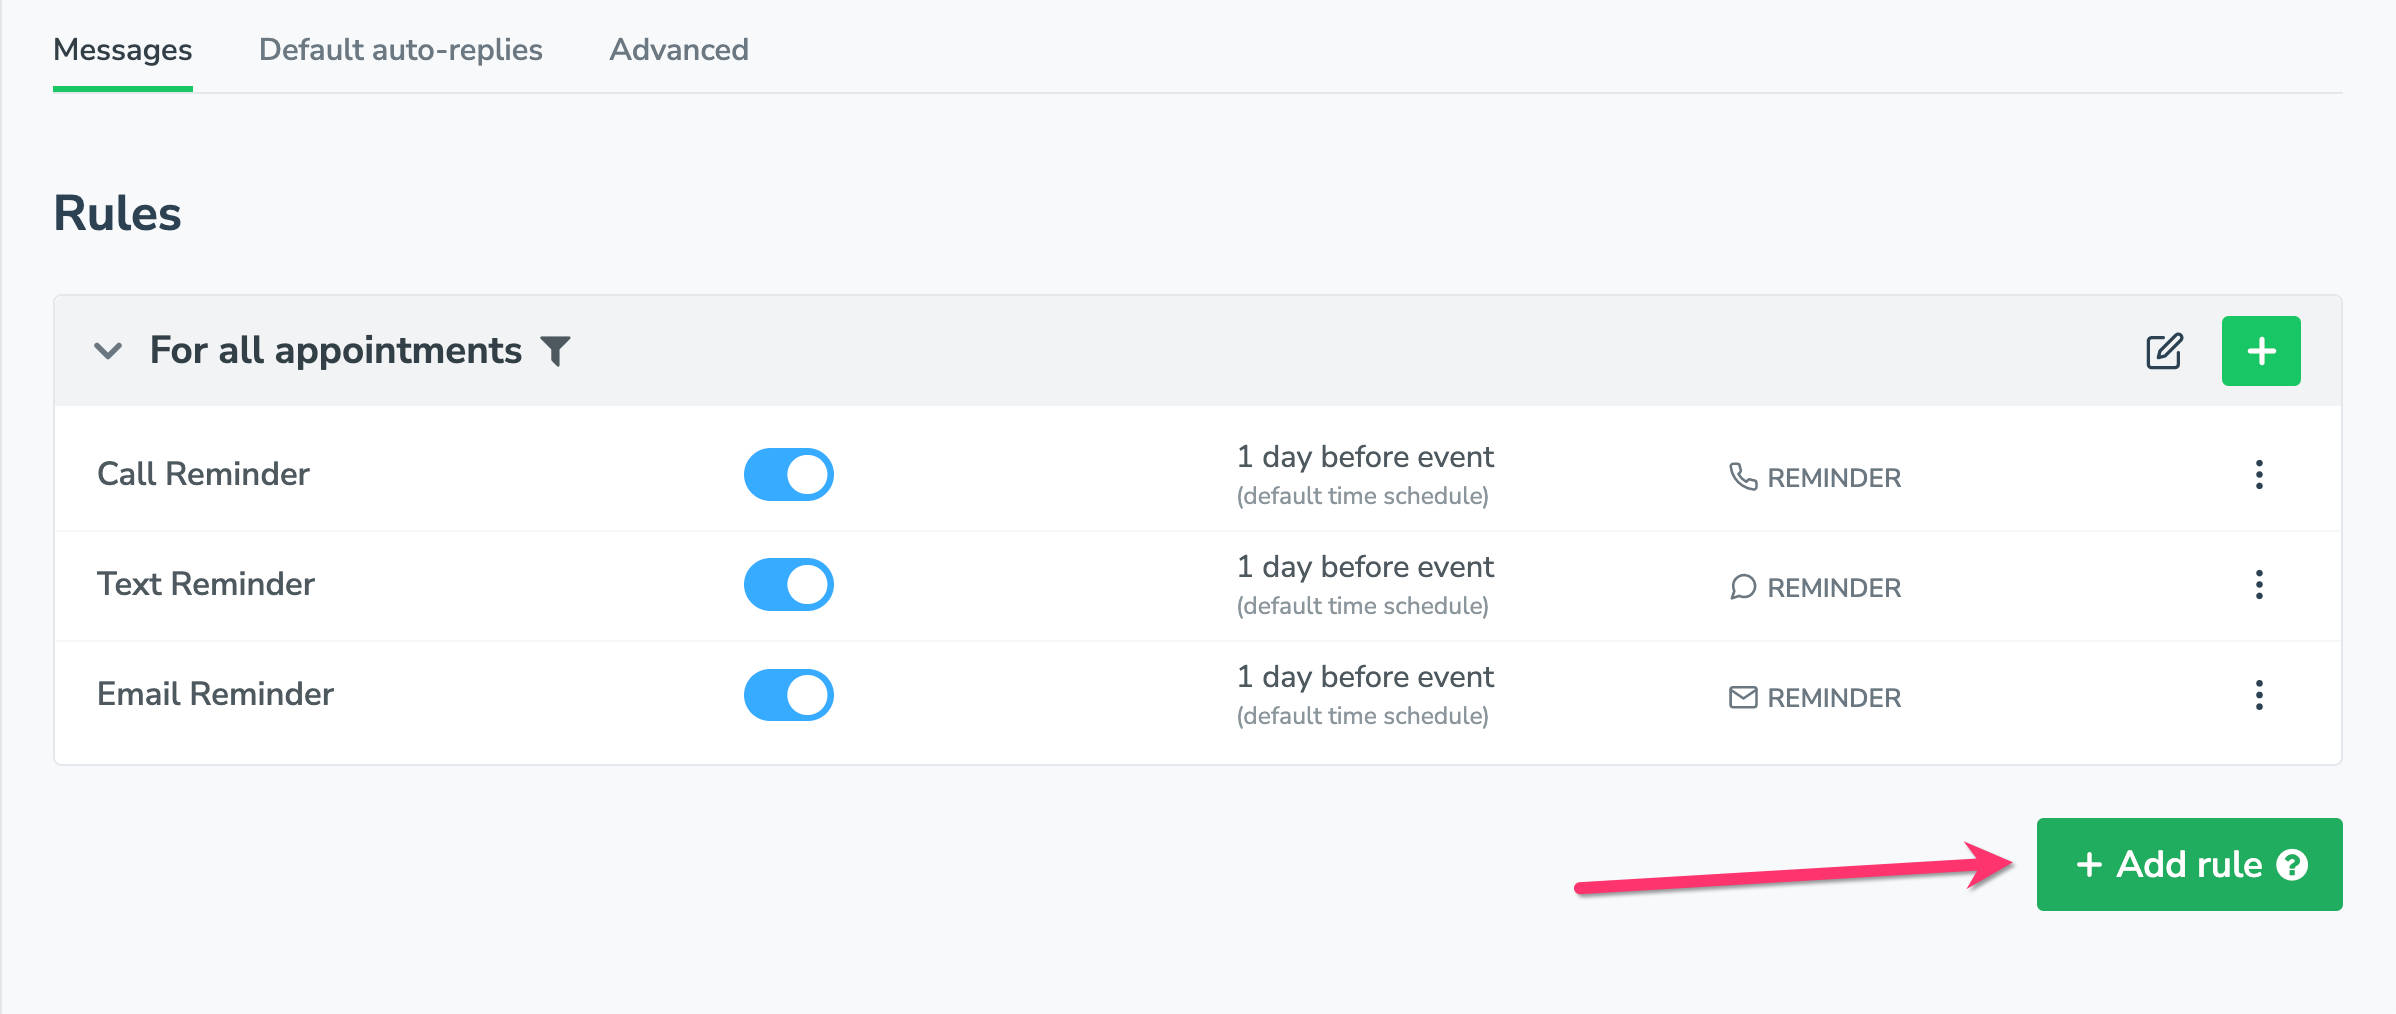
- If you want stricter control over the types, timing, and content in the messages you send to your clients, you can use Rules and different message types.
- Rules let you create and send messages to specific subsets of appointments.
- Then, click “+Add Message” and select whether you want to add a call, text, or email message.

- To create a rule, click “Add Rule,” then name it. Then, choose the settings you want to use to filter the appointments by (e.g., “event title” includes “consultation).
- A message editor will appear, and you’ll be asked to set:
- Name: The name of your message
- Purpose: Is this a booking confirmation, reminder, or follow-up message
- When: The timing of when you want the message delivered
- Language: Apptoto can auto-translate your message into five languages
- Message: The content of your message. You can use fields (dynamic data surrounded by {{ }} below) that Apptotot will use to fill in information from each appointment.
- Auto Replies (optional): Automatic responses that trigger if your clients respond in specific ways
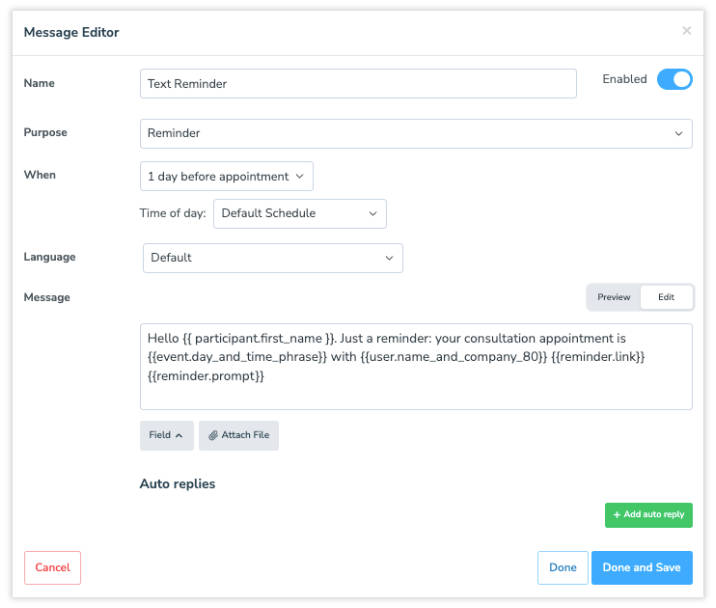
- Save your message. You can add as many messages, message types, and rules as you would like.
Send an Appointment Reminder Manually
The real power of Apptoto lies in full automation, but we get it, handing over the reins can feel a bit intimidating at first. Sending reminders manually is a great way to build confidence, preview your messages in action, and make sure everything looks right before you let automation take over. Let’s start by working through sending reminder messages manually.
How it works:
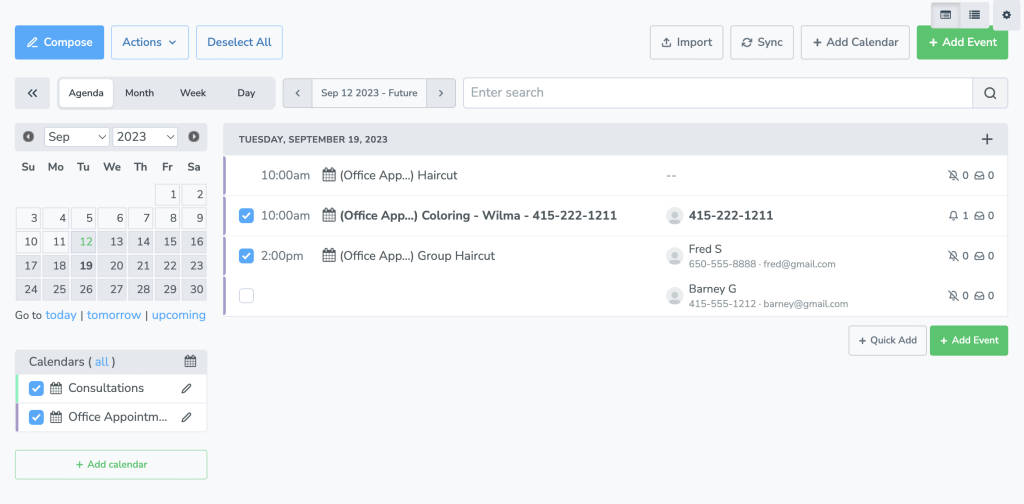
- On the Apptoto appointment interface, you’ll see a list of upcoming appointments.
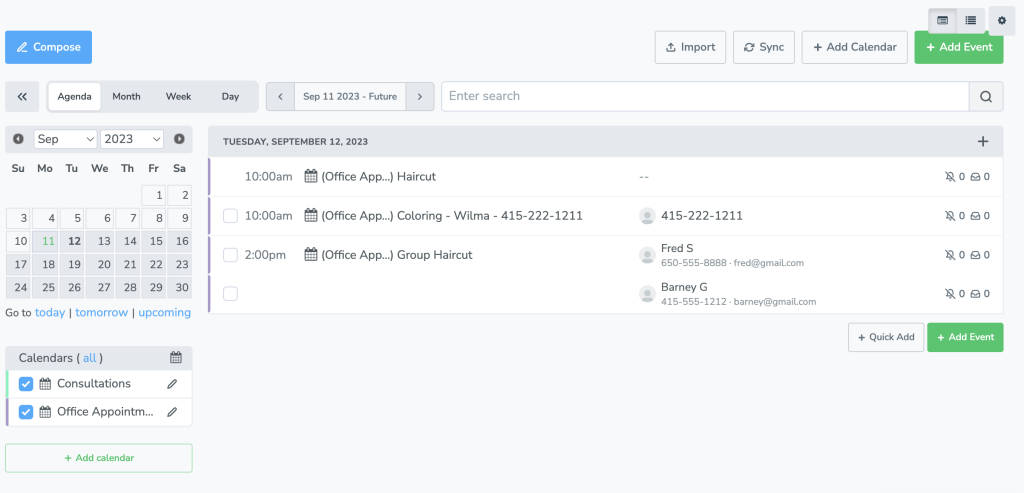
- You can add participants to each appointment by clicking the green + button that appears when you hover near the bell/inbox icons.

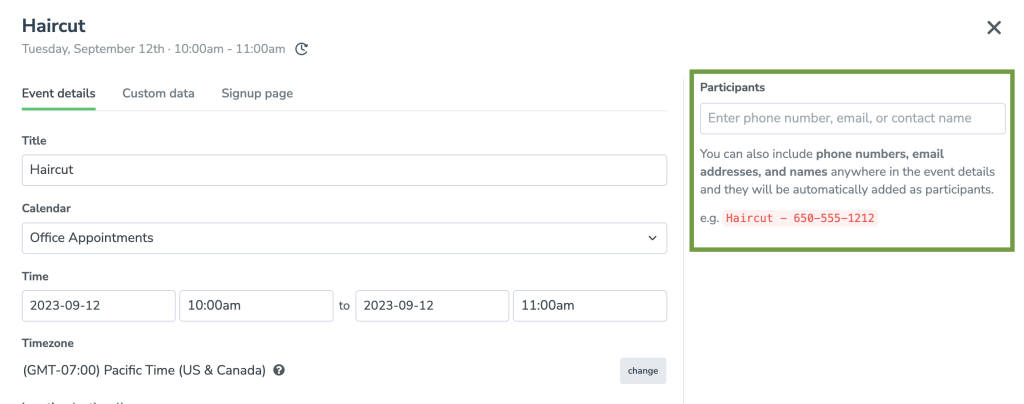
- The “Event Editor” screen will appear. You can add your participant’s name, email, and phone number using the “Participant” field.
- On the “Appointments” screen, click the bell/inbox icons, and the list of auto-messages you’ve already created will appear. Click “Send Now” next to the one you want to send to that client.
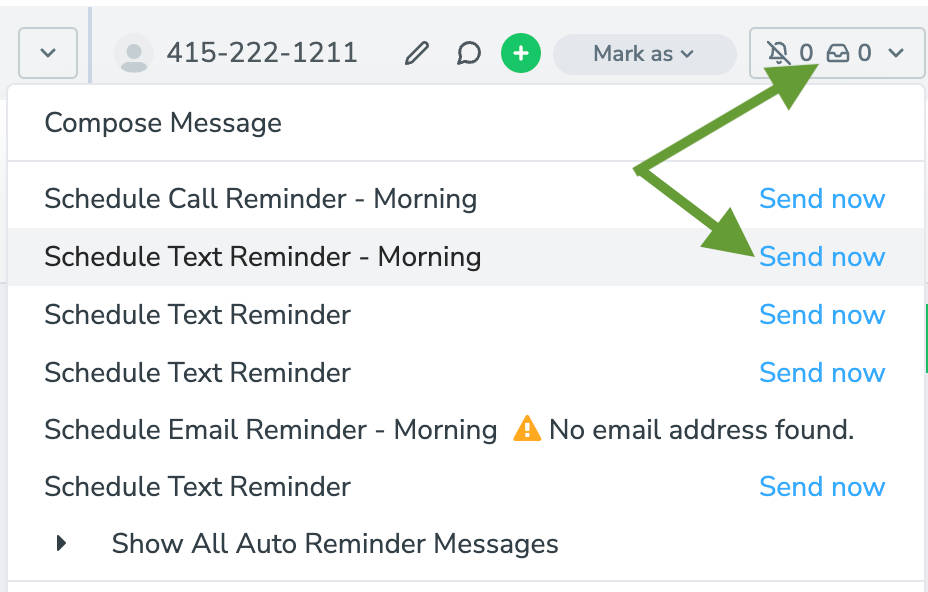
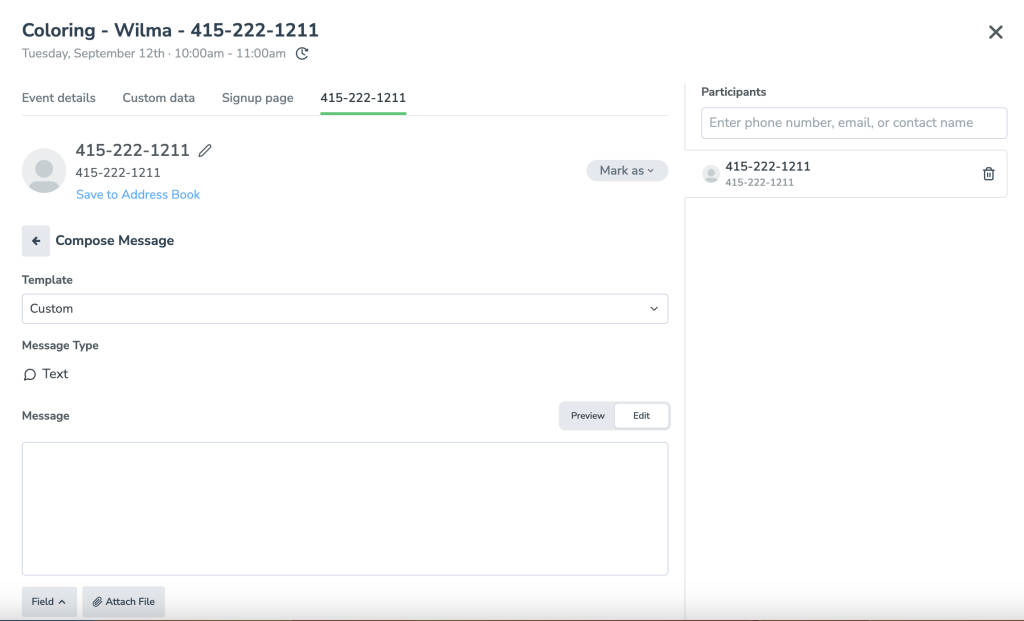
- To manually text a participant, you can also click “Compose Message” (the top option in the screenshot above). You’ll have the option to text, call, or email. Click text, fill out your text in the “Message” section below, and click “Send Now.”
Apptoto makes it easy to schedule (or unschedule) reminders for multiple appointments at a time. Click the checkboxes to the left of each event you want to update.
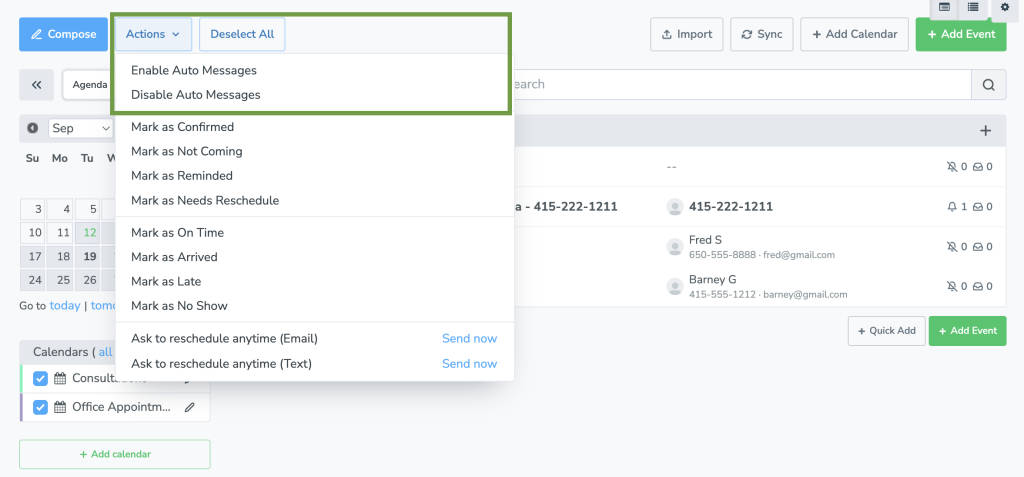
Then, use the “Actions” drop-down to execute bulk actions.
Send Appointment Reminders Automatically using “Auto-Messages”
If you’ve already synced your calendar to Apptoto (including your invitee’s contact info in the invite) you’re ready to take the next step: turning on Auto Messages.
Auto Messages let Apptoto send reminders automatically using the message templates you’ve already set up under the Messaging>Appointment Auto Messages tab above. These templates are fully customizable, so you can tailor them to match your tone, timing, and client needs.
Once Auto Messages are on, you can go back to managing your schedule directly from your calendar. Apptoto will handle the rest in the background, sending reminders, confirmations, and even updating events when clients respond.
How to do it:
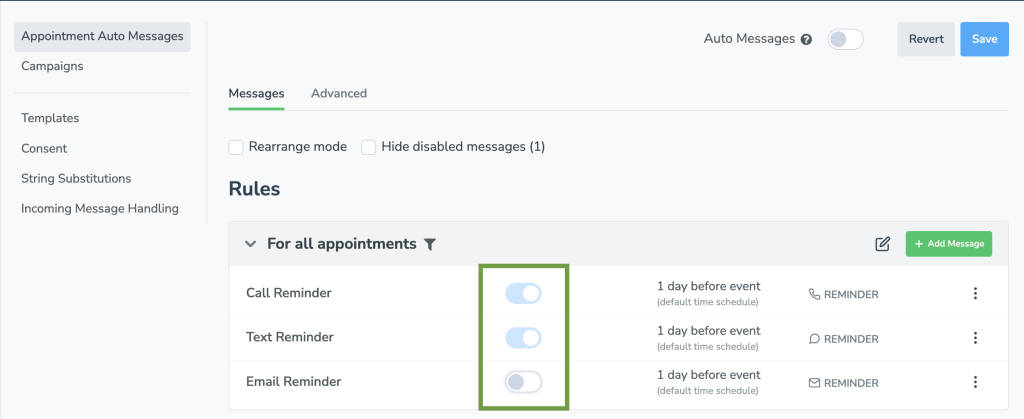
- On the “Message” > “Appointment Auto Messages” Tab, make sure that all the messages you want delivered automatically are toggled on (the toggle will be blue/on the right side).
- Then turn on “Auto Messages” by clicking the “Auto Messages” toggle at the top of your screen when you are signed into your Apptoto.com account.

- When you first turn Auto Messages on, it will ask you which Messages to turn on by default. If you set up the default Call, SMS, and Email reminders, here is what that will look like. Be sure to click “Turn On.”
- Note: If you have a more complex messaging sequence, you’ll see those in the screenshot below and can turn each on or off as needed.

Not quite ready to automate everything?
Turning on Auto Messages is the most convenient and reliable way to reduce no-shows, but we understand it can initially feel nerve-racking. If you’d rather ease into it, use In-Event Commands instead.
Just add #apptoto (it must include the # symbol) to an appointment in your calendar, and Apptoto will schedule the messages you’ve enabled on the Messaging tab; no need to log into Apptoto.
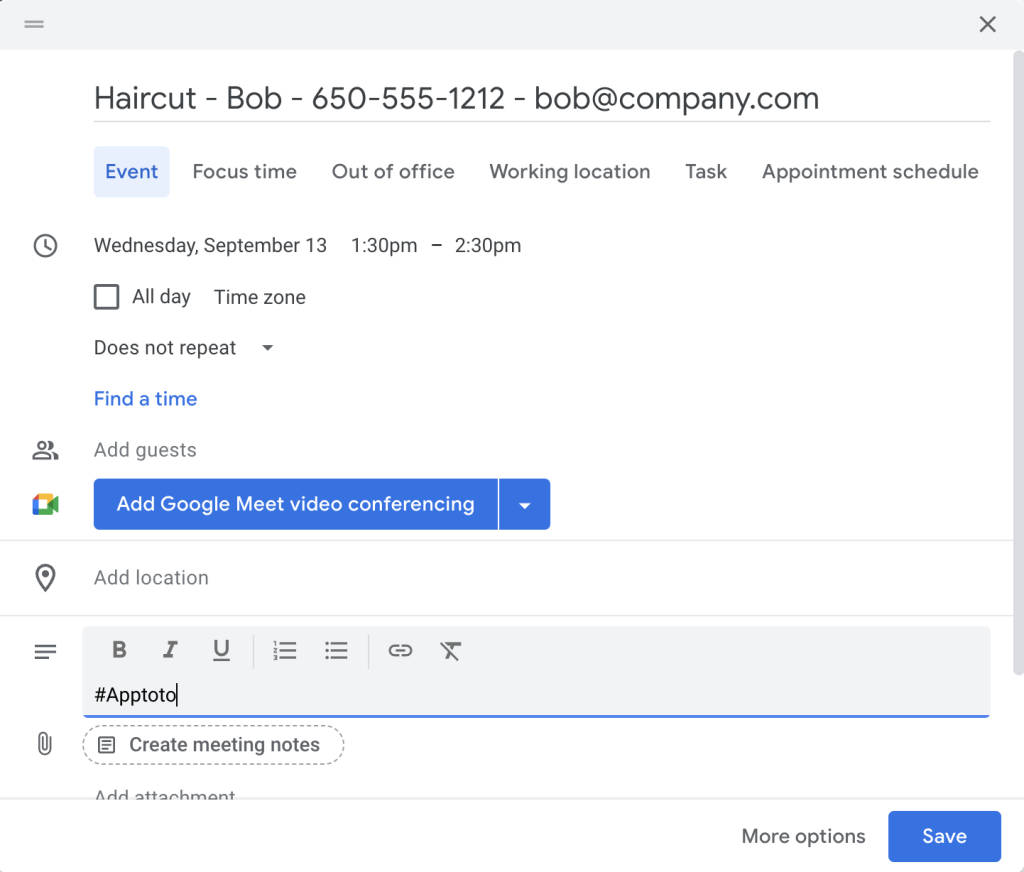
In this case, Apptoto will automatically send a Call and SMS Reminder to 650-555-1212 the day before the appointment. Note that it will NOT send an email to bob@company.com, because the Email Reminder is not enabled on the “Messages” tab (see below)
In this example, if you wanted the email to be sent for this particular appointment, you could add the command [EMAIL] to the appointment. Like so:
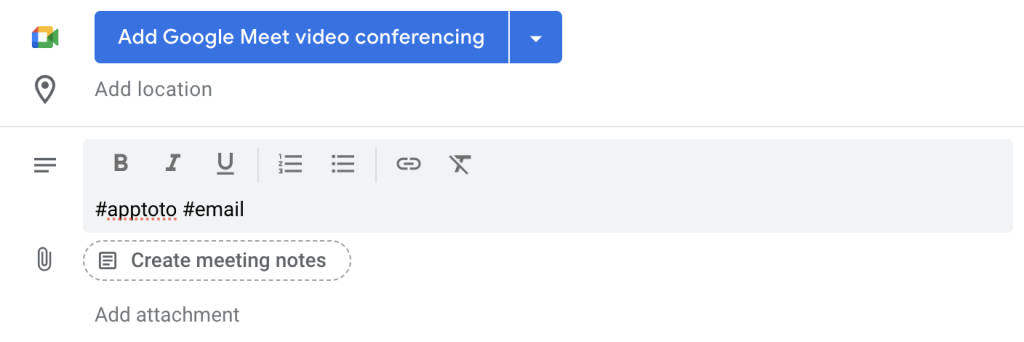
The In-Event commands can be put anywhere in the appointment (i.e., in the title, location, or body).
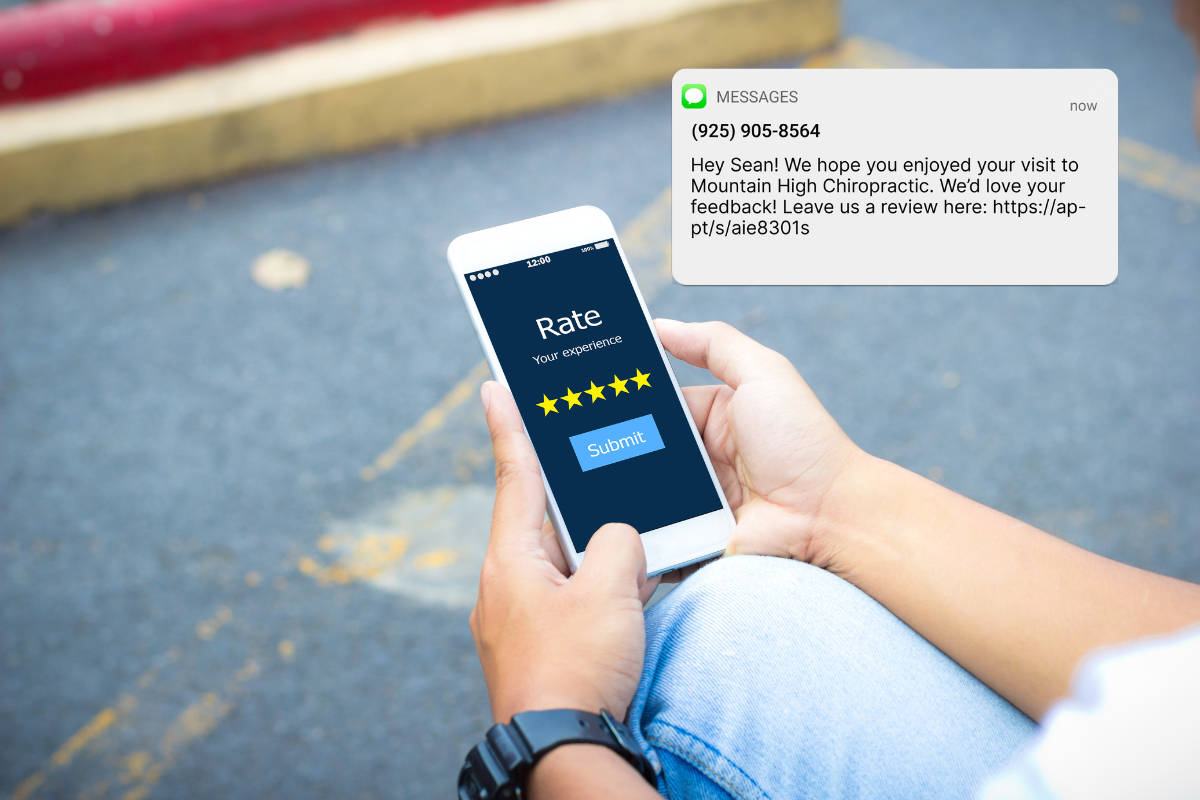
Quick Preview: What Your Clients Will See
Example Reminder Text:
“Hi Sarah, just a reminder about your massage appointment with Willow Wellness on Thursday at 2 PM. https://www.ap-pt/123abc. Reply 1 to confirm, 2 to reschedule, or 3 to cancel.
Reduce No-Shows by Optimizing Your Messaging Workflows
- Use multiple reminders: Try sending one 2 days before and 2 hours before
- A/B test your content: Test friendly vs. formal tones to see what works best
- Personalize your messages: Use dynamic fields to personalize each message with key details about your clients’ appointments
- Segment by appointment type or location: Customize messages for group versus individual sessions, in-person visits vs. virtual, etc.
- Track your no-show rate: Make adjustments based on real performance data
- Follow Messaging Rules & Regulations: Follow your country’s messaging laws and obtain consent to send clients marketing-related messaging.
Ready to Get Started?
Done right, appointment reminders don’t just help you stay organized—they help you stay booked. With Apptoto, you can automate the follow-up process without losing the personal touch.
Ready to reduce no-shows and simplify scheduling? Start your 14-day free trial, or book a demo with one of our expert customer success team members to see how we can customize Apptoto to your needs!
Frequently Asked Questions
We recommend at least two: one 24-48 hours prior, and one 1-2 hours before.
Yes! Use Rules to create different reminder workflows based on appointment type, location, languages, or other settings! Rules are incredibly flexible and allow you to customize unique messaging sequences for each type of appointment you have.
With automatic contact matching, you don’t need to enter all of your clients’ contact details every time. Just include their name, phone number, OR email in the appointment. Apptoto will search your synced address books, find the right contact, and pull in their full details. This lets Apptoto send the right reminders, follow their communication preferences (e.g., no calls), and keep a complete message history, helping you stay organized and reduce no-shows.
Apptoto supports two-way messaging, so you’ll see replies instantly in your Inbox/Outbox (in Apptoto). If a client confirms, reschedules, or cancels, those changes can be reflected in both Apptoto and your calendar. And if a client replies with a question or comment, you’ll receive the message so you can respond directly.
Each appointment has a bell and inbox icons on the far right-hand side of the appointments tab. The bell indicates scheduled notifications yet to be delivered, and the inbox represents delivered messages. If there are any errors, the inbox will show a red triangle, and hovering over this will show more information about why a message was not delivered. Bulk delivery information can also be found on the Tools > Log tab.
—
Founder