Estimated reading time: 3 minutes
Many of our clients manage their appointment-based business through Google Sheets. This can be a quick and easy way to keep all of your appointments in one place, especially if you aren’t using a CRM. But it can be cumbersome to continuously download your appointments from Apptoto into your spreadsheet. That’s where Apptoto’s Zapier integration can help! With a quick Zap, appointments booked in Apptoto can automatically be added as an entry into a Google spreadsheet.
Step-by-Step Guide to Setting Up Your Apptoto Zapier Integration
- Step 1: Sign up for Zapier (if you haven’t already)
- Step 2: Choose to sign up for Apptoto with your email or Google account
- Step 3: Log in to Zapier and click “Make a Zap”

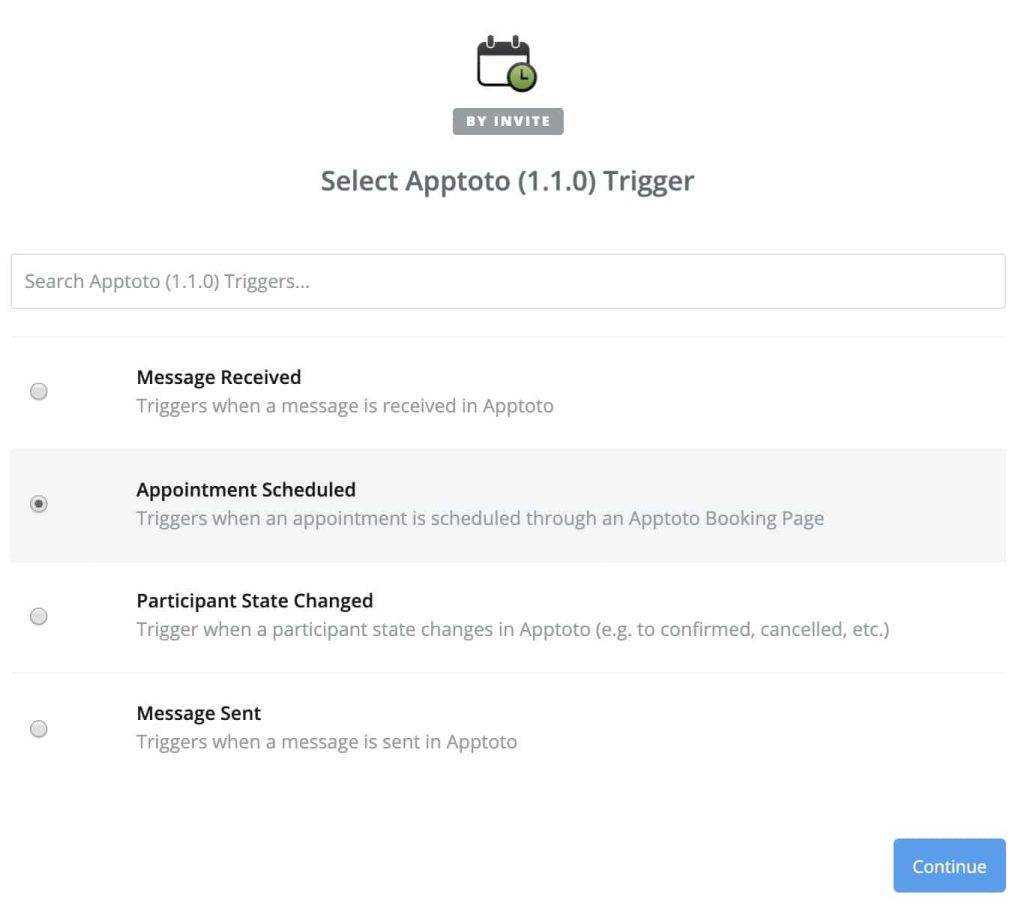
- Step 4: Set the trigger to “Appointment Scheduled” in Apptoto
- Step 5: If you haven’t already, connect your account to Zapier.
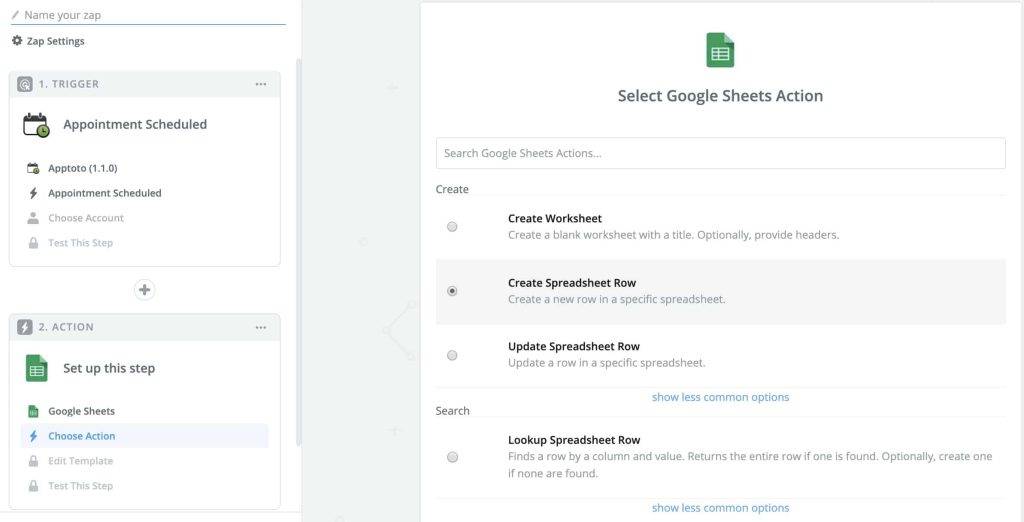
- Step 6: Next, add an Action/Search Step to “Create New Row” in a Google Sheets
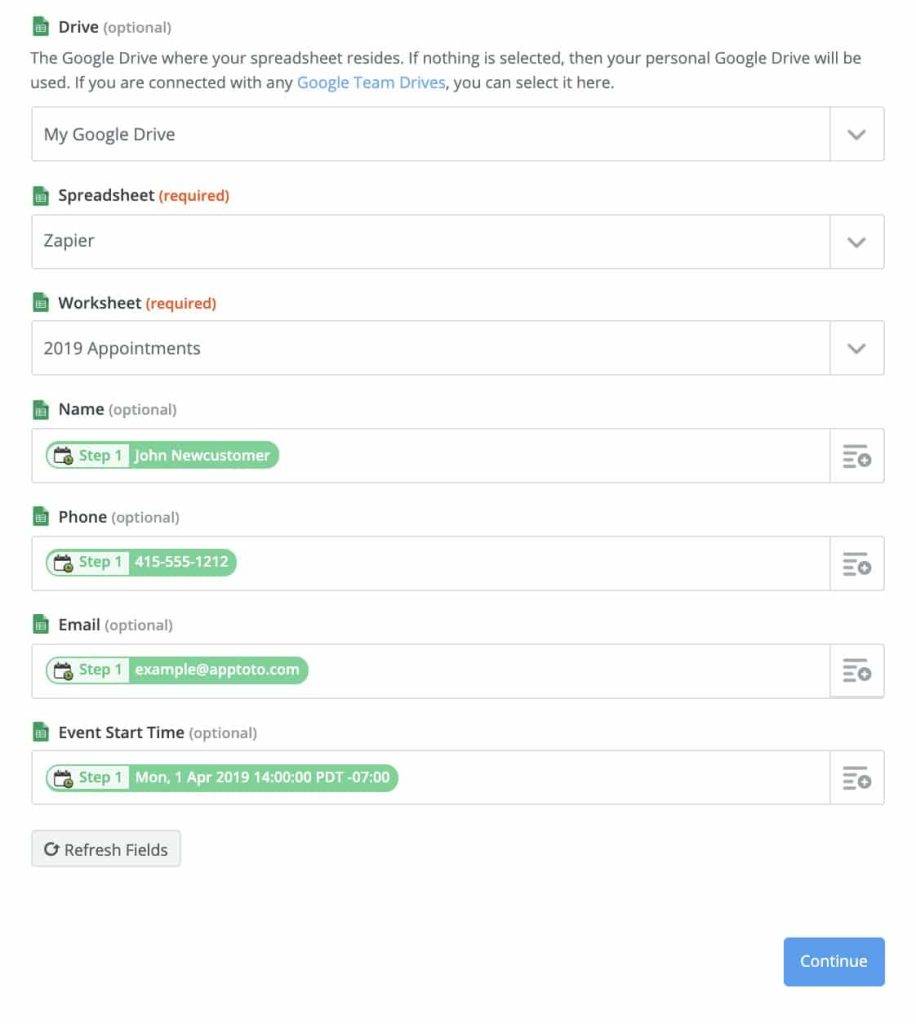
- Step 7: Set up the template in your Google Sheets account. You’ll want to add headers to the columns matching the data you want imported. This data will be pulled in directly from the calendar event. Note that you can customize it for your business needs. In the example below, we have created several basic headers in our spreadsheet that are being pulled into our Zap.
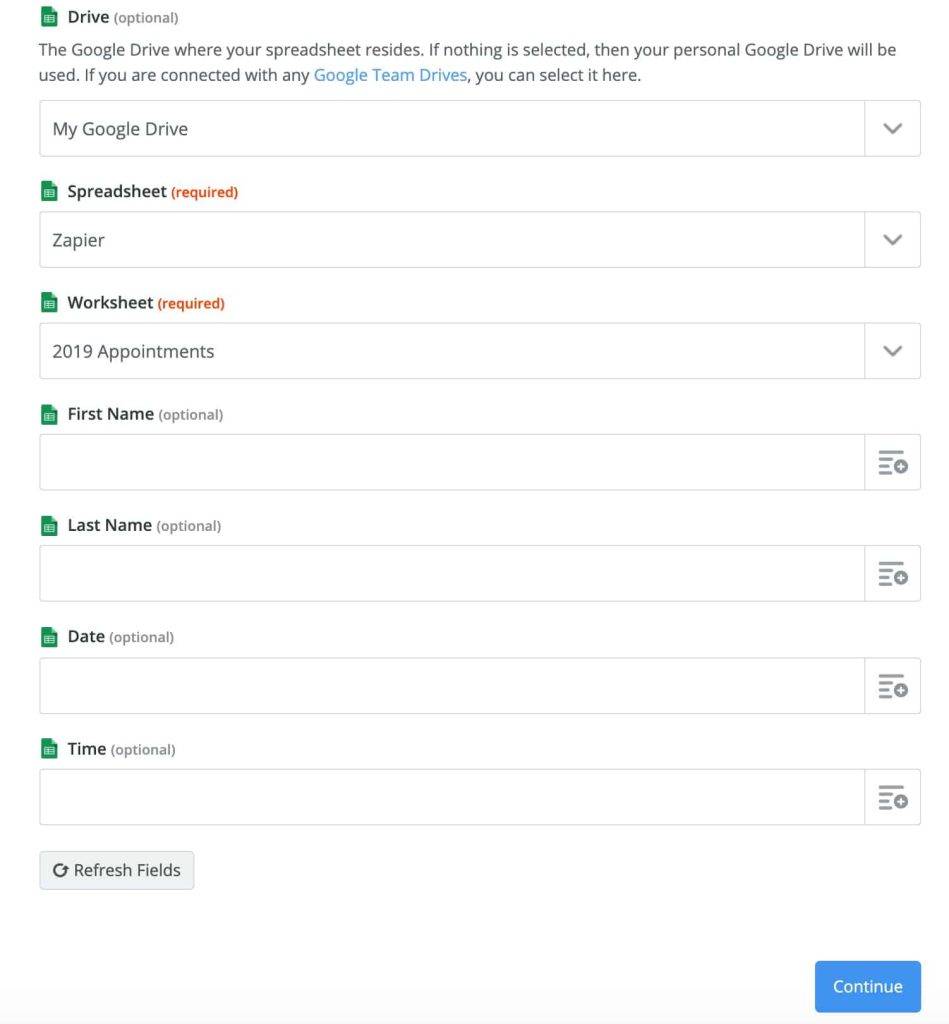
- Step 8: Select the appropriate data from the calendar to import into your spreadsheet. Again, you can customize it to your business needs.
- Step 9: Finally, save and test!
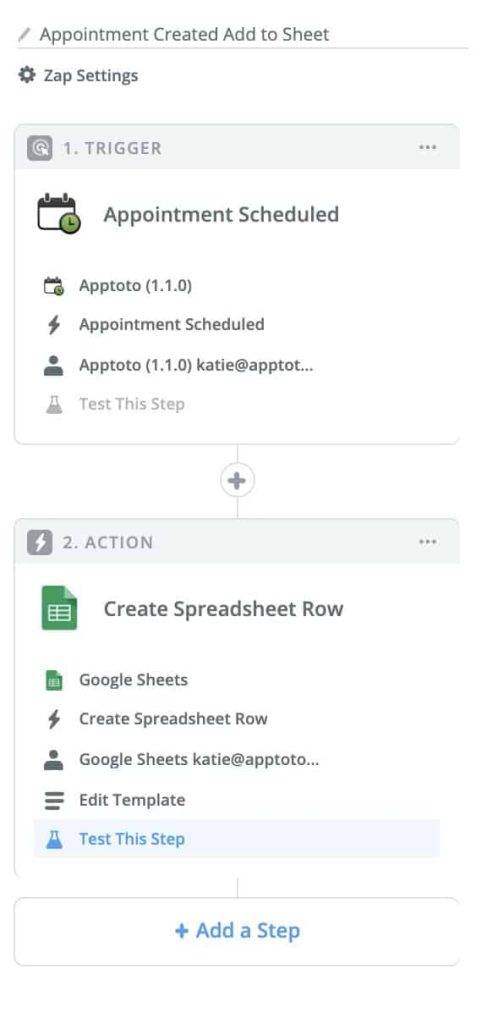
Once complete, your Zap workflow should look similar to this:
If you have any questions or need help, our support team would love to walk you through creating your Zap. Please contact us on chat or book time with our support team.
—
Founder