One of the capabilities of Apptoto is that we have the ability to work with any program that can provide an exported CSV file with the schedule and contact information of your clients. Often, we are asked what is a CSV file and how is it different from an Excel spreadsheet? A CSV is a comma separated values file, which allows data to be saved in a table structured format. CSVs look like a garden-variety spreadsheet but with a .csv extension (Traditionally they take the form of a text file containing information separated by commas, hence the name).
With Apptoto’s importer, the first step is to export your data from your existing program. The export function can often be found on it’s own or in a “Reports” function. If you are unable to find this function, we recommend contacting your software provider and if that is unsuccessful, please let us at Apptoto know and we will look into it for you.
Once the file is saved to your computer, login to your Apptoto account. For more information on creating an Apptoto account, please see our article titled Getting Started.
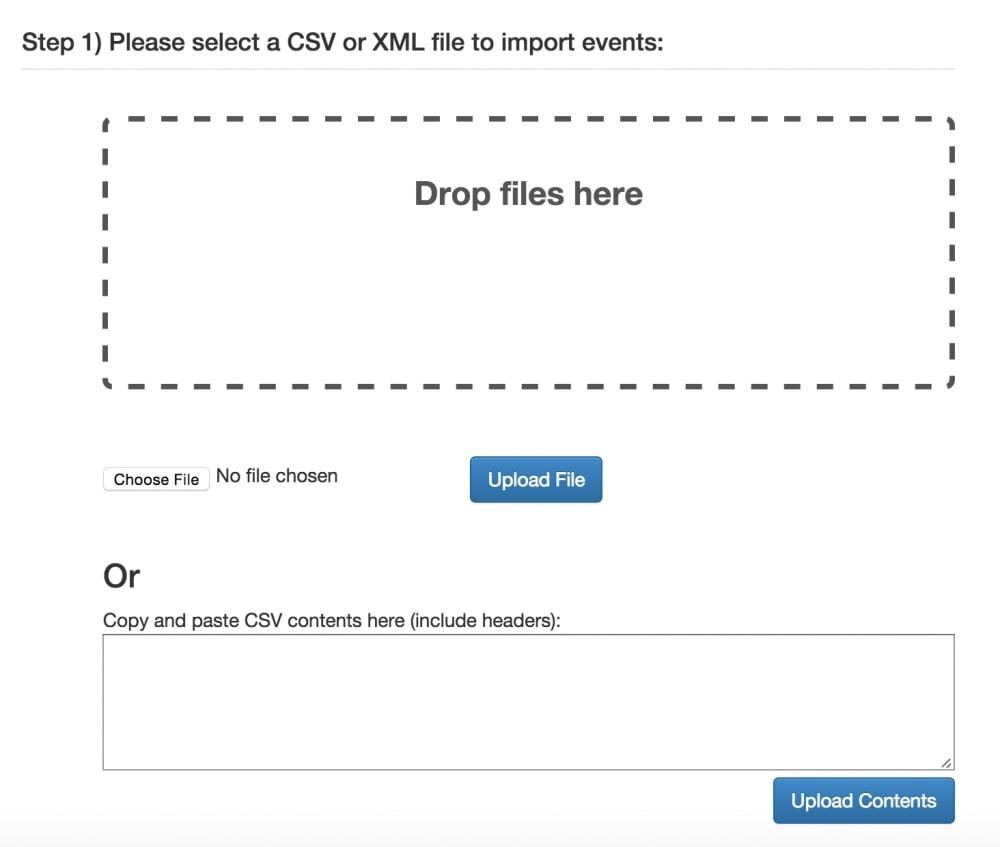
After logging in to your account, you will be directed to your dashboard. To start the new import, click on the Import button shown below:

Next, select the saved file by either dragging and dropping it or choosing the file from your documents. Once it is loaded, click on the Upload File button. If you are viewing it in a text editor, copy and paste in the contents area below and click the Upload Contents button.
When the Apptoto import function has accepted the file, it will populate it into a table with what Apptoto assumes are the column headers associated with your file. Here is an example:
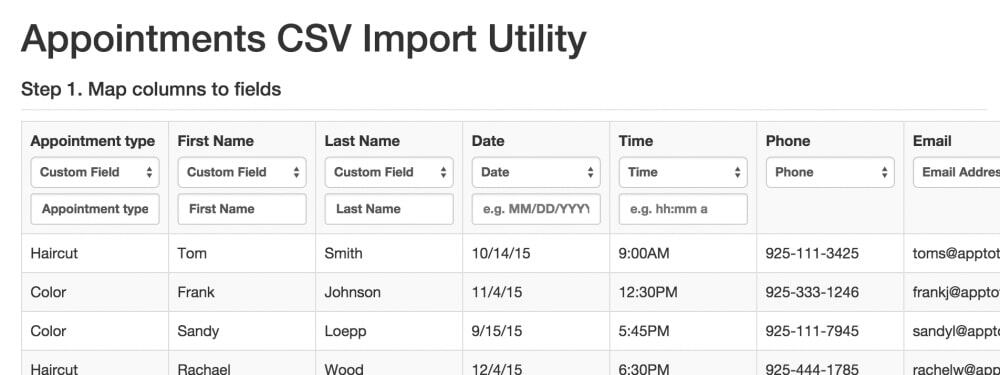
The custom fields are usable in this scenario but for simplicity and ease of entry, it is beneficial to change from the custom field title to the preset fields in the dropdown. Here would be the best options to ensure accurate data entry using the “First Name” and “Last Name” settings from the dropdown menu as well as a look at the drop down menu itself:

For that drop down, I changed the custom field “Appointment Type” to “Appointment_type” to make it usable in the title of the appointment (explained below) and selected “First Name” and “Last Name” from their respective dropdowns.
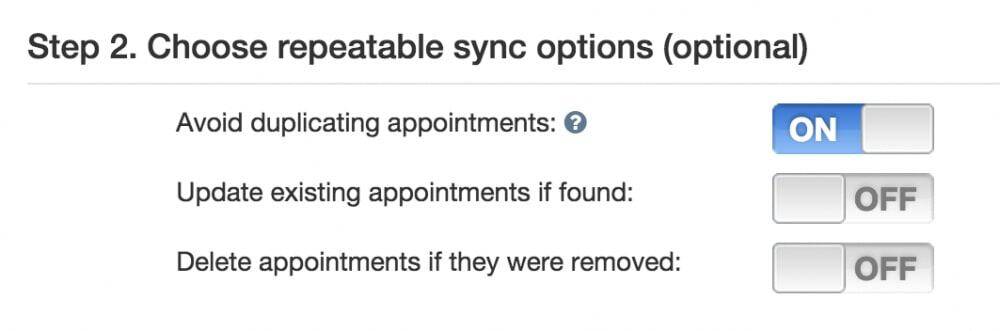
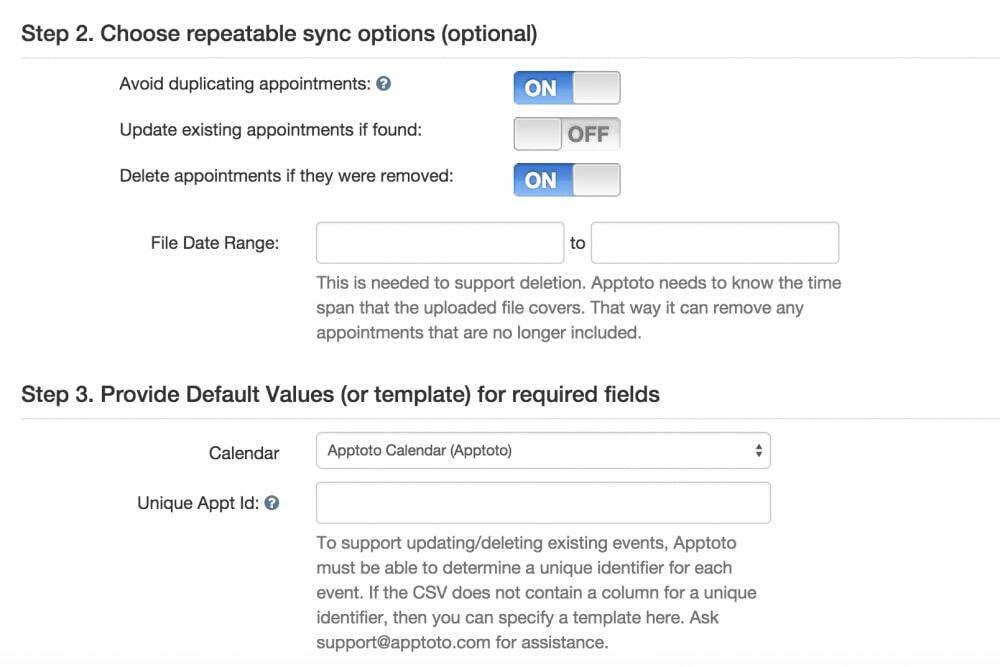
The next step is to look at the repeatable sync options listed in Step 2. These are utilized in Apptoto calendars and allow you to decide how Apptoto should use the information. The first, avoid duplicating appointments, will look at the appointments date and time as well as title and if it finds an identical appointment already in the calendar, it will not import it. Here are the options as shown during import:
The second is update existing appointments if found. When that is turned on, Apptoto will require a unique appointment id. If there is a column in your CSV file that provides an appointment id that is assigned in the system you export from, that can be used. If that is not provided, we can use another setting. For example we could tell Apptoto that we want to use the client’s first and last name – this would work if the person only has one appointment in the time frame. If you have questions, please contact us at support@apptoto.com and we will look at your CSV and see how we can set it up best. Here is a screenshot with that turned ON:
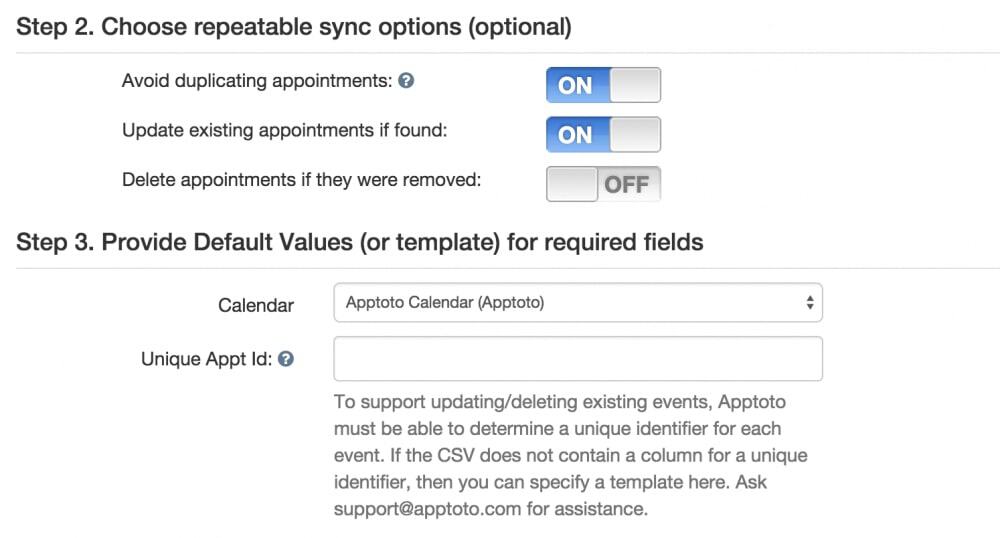
The third option, deleting appointments that were removed, will also require the unique appointment id described above. Another requirement for this feature is providing the date range for the appointments in the import so Apptoto knows how far in the future to search for appointments that have been removed. Here is a screenshot of this feature enabled:
The next step is the Title which is what you want Apptoto to display as the title of the appointment. In this instance, I would want the appointment to show Haircut – Mike McCune so I could glance through the calendar and see who the appointment is for and what service is being provided. It is not the only way to do it, you can title it as 04/07/15 is that is the date of the upload but then all of your appointments would have that name. Here is a screenshot of how I set those settings to accomplish that:

The matching arrows show which column I want Apptoto to extract the information from and then in the Title, how I want them to be displayed. I then clicked import but unfortunately it was unsuccessful as documented by the following screenshot (I will show you the reason as well):
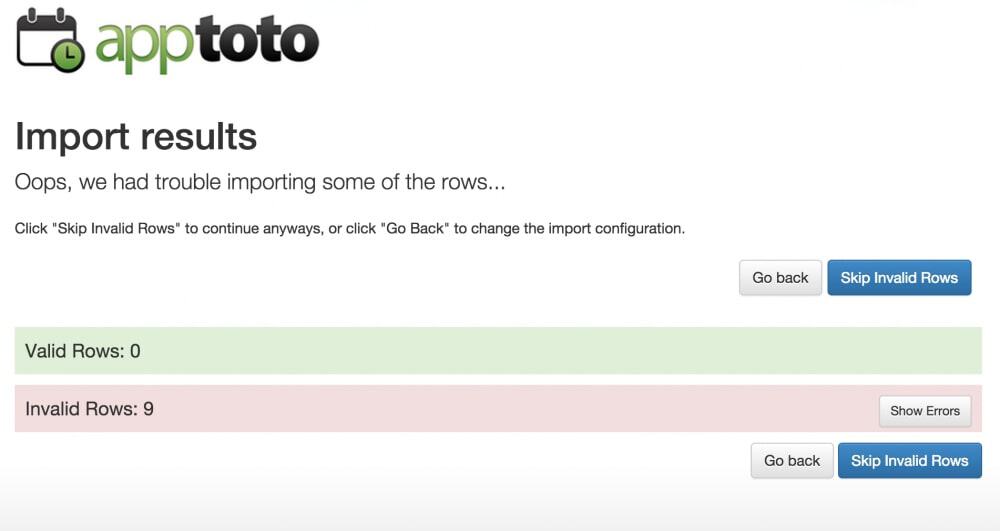
The “Skip Invalid Rows” button will proceed with your import and leave the invalid rows behind. This can be what you need if some appointments are doubled up in your file or they do not have all of the information Apptoto requires. After clicking the “Show Errors” button, it informed me that the problem was that the event was too far in the past. To show you, I clicked the “Go back” button and this is where the error was:
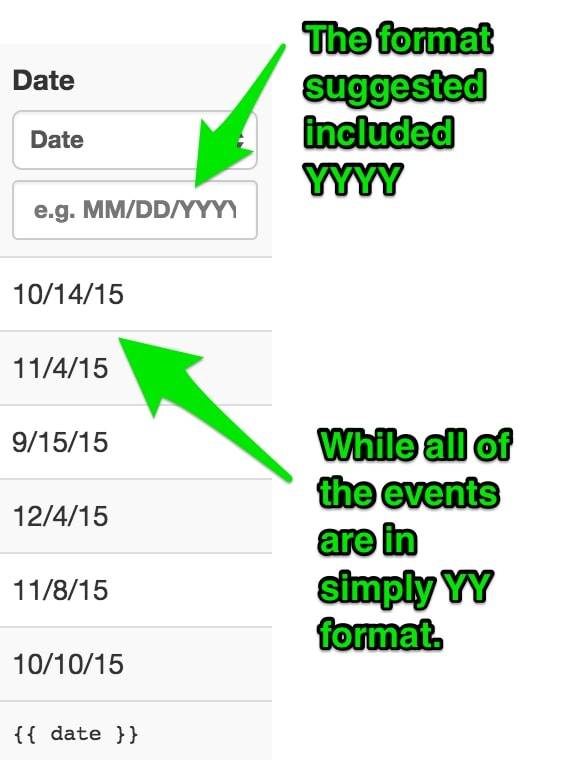
To correct the error, I changed the e.g. MM/DD/YYYY to MM/DD/YY with the rest of the settings the same and ended up with the following result after clicking the “Show” button:
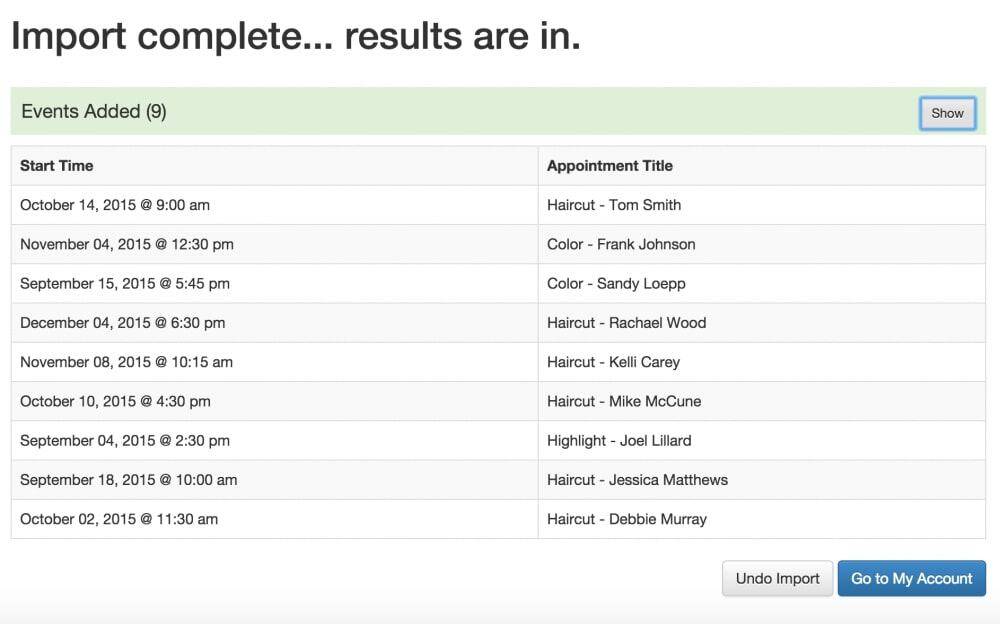
The appointments have now been added to the account and the import is complete. The Apptoto dashboard will show the next 10 days by default when you click go to account so don’t panic if you do not see all of you added appointments! If you have further questions please contact us at support@apptoto.com.
For a walkthrough of next steps, see message setup.